There’s a certain kind of Photoshop project that looks impossibly complicated from the outside but is actually built on two or three clever decisions made early on. A wireframe globe is exactly that kind of project. It looks like something you’d need a dedicated 3D application to pull off, but Photoshop handles it surprisingly well if you know which tools to reach for and, more importantly, which workflow traps to avoid. I’ve wasted more afternoons than I’d like to admit duplicating and merging 3D layers, watching my machine crawl to a halt, wondering if there was a better way.
There is a better way. Watch the full tutorial on YouTube. In this KelbyOne tutorial from Photoshop User TV, Corey Barker walks through building a 3D wireframe globe using a workflow that’s far more efficient than anything I’d stumbled onto on my own. The key insight is a feature called Instance Object, which changes how you think about replicating 3D geometry in Photoshop entirely. Here’s how the whole thing comes together.
Step 1: Draw Your Base Ring Shape
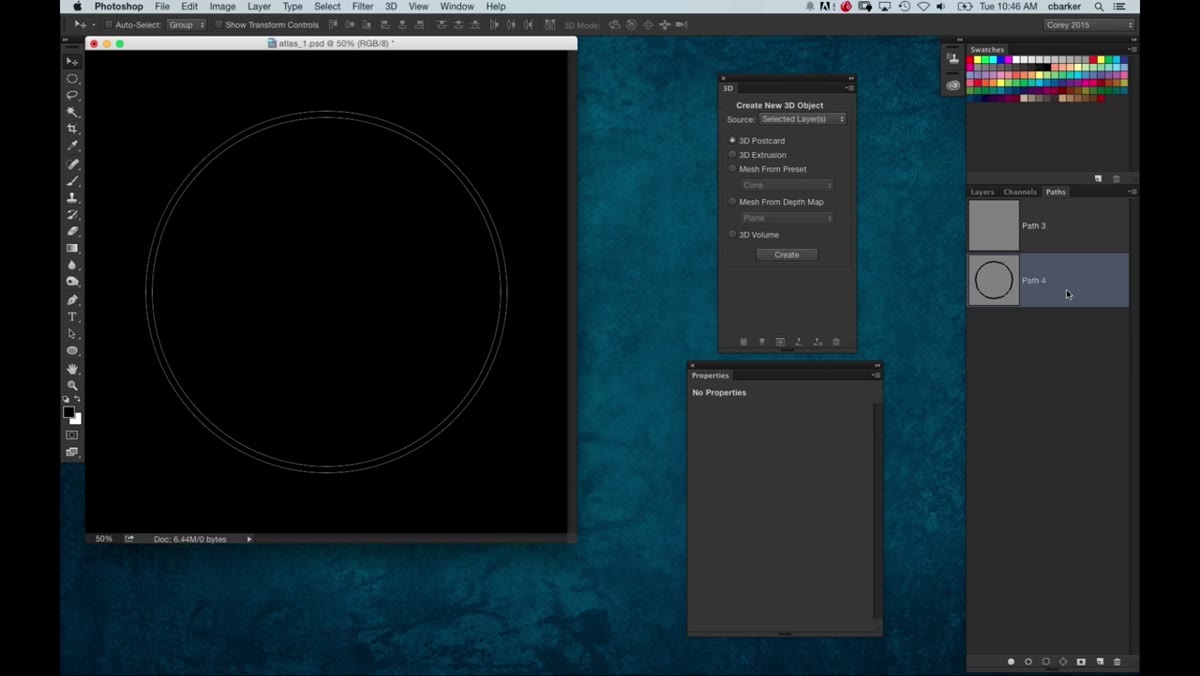 A simple circle shape on a blank Photoshop canvas
Start with a circle. Seriously, that’s it. Draw an ellipse, then cut out the center so you’re left with a thin ring shape. The exact thickness depends on the aesthetic you’re after, but a relatively thin ring will look more convincing as part of a globe wireframe than a chunky one. Keep it as a path-based shape layer rather than a pixel layer. This matters a lot for the next step.
A simple circle shape on a blank Photoshop canvas
Start with a circle. Seriously, that’s it. Draw an ellipse, then cut out the center so you’re left with a thin ring shape. The exact thickness depends on the aesthetic you’re after, but a relatively thin ring will look more convincing as part of a globe wireframe than a chunky one. Keep it as a path-based shape layer rather than a pixel layer. This matters a lot for the next step.
Step 2: Fill the Layer with a Base Gray
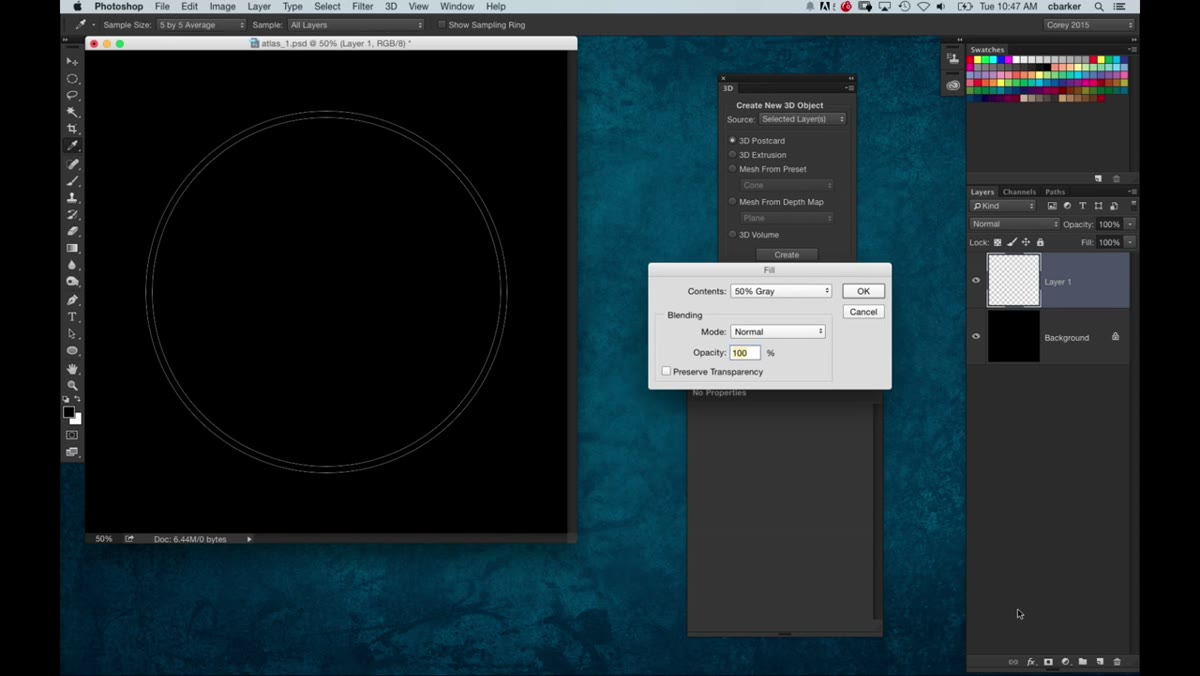 New layer with neutral gray fill applied to the ring shape
Create a new layer and fill it with a mid-tone gray before you do anything in 3D. This isn’t just an aesthetic placeholder. A neutral gray shows you how 3D lighting is actually landing on your object without the color getting in the way of reading the form. Too light and you lose shadow detail. Too dark and highlights disappear. Gray sits right in the middle and gives you an honest read. You can swap the color out later once the geometry and lighting feel right.
New layer with neutral gray fill applied to the ring shape
Create a new layer and fill it with a mid-tone gray before you do anything in 3D. This isn’t just an aesthetic placeholder. A neutral gray shows you how 3D lighting is actually landing on your object without the color getting in the way of reading the form. Too light and you lose shadow detail. Too dark and highlights disappear. Gray sits right in the middle and gives you an honest read. You can swap the color out later once the geometry and lighting feel right.
Step 3: Extrude the Shape into 3D
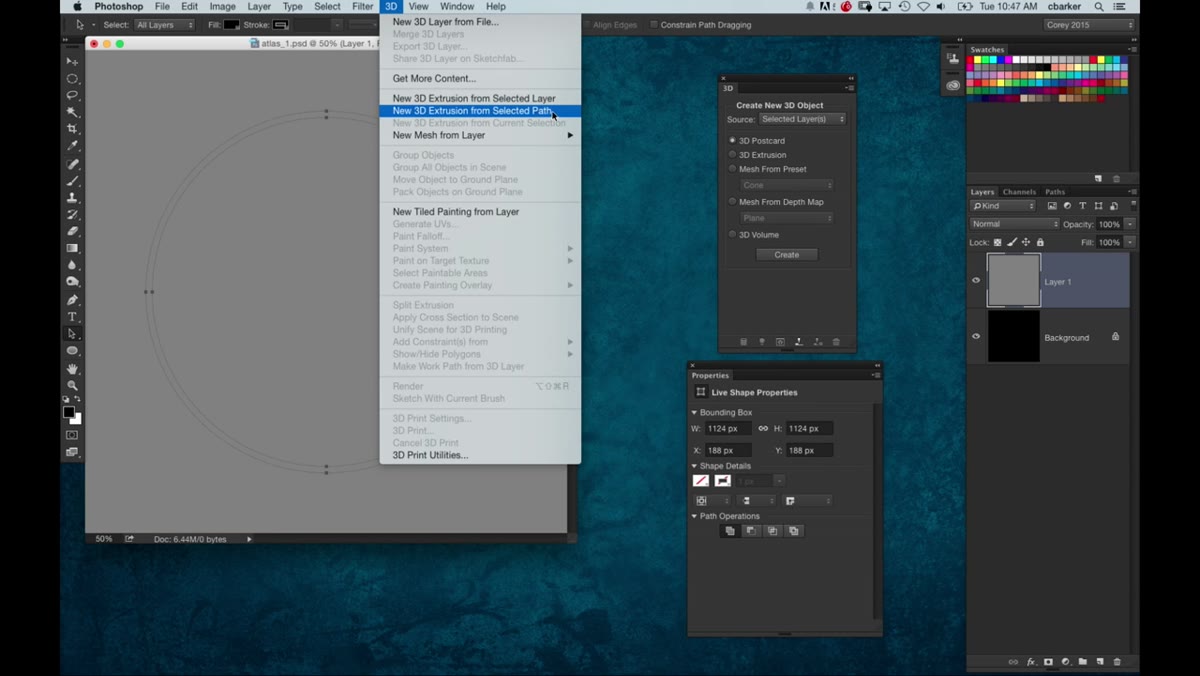 3D extrusion panel open with the ring shape selected
With your shape selected, head to the 3D menu and choose New 3D Extrusion from Selected Path. This is the critical reason to keep your shape as a path rather than rasterizing it first. Path-based 3D extrusions in Photoshop produce significantly cleaner edges than anything generated from pixel data. Once the extrusion is created, pull the Extrusion Depth value way down. The default depth will make your ring look like a pipe section. You want something thin, more like a coin than a cylinder. Dial it back until the proportions feel right for a globe ring.
3D extrusion panel open with the ring shape selected
With your shape selected, head to the 3D menu and choose New 3D Extrusion from Selected Path. This is the critical reason to keep your shape as a path rather than rasterizing it first. Path-based 3D extrusions in Photoshop produce significantly cleaner edges than anything generated from pixel data. Once the extrusion is created, pull the Extrusion Depth value way down. The default depth will make your ring look like a pipe section. You want something thin, more like a coin than a cylinder. Dial it back until the proportions feel right for a globe ring.
Step 4: Add a Subtle Bevel
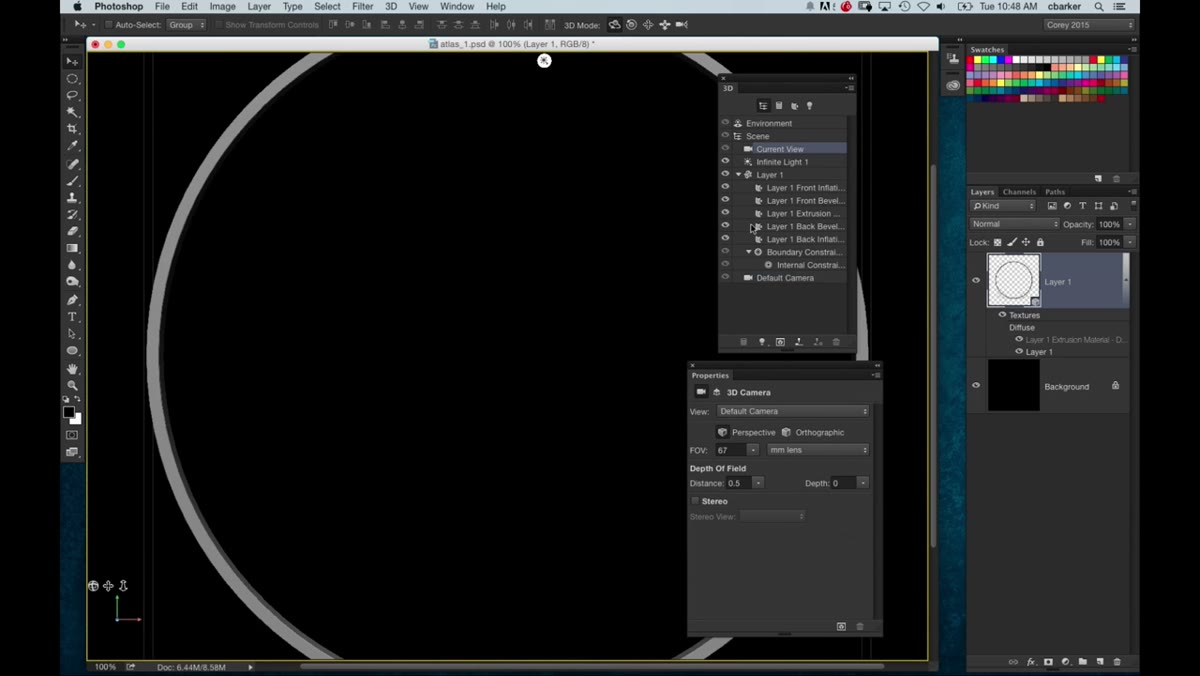 Bevel settings panel with 10% bevel applied to the 3D ring
Once you’re happy with the depth, navigate to the object’s properties and add a small bevel. Corey lands on around 10% in the tutorial, and that’s a reasonable target. The bevel does two things: it catches the light in a way that reads as a polished or machined edge, and it breaks up the flatness of the extruded face so the ring doesn’t look like a cardboard cutout. Don’t go overboard here. A bevel that’s too large will start to eat into the ring’s surface area and distort the whole shape. Subtle is the word.
Bevel settings panel with 10% bevel applied to the 3D ring
Once you’re happy with the depth, navigate to the object’s properties and add a small bevel. Corey lands on around 10% in the tutorial, and that’s a reasonable target. The bevel does two things: it catches the light in a way that reads as a polished or machined edge, and it breaks up the flatness of the extruded face so the ring doesn’t look like a cardboard cutout. Don’t go overboard here. A bevel that’s too large will start to eat into the ring’s surface area and distort the whole shape. Subtle is the word.
Step 5: Use Instance Object Instead of Duplicating
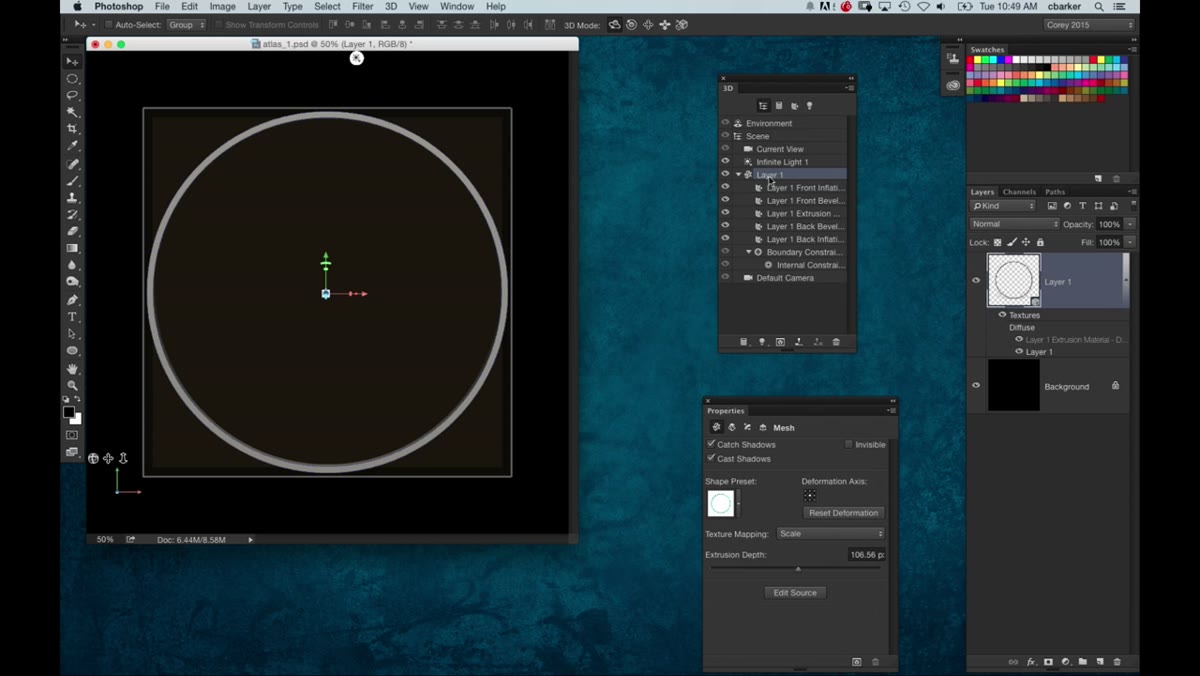 3D panel flyout menu with Instance Object option highlighted
Here’s where the workflow gets genuinely interesting. The old approach to building a globe from rings would be to duplicate the 3D layer as many times as needed and then merge everything together. That approach works, eventually, after your computer finishes its emotional breakdown. Photoshop’s Instance Object feature solves this. With your 3D object selected in the 3D panel, open the flyout menu and choose Instance Object.
3D panel flyout menu with Instance Object option highlighted
Here’s where the workflow gets genuinely interesting. The old approach to building a globe from rings would be to duplicate the 3D layer as many times as needed and then merge everything together. That approach works, eventually, after your computer finishes its emotional breakdown. Photoshop’s Instance Object feature solves this. With your 3D object selected in the 3D panel, open the flyout menu and choose Instance Object.
What this does is create a linked copy of your original shape rather than an independent duplicate. Think of it the way Illustrator handles symbols, or the way Smart Objects work in a standard Photoshop workflow. The instanced object shares its properties with the master object. If you change the bevel on the master, every instance updates automatically. The instances themselves don’t carry redundant property data, which means Photoshop isn’t processing multiple independent 3D objects. Your machine stays functional. Your deadline stays realistic.
Step 6: Arrange the Instances to Form the Globe
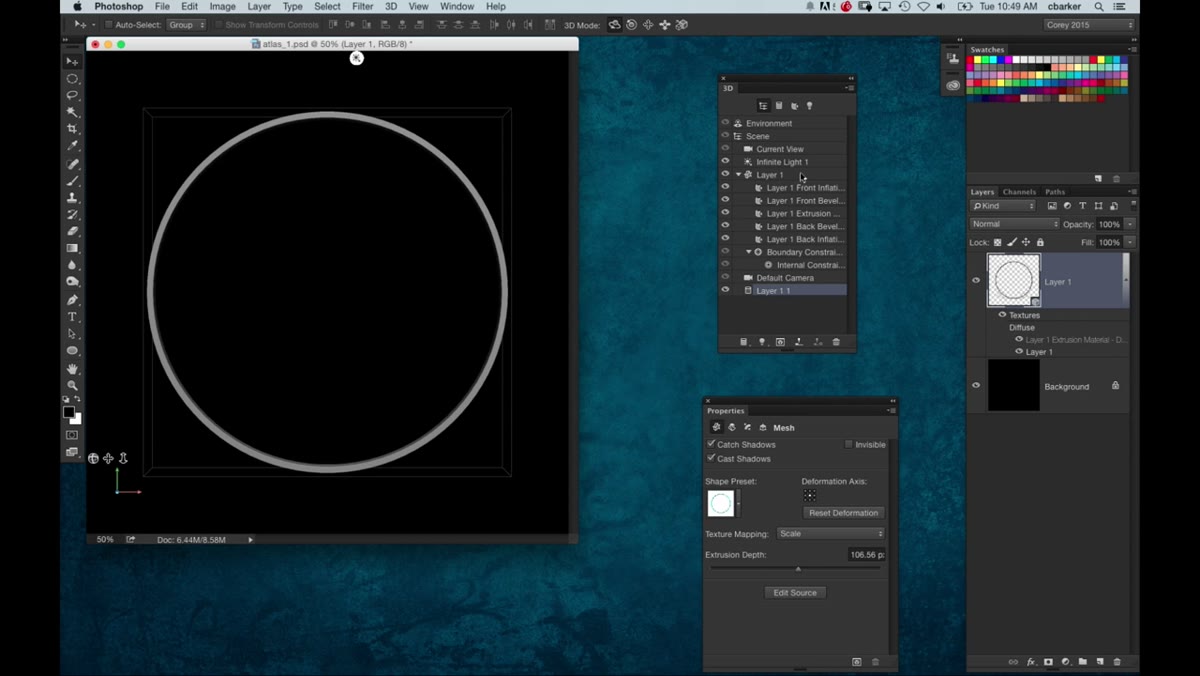 Multiple instanced ring objects arranged in globe formation
Create as many instances as you need to build out the globe shape, then rotate and position each one using the 3D transform controls. A basic wireframe globe generally uses rings arranged across multiple axes: some running horizontally like latitude lines, others running vertically like longitude lines. Rotating each instance in 3D space lets you position them precisely. Because they’re all instances of the same master object, the visual consistency across the whole globe is automatic. No subtle differences in bevel or depth sneaking in between rings.
Multiple instanced ring objects arranged in globe formation
Create as many instances as you need to build out the globe shape, then rotate and position each one using the 3D transform controls. A basic wireframe globe generally uses rings arranged across multiple axes: some running horizontally like latitude lines, others running vertically like longitude lines. Rotating each instance in 3D space lets you position them precisely. Because they’re all instances of the same master object, the visual consistency across the whole globe is automatic. No subtle differences in bevel or depth sneaking in between rings.
What I’d Add From My Own Experience
The Instance Object approach has implications well beyond globe-building. Any time you’re building a 3D scene in Photoshop that uses repeated geometry, whether that’s a pattern of identical bolts on a surface, a row of the same architectural element, or a grid of spheres, instances should be your first thought rather than your last resort. I learned about Smart Objects the hard way after a particularly catastrophic file loss situation, and Instance Object scratched the same itch for me in the 3D space. The underlying logic is the same: maintain a single source of truth, propagate changes downward, and don’t multiply your processing overhead unnecessarily.
One practical note: if you need one instance to differ slightly from the master, say a different rotation or position, that’s fine. What you can’t do is give one instance a different bevel without affecting all the others. Plan your design accordingly. If you genuinely need variation between objects, those specific pieces should be separate 3D layers, not instances.
The single most important thing to take away from this tutorial is the Instance Object feature itself. It’s one of those Photoshop tools that doesn’t get nearly enough attention, and once you understand what it’s doing under the hood, it changes how you approach any project with repeated 3D elements. The globe is just a memorable example. Watch the full tutorial on YouTube to see Corey walk through the complete build, including how the lighting and scene setup come together at the end.
Comments
Leave a Comment