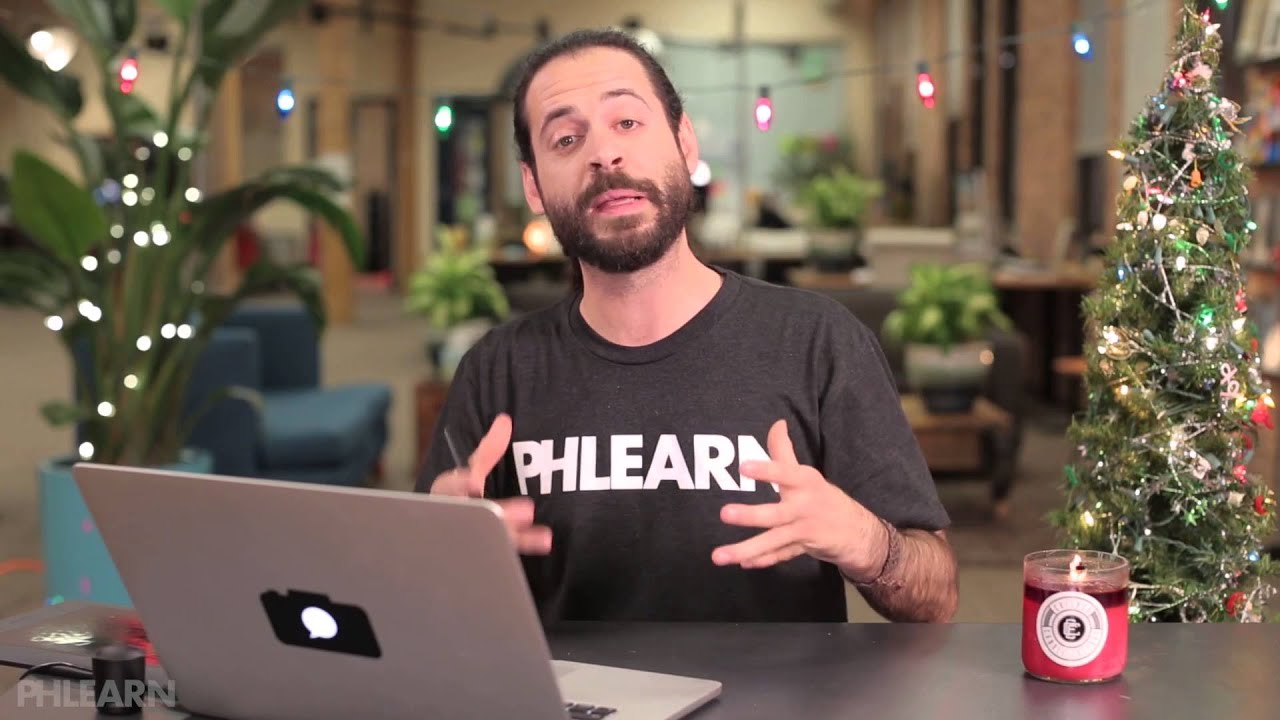
Every December I end up in the same situation: someone in my family texts asking if I can “quickly throw together” a holiday card. And every year I either spend way too long building something from scratch or I panic-buy a Canva template and feel vaguely ashamed of myself. This year I actually sat down and watched through a proper tutorial on the subject, and the one that delivered the goods was from Aaron Nace over at PHLEARN. Watch the full tutorial on YouTube before or after reading this breakdown.
What makes this approach smart is that PHLEARN provides a free template with the layer architecture already built out. You’re not starting from zero. The mask logic is already set up, the hand-lettered text is already there looking good, and your job is basically to slot your photos into the right spots and do a little color matching. For anyone who’s built a collage from scratch before, you know how much time goes into the mask setup alone. This tutorial skips that tax entirely.
That said, the technique Nace walks through is worth understanding at the step level, because once you see how the group-plus-mask system works, you can build your own version of this for any project where you need photos to live inside defined shapes. Here’s exactly how it comes together.
Step 1: Download the Free Template and Open It in Photoshop
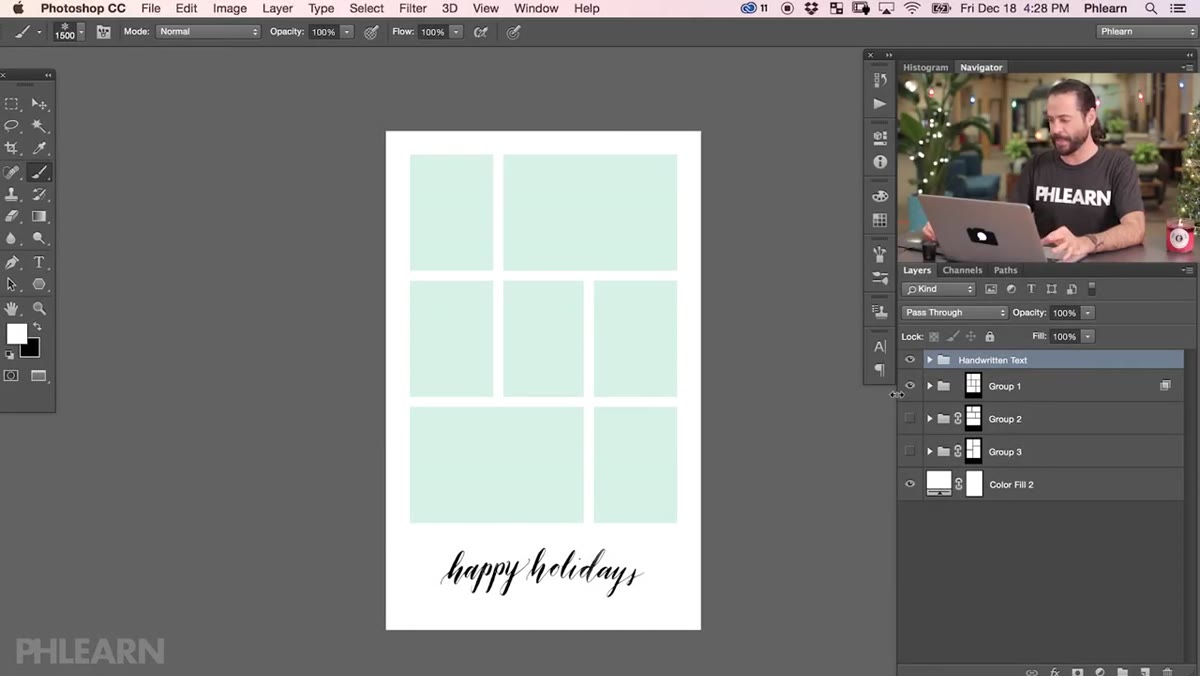 Holiday card template open in Photoshop with grouped layers visible
Grab the free template from PHLEARN.com and open it in Photoshop. When it loads, take a minute to actually look at the layer panel before you do anything. The template has two layers of handwritten text at the top, a “joy” element and a “happy holidays” script, plus three groups underneath. Each group represents a photo slot in the collage. The masks on those groups are what control where your photos will actually show up. Nothing fancy yet, just orientation.
Holiday card template open in Photoshop with grouped layers visible
Grab the free template from PHLEARN.com and open it in Photoshop. When it loads, take a minute to actually look at the layer panel before you do anything. The template has two layers of handwritten text at the top, a “joy” element and a “happy holidays” script, plus three groups underneath. Each group represents a photo slot in the collage. The masks on those groups are what control where your photos will actually show up. Nothing fancy yet, just orientation.
If you want to build your own version of this structure later, the process is exactly what it sounds like: draw a rectangle with the Marquee tool, fill it with a color, subtract the areas you don’t want, and attach that filled shape as a group mask. The template just saves you from doing that now.
Step 2: Load All Your Photos Into Photoshop at Once
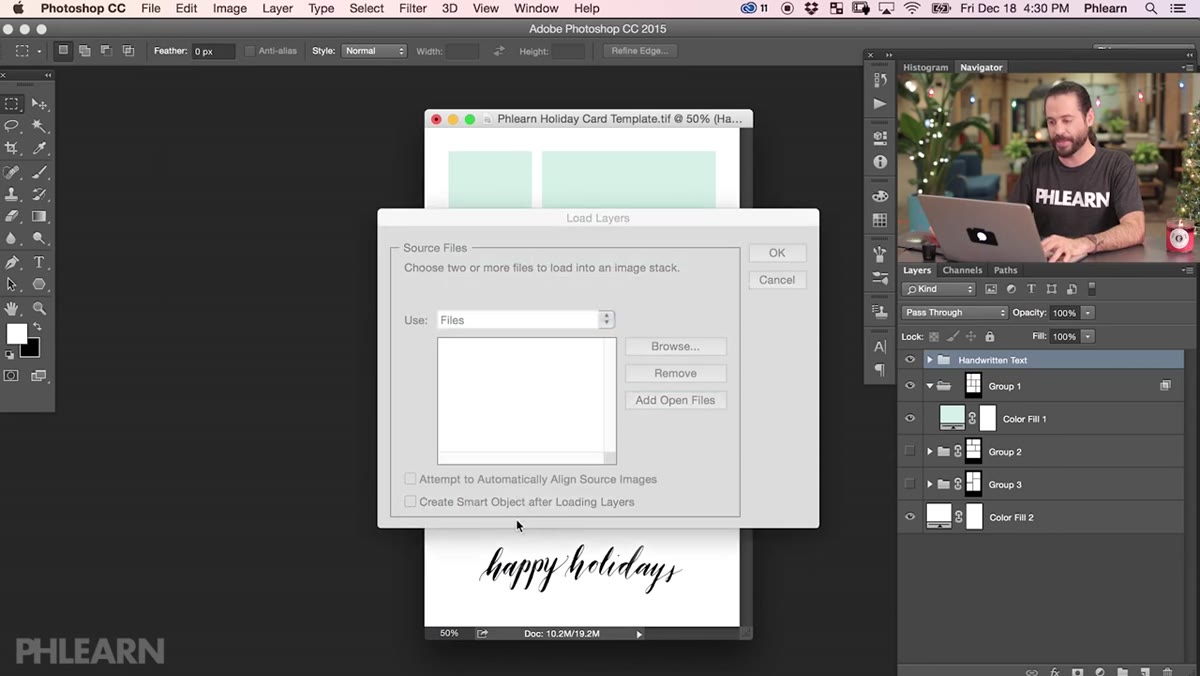 File Scripts Load Files Into Stack dialog open
Here’s a keyboard-shortcut-adjacent tip that I genuinely wish I’d known earlier. Instead of opening each photo one by one, go to File, then Scripts, then “Load Files into Stack.” This stacks every image you select into a single Photoshop document as separate layers. Hit Browse, shift-click every photo you want to use, hit Open, then OK.
File Scripts Load Files Into Stack dialog open
Here’s a keyboard-shortcut-adjacent tip that I genuinely wish I’d known earlier. Instead of opening each photo one by one, go to File, then Scripts, then “Load Files into Stack.” This stacks every image you select into a single Photoshop document as separate layers. Hit Browse, shift-click every photo you want to use, hit Open, then OK.
For a holiday card, you’re probably pulling from a mix of sources: candid family shots from throughout the year, something more deliberately Christmas-themed, maybe a photo from a tree farm or a living room with lights. Load them all in at once. You’ll pick which goes where once they’re inside the template.
Step 3: Drag Photos Into the Correct Groups in the Template
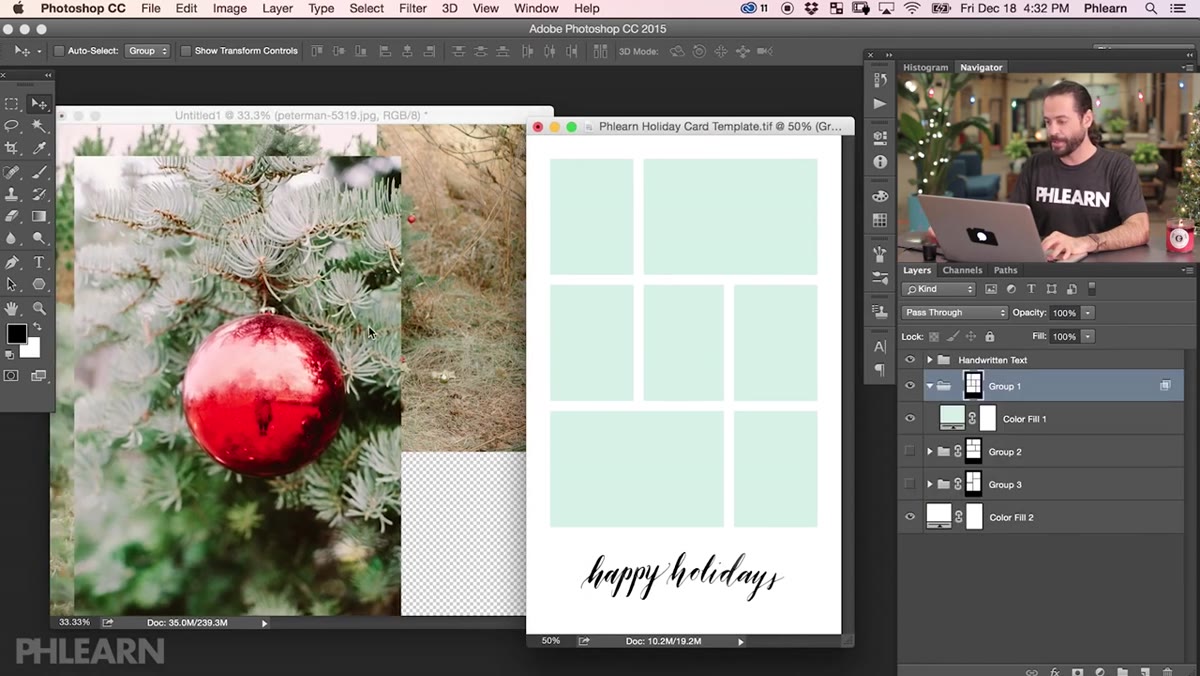 Photo being dragged from stack document into template document
With both documents open, you drag photos directly from the stack document into the template document. The critical part here is placement in the layer panel: when you drop a photo, it needs to land inside the correct group. A photo inside Group 1 will only be visible inside Group 1’s mask area. Drop it outside the group and it ignores the mask entirely and covers everything.
Photo being dragged from stack document into template document
With both documents open, you drag photos directly from the stack document into the template document. The critical part here is placement in the layer panel: when you drop a photo, it needs to land inside the correct group. A photo inside Group 1 will only be visible inside Group 1’s mask area. Drop it outside the group and it ignores the mask entirely and covers everything.
Nace drags them in one at a time and sizes each one before moving to the next. That’s the cleaner workflow. You can drop all three in first and then go back to resize, but honestly doing them one at a time keeps things from getting confusing fast.
Step 4: Resize and Position Photos Using Free Transform
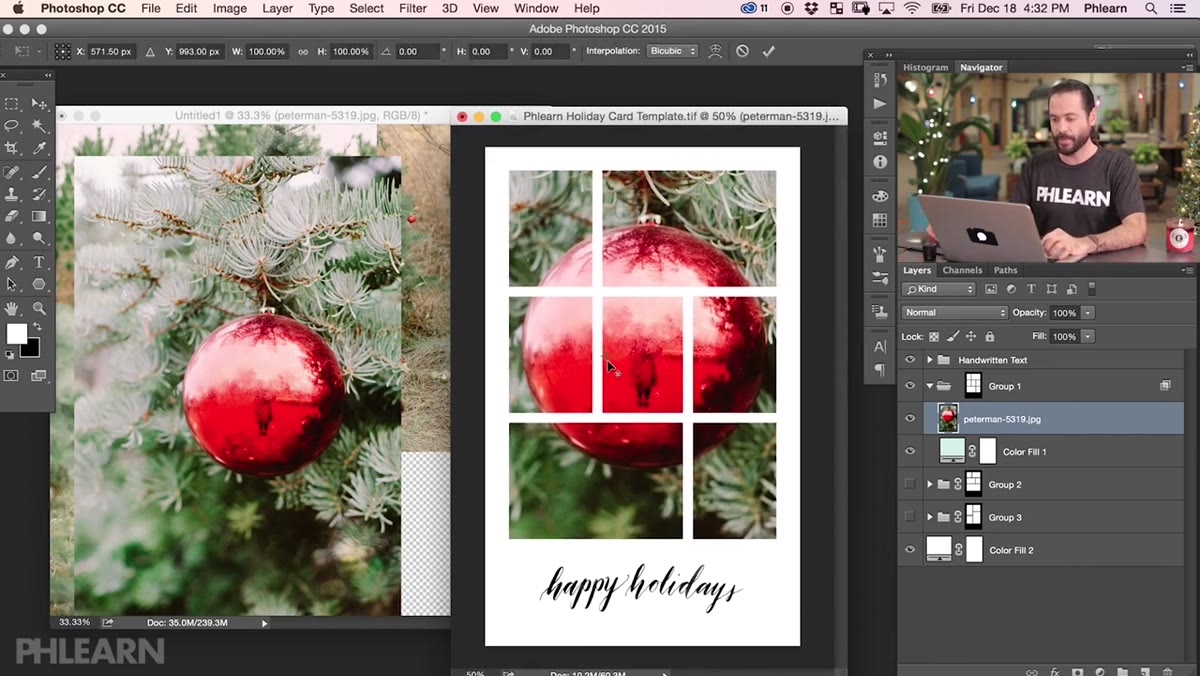 Free Transform handles visible around photo inside group
Once a photo is inside a group, hit Command+T (Ctrl+T on Windows) to bring up Free Transform. At the top of the screen you’ll see width (W) and height (H) percentage fields. This is the cleanest way to scale a photo precisely rather than just dragging handles and guessing. Type a percentage value into the W field and let Photoshop scale proportionally.
Free Transform handles visible around photo inside group
Once a photo is inside a group, hit Command+T (Ctrl+T on Windows) to bring up Free Transform. At the top of the screen you’ll see width (W) and height (H) percentage fields. This is the cleanest way to scale a photo precisely rather than just dragging handles and guessing. Type a percentage value into the W field and let Photoshop scale proportionally.
The goal is to fill the mask area without leaving empty space at the edges. Zoom into each slot as you go so you can see what the mask is actually cutting off. A headshot that looks perfectly framed in isolation might chop someone’s forehead off once the mask kicks in. Reposition by clicking and dragging inside the transform bounding box, not the handles.
Step 5: Color Match the Hand-Lettered Text to Your Photos
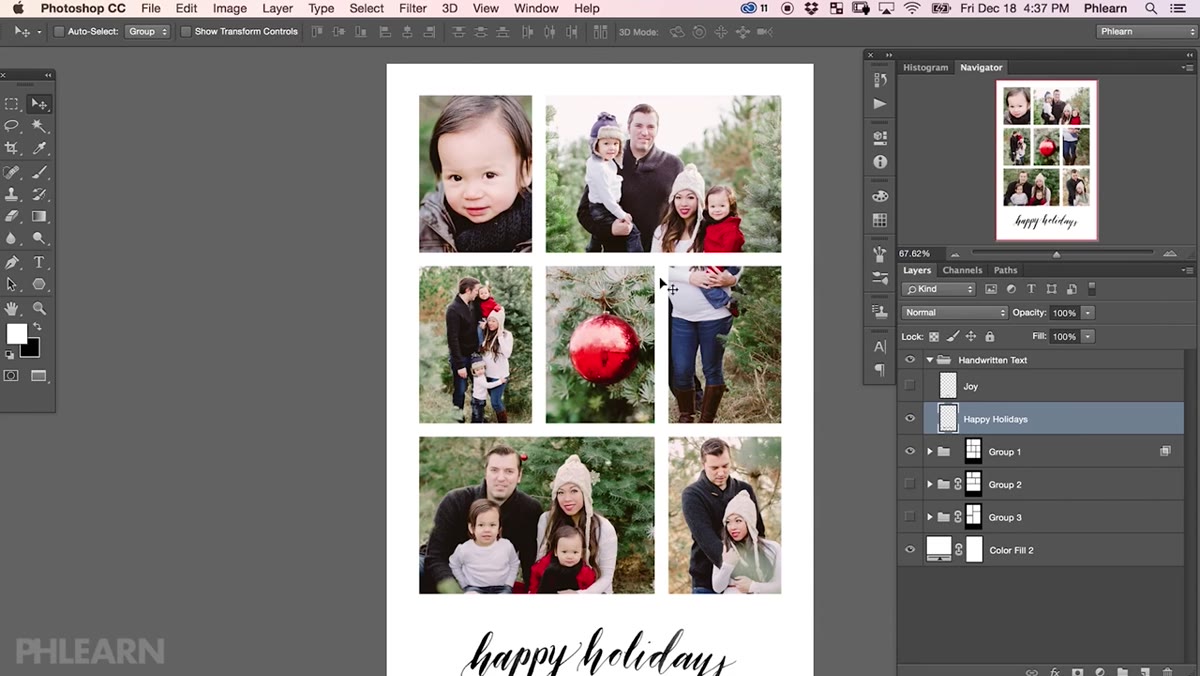 Handwritten text layer selected with color match being applied
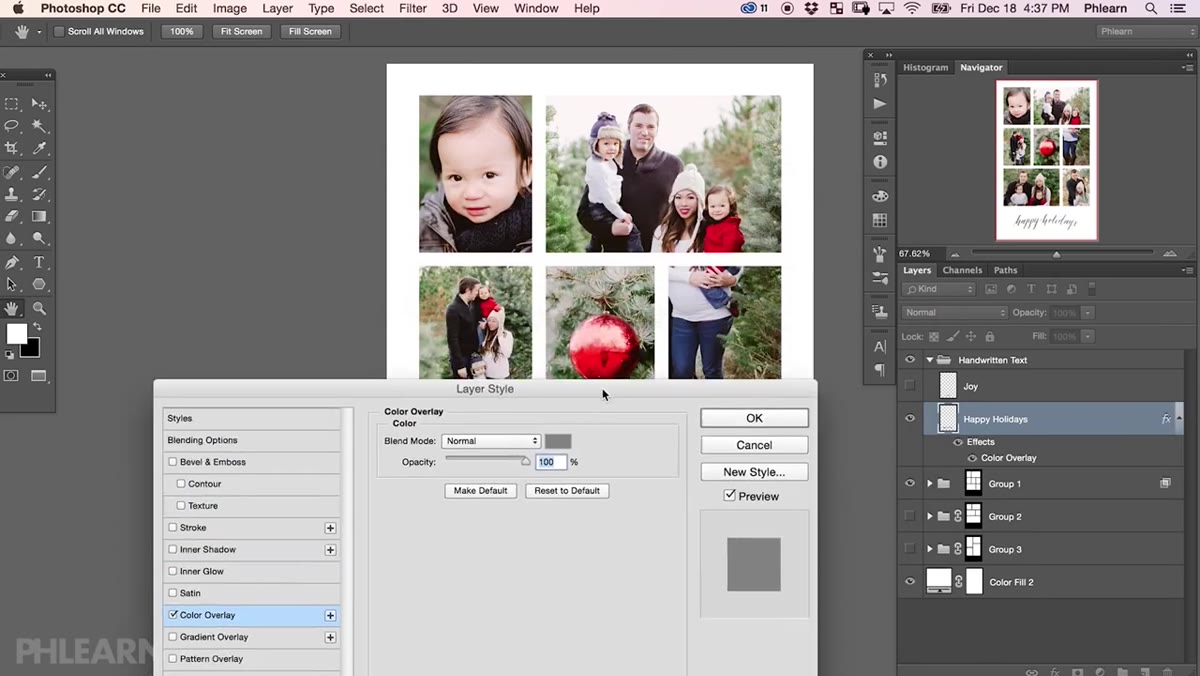
This is the step that takes the card from looking assembled to looking designed. The template’s text comes in at a default color, and if that color doesn’t connect to your photos, the card feels like two separate things sitting on top of each other. Nace shows you how to sample colors directly from your chosen photos and apply them to the text layers.
Handwritten text layer selected with color match being applied
This is the step that takes the card from looking assembled to looking designed. The template’s text comes in at a default color, and if that color doesn’t connect to your photos, the card feels like two separate things sitting on top of each other. Nace shows you how to sample colors directly from your chosen photos and apply them to the text layers.
Double-click the text layer’s color swatch to open the color picker, then move your cursor over one of your photos while the picker is open. Click a color that already lives in the image, something from clothing, holiday lights, or the background. Apply that to the text. Do this for each text element. It takes two minutes and it’s probably the highest return-on-effort step in the whole tutorial.
Step 6: Export for Web to Send as a Digital Card
 Save for Web dialog with export settings
When everything’s positioned and color-matched, go to File, then Export, then “Save for Web (Legacy).” This is how you get a file size small enough to drop into an email without it bouncing back. For a holiday card, JPEG at around 60-80% quality usually hits a good balance between file size and looking good on a screen. You don’t need print resolution here. Something in the 1000-1500 pixel range on the long edge is plenty.
Save for Web dialog with export settings
When everything’s positioned and color-matched, go to File, then Export, then “Save for Web (Legacy).” This is how you get a file size small enough to drop into an email without it bouncing back. For a holiday card, JPEG at around 60-80% quality usually hits a good balance between file size and looking good on a screen. You don’t need print resolution here. Something in the 1000-1500 pixel range on the long edge is plenty.
This is the move that actually saves you money versus mailing physical cards, which Nace points out and which I think is genuinely underrated advice.
One Thing I’d Add: Clipping Masks Instead of Group Masks for More Flexibility
The group mask system in the template works great and I’m not knocking it. But if you’re building your own version of this, consider using clipping masks instead. Drop a shape layer in the stack, clip your photo directly to it with Option+Click (Alt+Click on Windows) between the two layers, and you can swap photos in and out without touching the mask at all. I actually rebuilt a collage layout like this last year when a client wanted to swap three images two days before print. Clipping masks made that a five-minute job instead of a thirty-minute one.
The single most important thing this tutorial teaches isn’t the holiday card itself. It’s the group-plus-mask logic for containing photos inside defined shapes. Once that clicks, you can build photo collages, magazine layouts, and composite backgrounds without ever fighting with stray image edges again. Nace explains it clearly and the free template makes it immediately usable.
Watch the full tutorial on YouTube and grab the free template from PHLEARN.com while you’re there. Your family group chat will thank you.
Comments (1)
Great breakdown. The step-by-step approach really helps.
Leave a Comment