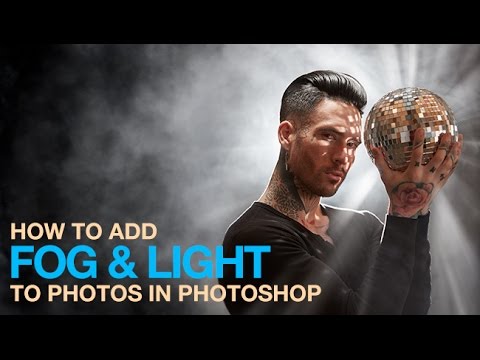
There’s a specific kind of photo that drives me crazy. You know the one. Great composition, solid exposure, interesting subject, and then – a flat, dead bottom half that looks like the photographer just forgot that gravity exists. I’ve had this problem more times than I want to admit, especially with moody indoor shots where the lighting drama is happening up top but the floor is just… there. Embarrassing and beige. I used to clone-stamp my way out of it, which is the Photoshop equivalent of duct-taping a bumper back on and calling it a restoration.
Then I watched Aaron Nace’s tutorial on adding fog and light in Photoshop over at PHLEARN, and I felt that specific flavor of mild shame that only comes from realizing someone solved your exact problem elegantly while you were out here suffering. Watch the full tutorial on YouTube – it’s worth your time. The technique centers on a custom fog brush that PHLEARN offers as a free download, and the same brush doubles as a tool for painting in light beams. That’s two genuinely useful effects, one brush, zero excuses.
What I like about this approach is that it’s grounded in how light actually behaves. Fog isn’t a uniform gray filter you slap over an image. It’s uneven, layered, and has texture – because real fog comes from clouds, and the brush Aaron built is actually derived from a cloud photograph. That detail matters because it’s why the result looks believable instead of like a bad Instagram filter from 2011.
Step 1: Download and Load the Custom Fog Brush
 Preset Manager open with Brushes selected in Photoshop
Before anything else, grab the free PHLEARN fog brush from the link in Aaron’s video description. It downloads as an
Preset Manager open with Brushes selected in Photoshop
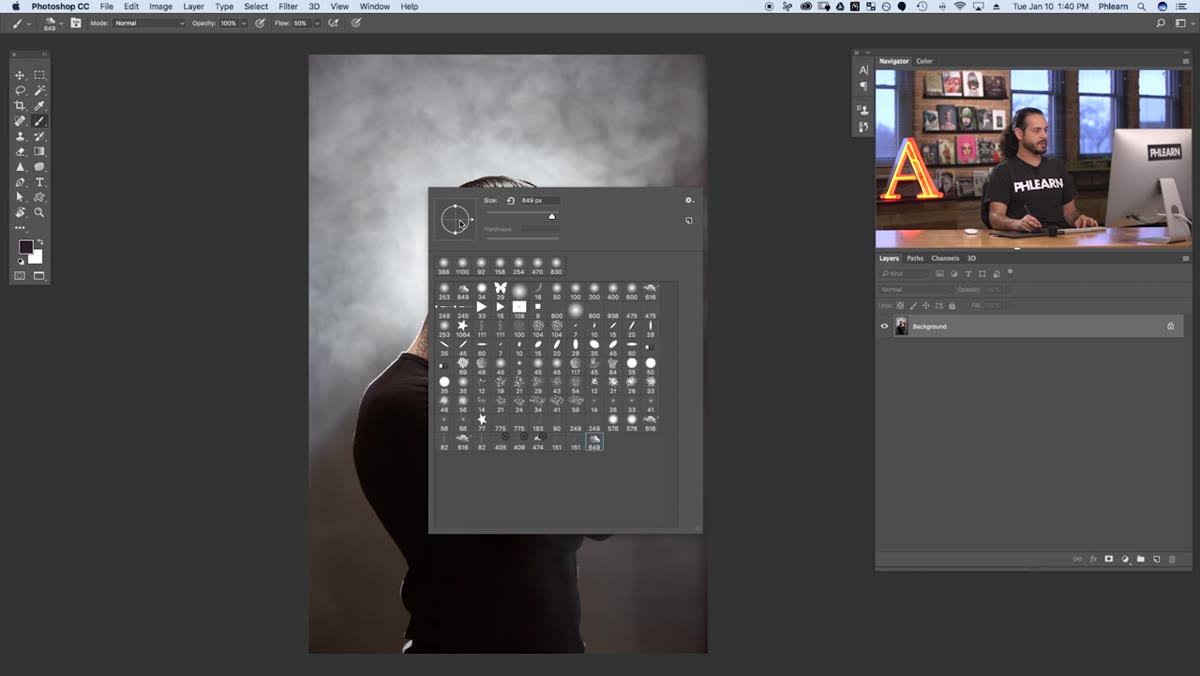
Before anything else, grab the free PHLEARN fog brush from the link in Aaron’s video description. It downloads as an .ABR file, which is Photoshop’s brush preset format. To load it, go to Edit > Presets > Preset Manager. In the dropdown at the top of the Preset Manager window, select Brushes, then click Load. Navigate to wherever you saved the .ABR file – it’ll be named something like “phlearn-fog-brush.abr” – and hit Open. The brush will land at the very bottom of your brush list.
Once it’s loaded, grab the Brush tool, right-click your canvas, and scroll all the way to the end of the brush picker. You’ll see the fog brush there. It’s a large, irregular shape – 849 pixels in the default preset – and it’s going to look weird at first. That’s correct. That’s the point.
Step 2: Test the Brush Behavior on a New Layer
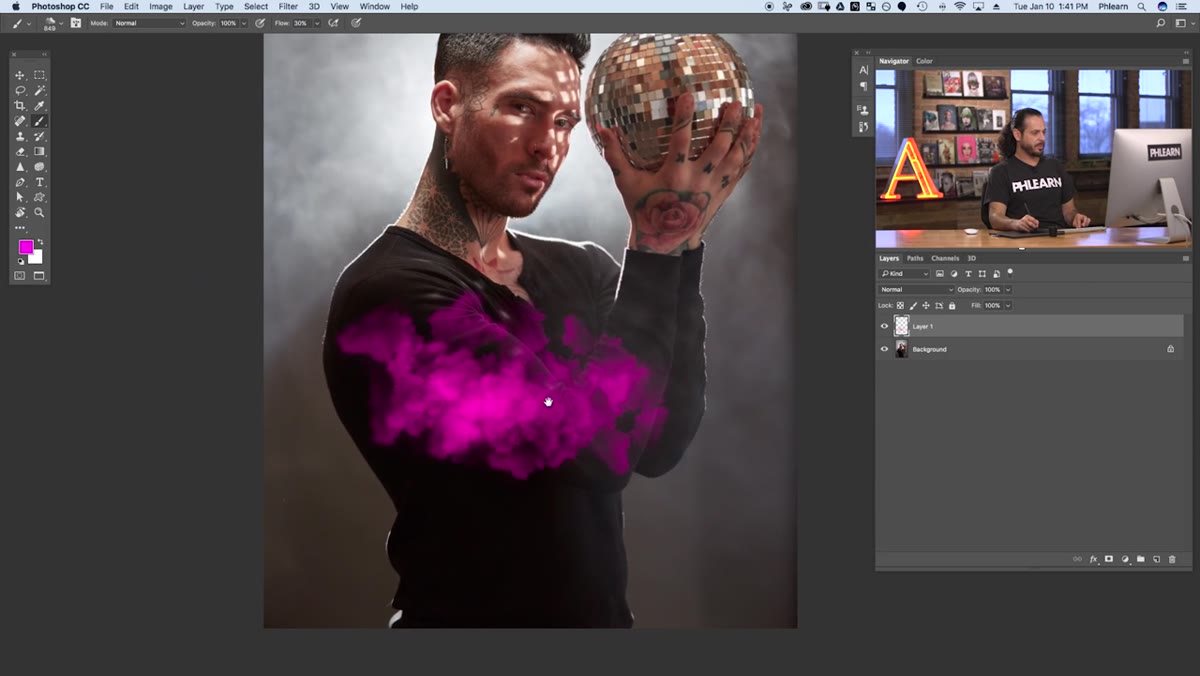
 Irregular fog brush strokes in bright pink on a blank layer
Create a new empty layer above your image before you touch anything else. This is non-negotiable. Aaron demonstrates the brush behavior by painting in bright pink on a blank layer, which is a smart move because it lets you see exactly what the brush is doing without committing to anything on your actual photo.
Irregular fog brush strokes in bright pink on a blank layer
Create a new empty layer above your image before you touch anything else. This is non-negotiable. Aaron demonstrates the brush behavior by painting in bright pink on a blank layer, which is a smart move because it lets you see exactly what the brush is doing without committing to anything on your actual photo.
What you’ll notice immediately is that every single click produces a different result. The size shifts. The opacity varies. The rotation changes. That randomness is the entire engine of this effect – it’s what keeps the fog from looking like a repeating tile pattern. Each stamp is unique, so even heavy coverage reads as organic.
Step 3: Sample Your Fog Color from the Image
 Eyedropper sampling a light tone from the existing fog in the photo
Switch your foreground color from that test pink to a color actually pulled from your image. Use the Eyedropper tool and click on an area of existing fog or bright atmosphere in your photo. You want something light – off-white, a pale warm gray, whatever your image’s highlight range looks like. Matching this tone is what makes the painted fog feel like it belongs in the scene rather than sitting on top of it.
Eyedropper sampling a light tone from the existing fog in the photo
Switch your foreground color from that test pink to a color actually pulled from your image. Use the Eyedropper tool and click on an area of existing fog or bright atmosphere in your photo. You want something light – off-white, a pale warm gray, whatever your image’s highlight range looks like. Matching this tone is what makes the painted fog feel like it belongs in the scene rather than sitting on top of it.
Aaron’s image had a natural foggy area in the upper portion, so he sampled from there. If your photo doesn’t have obvious existing fog to match, sample from your brightest midtone area and nudge it slightly warmer or cooler depending on your overall color grade.
Step 4: Paint Fog on a New Layer Over the Problem Areas
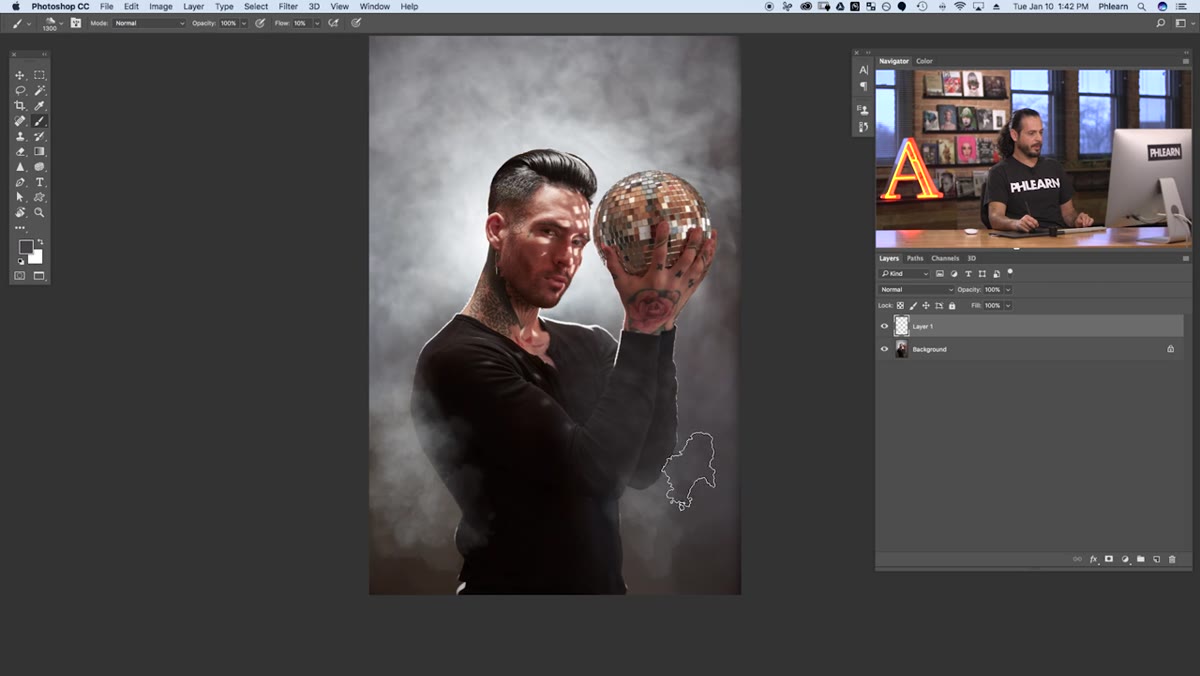
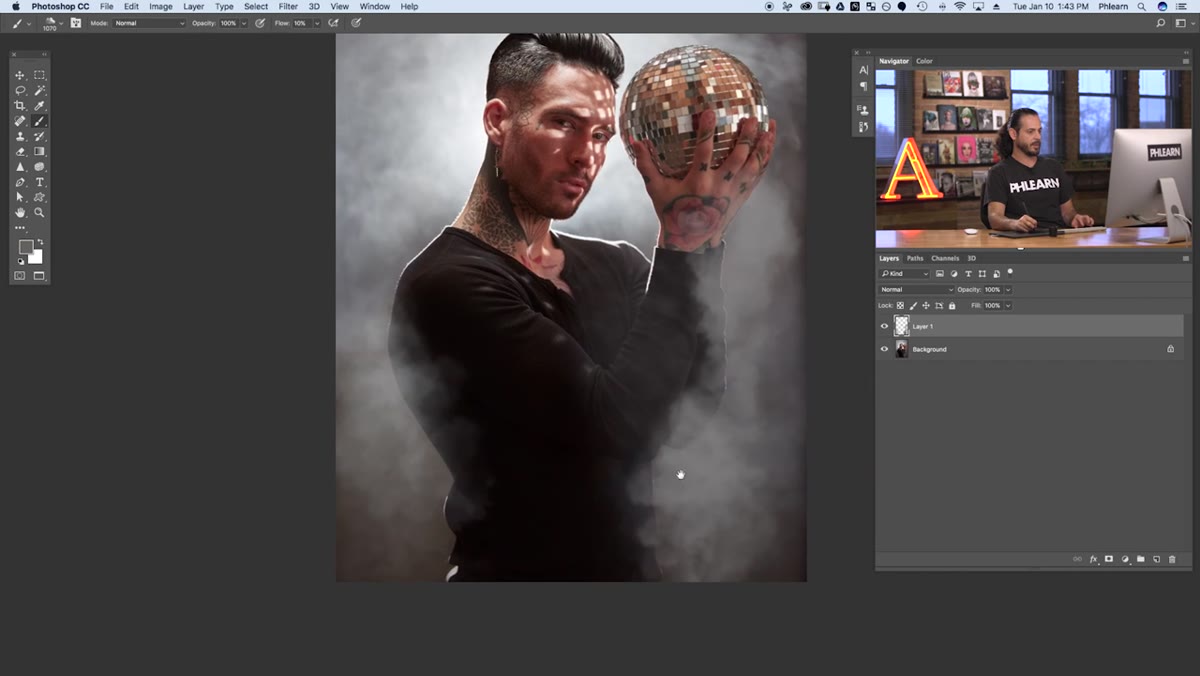
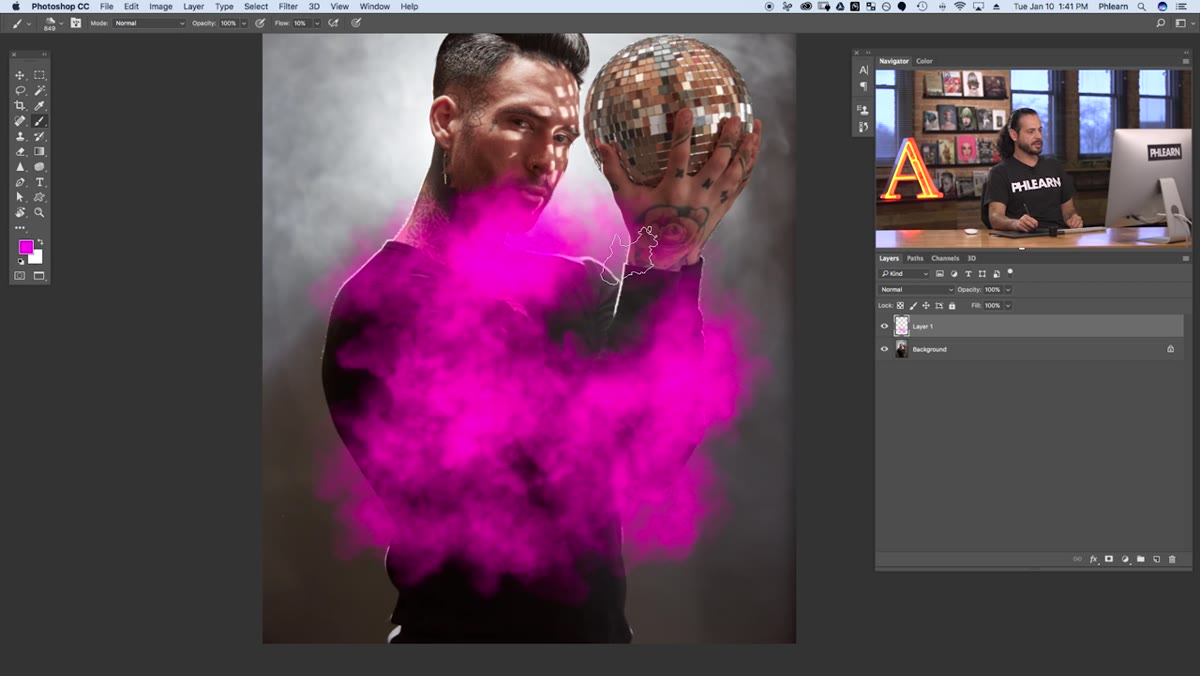 Fog brush strokes being applied over the lower portion of the image
With your sampled color set and the fog brush active, start clicking – not dragging – over the areas you want to fill. Single clicks give you more control over where each cloud of fog lands. Build coverage gradually by layering multiple clicks rather than trying to nail it in one pass.
Fog brush strokes being applied over the lower portion of the image
With your sampled color set and the fog brush active, start clicking – not dragging – over the areas you want to fill. Single clicks give you more control over where each cloud of fog lands. Build coverage gradually by layering multiple clicks rather than trying to nail it in one pass.
Drop the layer’s overall Opacity back to somewhere between 40-70% after you’ve painted. You want the fog to feel like atmosphere, not like someone held a cotton ball up to the lens. If specific areas feel too dense, add a layer mask and brush out the excess with a soft black brush at low opacity.
Step 5: Duplicate the Technique to Create Light Beams
 Same fog brush being used at an angle to simulate light rays
Here’s where it gets genuinely fun. The same fog brush that fills in dead space at the bottom of your image can also paint convincing light beams. The trick is in the Brush Angle setting. In the brush options panel, rotate the brush angle so the long axis of the shape points in the direction your light source is coming from.
Same fog brush being used at an angle to simulate light rays
Here’s where it gets genuinely fun. The same fog brush that fills in dead space at the bottom of your image can also paint convincing light beams. The trick is in the Brush Angle setting. In the brush options panel, rotate the brush angle so the long axis of the shape points in the direction your light source is coming from.
For Aaron’s image the light was radiating from a disco ball, so the beams splay outward from a center point. On a new layer set to a blend mode like Screen or Soft Light, click along the path where each beam would travel. Keep the layer opacity low – around 20-40% – and build up intensity by clicking multiple times in the same area. Screen mode is particularly useful here because it naturally ignores dark pixels, letting your fog strokes read as pure light rather than as an overlay sitting awkwardly over shadows.
Step 6: Adjust Blend Modes and Opacity to Sell the Effect
 Layer blend mode dropdown showing Screen mode selected for light layer
Once you have both your fog layer and your light beam layer in place, spend a few minutes toggling through blend modes to see what works with your specific image. Screen and Soft Light are your starting points, but Overlay can punch up intensity if the effect is reading too subtle. Reduce or increase individual layer opacity in small increments – 5% at a time. It sounds tedious but the difference between 35% and 45% opacity can be the difference between atmospheric and overdone.
Layer blend mode dropdown showing Screen mode selected for light layer
Once you have both your fog layer and your light beam layer in place, spend a few minutes toggling through blend modes to see what works with your specific image. Screen and Soft Light are your starting points, but Overlay can punch up intensity if the effect is reading too subtle. Reduce or increase individual layer opacity in small increments – 5% at a time. It sounds tedious but the difference between 35% and 45% opacity can be the difference between atmospheric and overdone.
Always toggle the layers on and off a few times before you call it done. Your eyes adjust to what you’re building, and the before/after comparison is a reliable gut-check.
One Thing I’d Add From My Own Experience
Aaron’s method works straight out of the box, but I’ve found it even more useful to convert both the fog layer and the light beam layer to Smart Objects before applying any additional filtering. If you want to run a Gaussian Blur over the fog to soften it further, or add a motion blur to the light beams for more directionality, doing that as a Smart Filter means you can dial the settings back any time without destroying the layer. I learned the value of Smart Objects the hard way – one bad filter on a flattened layer, no undo history, and a very uncomfortable client call – so now it’s just habit.
The other small addition I’d recommend: mask the very edges of your fog layer so it doesn’t creep into areas of the image that need to stay sharp. A gradient mask from the center outward usually does the job cleanly.
The bigger lesson here is that atmosphere in a photo isn’t just something you capture. It’s something you can build, deliberately and convincingly, with the right tools and a basic understanding of how opacity and blend modes interact. A cloud-shaped brush and 20 minutes is genuinely all this takes. Watch the full tutorial on YouTube to see Aaron walk through the whole thing on a real image – the before and after is more convincing than anything I can describe in text.
Comments (1)
This is exactly what I needed today. Been struggling with this for weeks.
Leave a Comment