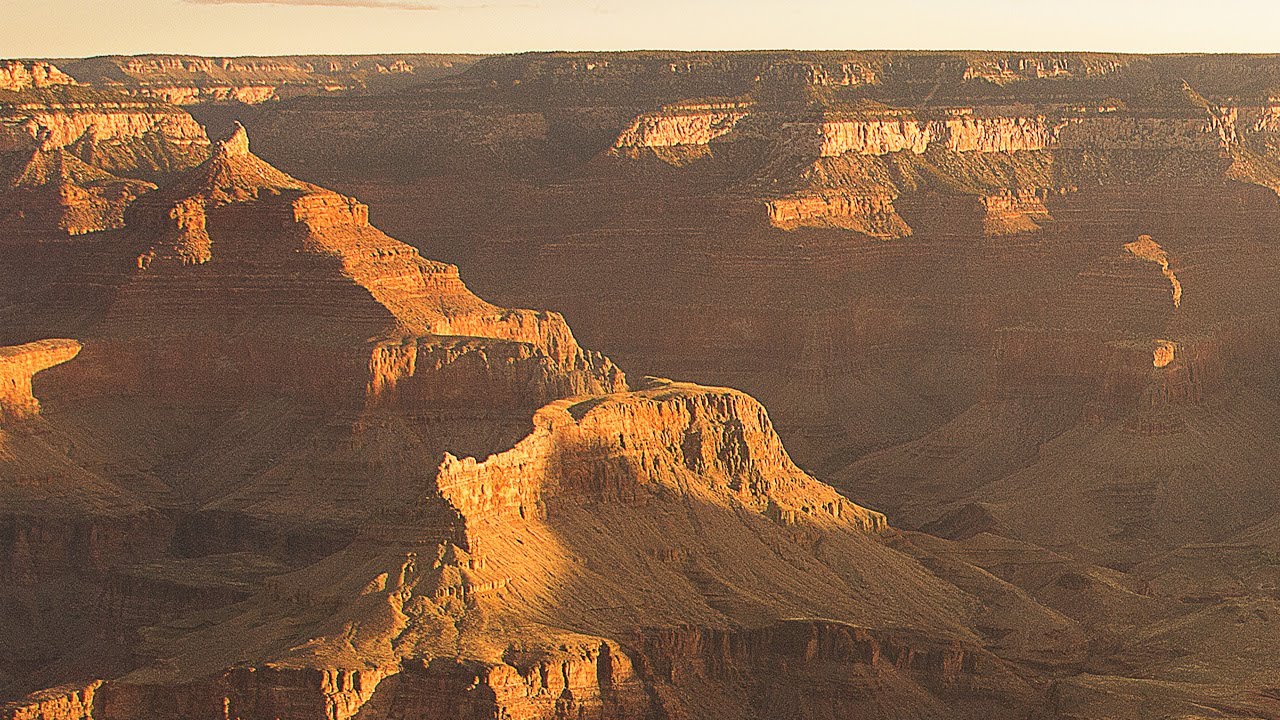
Every photographer knows the feeling. You’re standing at the rim of something genuinely breathtaking, the light is doing that thing, your camera is out, and you’re sure you’re capturing a moment you’ll show people for years. Then you get home, open Lightroom or Photoshop, and the photo looks like you took it through a foggy shower door. Flat, hazy, weirdly blue. I’ve been there more times than I’d like to admit, and for a while I just wrote it off as “skill issue, buy a better lens,” which is exactly the kind of expensive wrong answer I specialize in.
The real fix is simpler and faster than you think. In this Aaron Nace (PHLEARN) tutorial, he works through a Grand Canyon photo that has all the classic vacation landscape problems: atmospheric haze, uneven brightness, muddy colors, and softness that makes the rocks look like watercolor smudges. The workflow he runs through hits each problem in a logical order, and the whole thing can be adapted to pretty much any landscape you’ve ever been disappointed by. Watch the full tutorial on YouTube or follow along with the breakdown below.
Step 1: Diagnose Before You Dive In
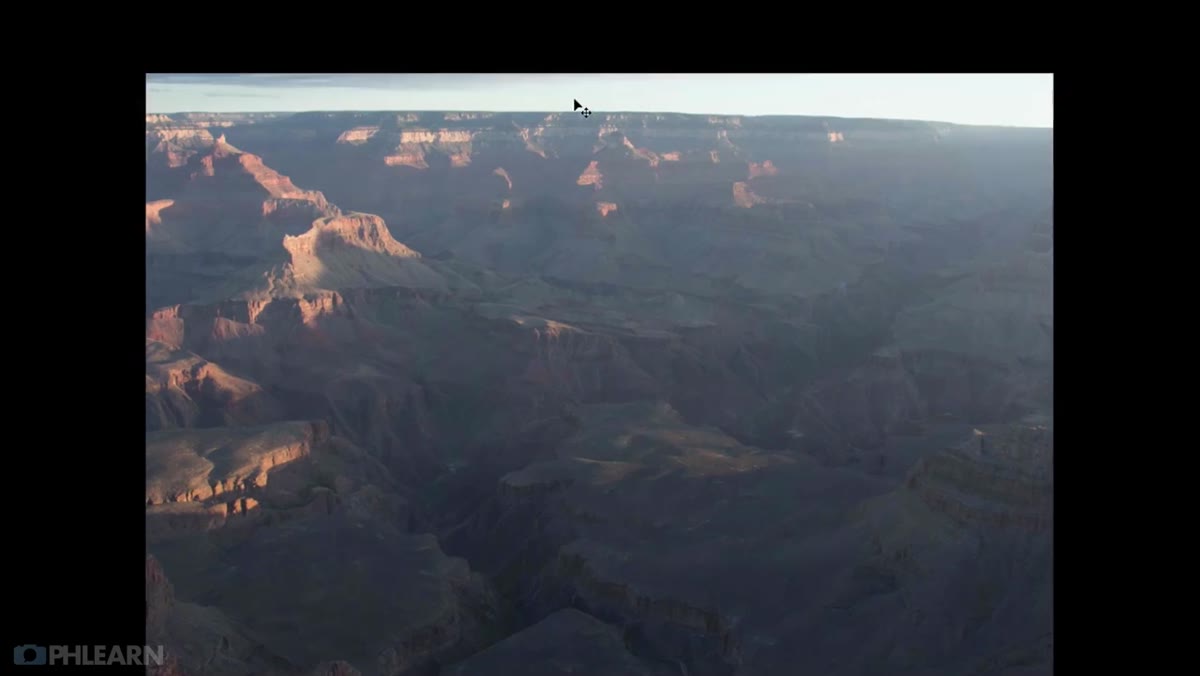 Grand Canyon photo displayed fullscreen in Photoshop
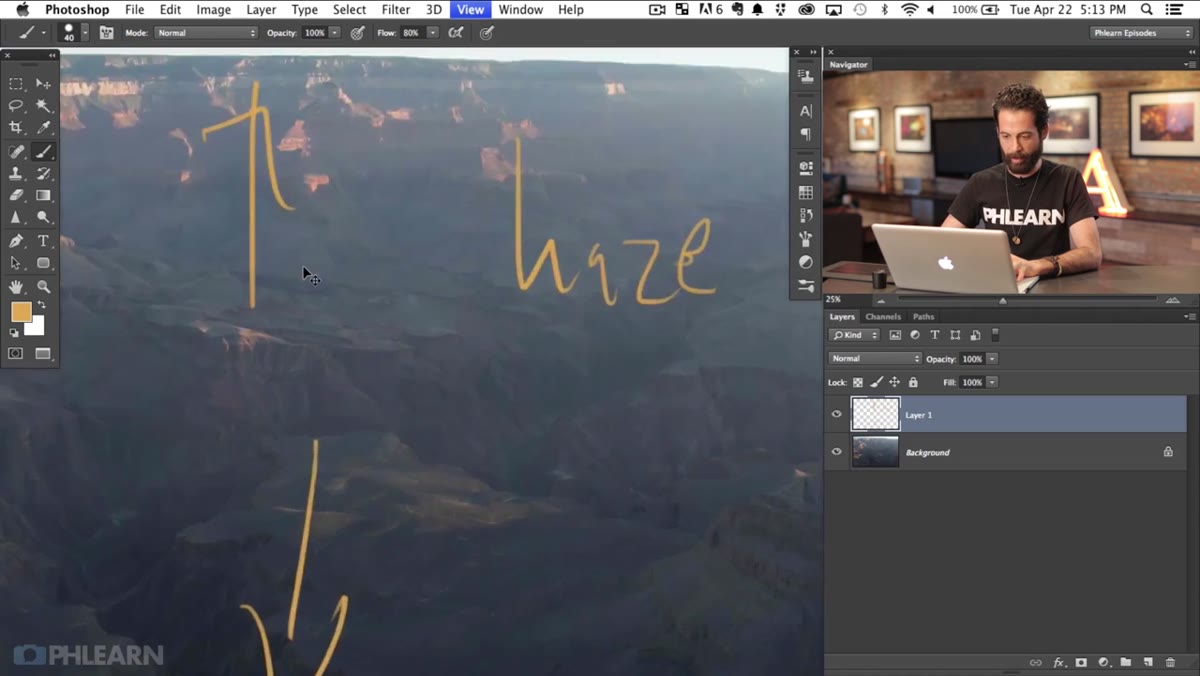
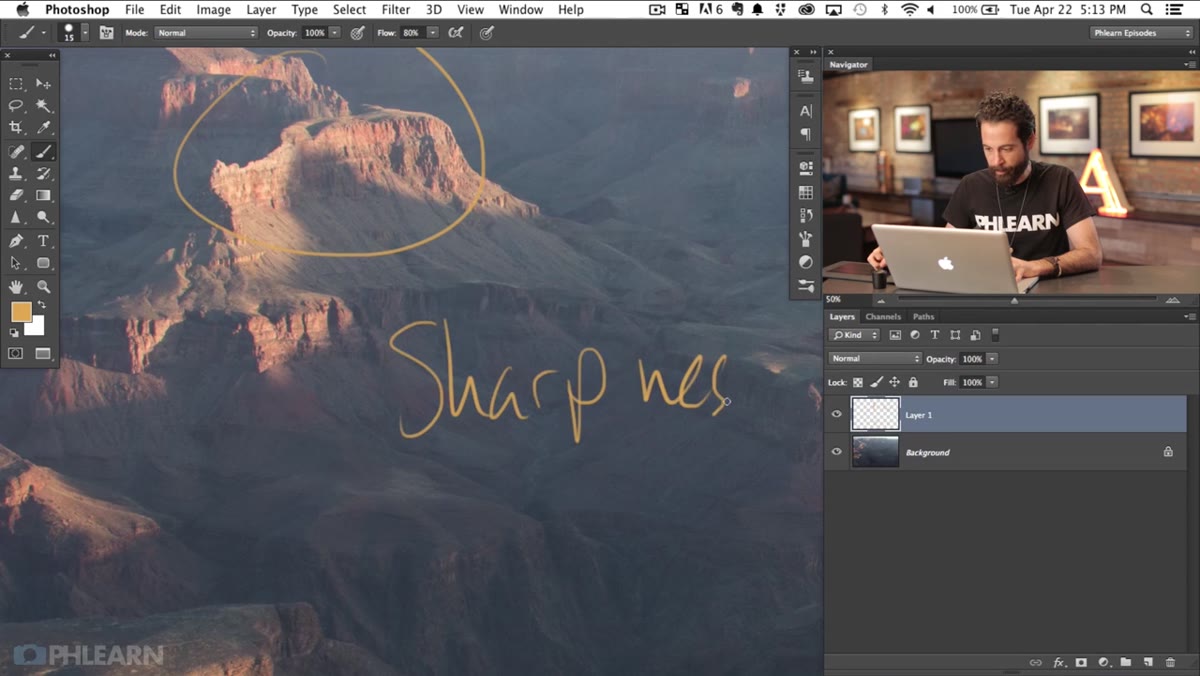
Before touching a single slider, Aaron does something a lot of people skip: he actually looks at the image critically and calls out specific problems. In the Grand Canyon shot, he identifies four distinct issues: atmospheric haze creating a blue cast across the distance, uneven brightness between the top and bottom of the frame, a lack of sharpness in the rock detail, and color that reads blue when the scene was actually a warm sunset.
Grand Canyon photo displayed fullscreen in Photoshop
Before touching a single slider, Aaron does something a lot of people skip: he actually looks at the image critically and calls out specific problems. In the Grand Canyon shot, he identifies four distinct issues: atmospheric haze creating a blue cast across the distance, uneven brightness between the top and bottom of the frame, a lack of sharpness in the rock detail, and color that reads blue when the scene was actually a warm sunset.
This triage step matters more than it sounds. If you just start pulling sliders around hoping something improves, you’ll usually fix one thing and accidentally break two others. Spend sixty seconds naming what’s actually wrong. Write it down if you have to. It keeps you from chasing your own tail.
Step 2: Open a Levels Adjustment Layer
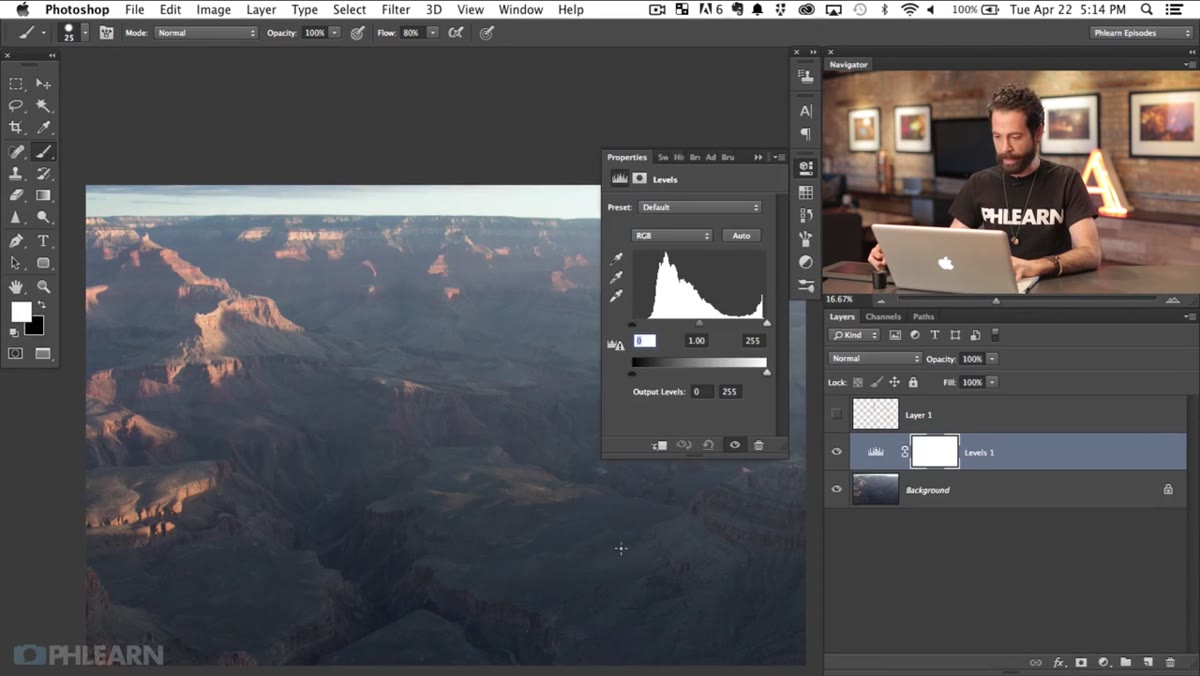 Levels adjustment layer panel open in Photoshop
Add a Levels adjustment layer rather than editing the image directly. In the Adjustments panel, click the Levels icon (it looks like a small histogram with a mountain shape). This keeps your original image untouched and lets you go back and tweak things later without redoing your work. Non-destructive editing isn’t just good practice, it’s the difference between a professional workflow and one where you’re hitting Ctrl+Z forty times hoping for a miracle.
Levels adjustment layer panel open in Photoshop
Add a Levels adjustment layer rather than editing the image directly. In the Adjustments panel, click the Levels icon (it looks like a small histogram with a mountain shape). This keeps your original image untouched and lets you go back and tweak things later without redoing your work. Non-destructive editing isn’t just good practice, it’s the difference between a professional workflow and one where you’re hitting Ctrl+Z forty times hoping for a miracle.
Once the Levels panel is open, you’ll see the histogram and the Auto button sitting right there. Most people either ignore the Auto button entirely or click it once, shrug, and move on. Aaron’s move is to go one level deeper.
Step 3: Unlock the Auto Options
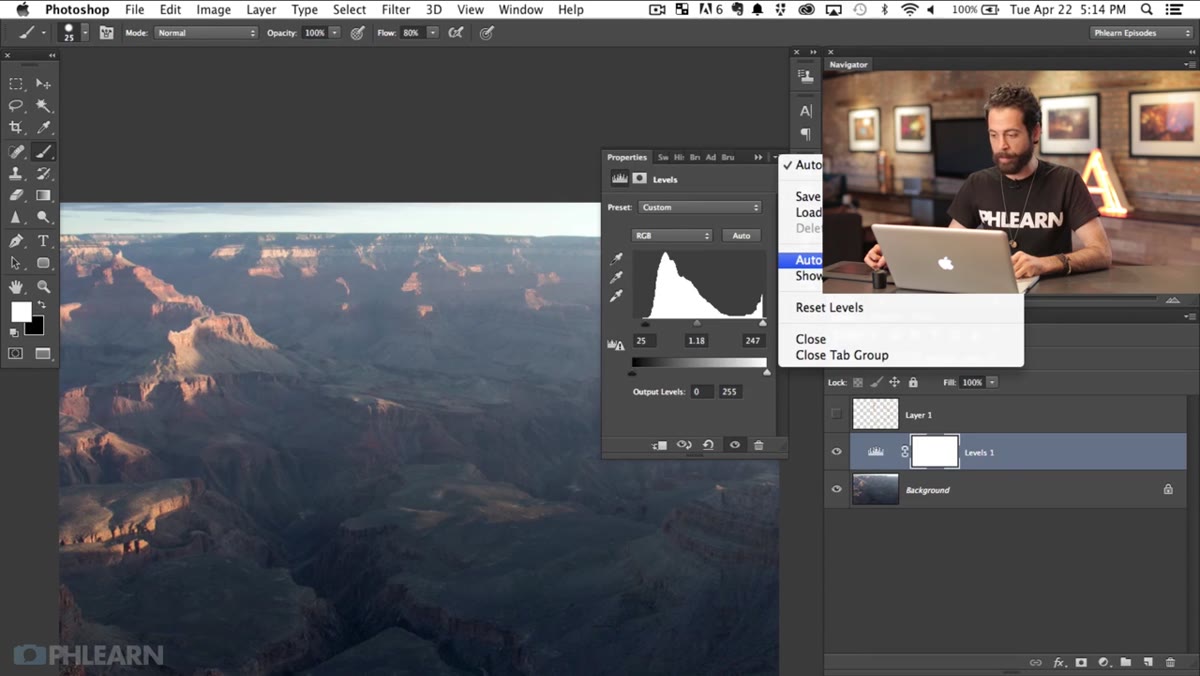 Auto Options dropdown menu visible in Levels panel
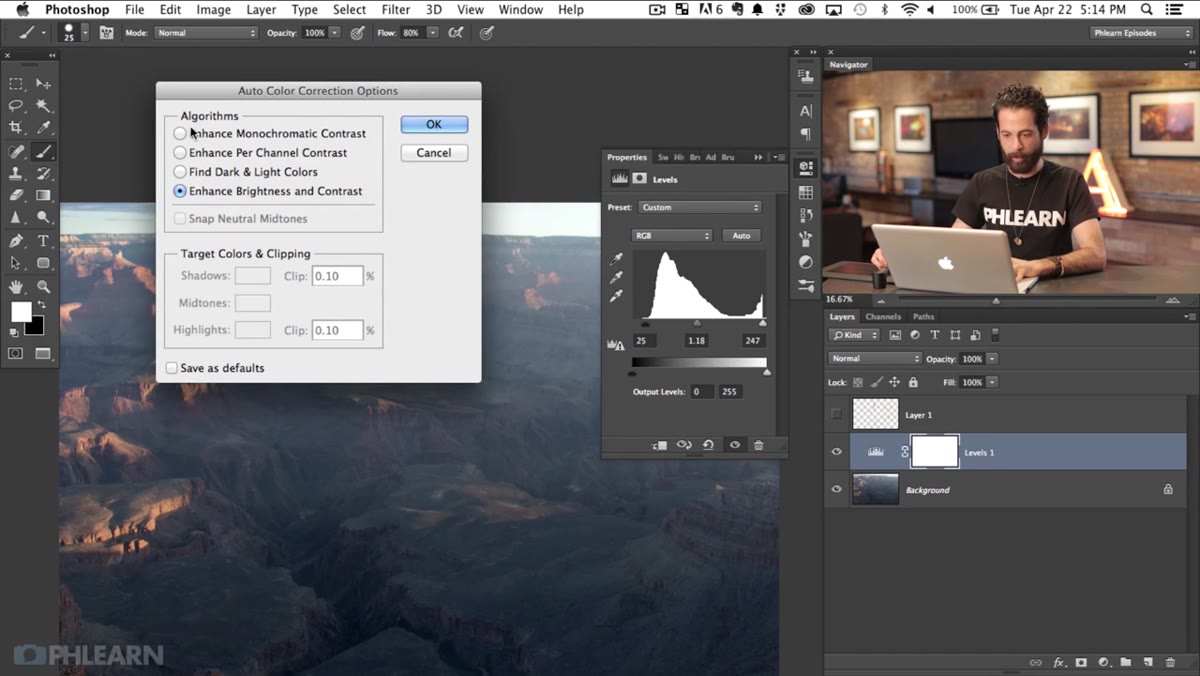
Here’s the tip that makes this tutorial worth bookmarking. In the Levels panel, there’s a small icon that looks like three horizontal lines or a settings gear, depending on your version of Photoshop. Click it and choose “Auto Options.” A dialog box opens with several different algorithms Photoshop can use when it runs an auto correction.
Auto Options dropdown menu visible in Levels panel
Here’s the tip that makes this tutorial worth bookmarking. In the Levels panel, there’s a small icon that looks like three horizontal lines or a settings gear, depending on your version of Photoshop. Click it and choose “Auto Options.” A dialog box opens with several different algorithms Photoshop can use when it runs an auto correction.
The options include things like “Enhance Monochromatic Contrast” and “Enhance Per Channel Contrast,” but the one Aaron focuses on is “Snap Neutral Midtones.” Enable that checkbox before you do anything else. This setting tells Photoshop to look for tones in the image that should be neutral gray and correct the color balance based on that assumption. For landscape shots with atmospheric haze (which almost always has a strong blue bias), this is genuinely powerful because it attacks the color cast directly rather than just boosting contrast.
Step 4: Try Multiple Auto Algorithms Before Committing
 Clicking between Auto algorithm options in dialog
With the Auto Options dialog open, don’t just pick one setting and click OK immediately. Aaron’s approach is to cycle through the different algorithm options while watching the preview update in real time. Each one will interpret the image differently, and the “best” one depends entirely on the specific photo you’re working with.
Clicking between Auto algorithm options in dialog
With the Auto Options dialog open, don’t just pick one setting and click OK immediately. Aaron’s approach is to cycle through the different algorithm options while watching the preview update in real time. Each one will interpret the image differently, and the “best” one depends entirely on the specific photo you’re working with.
For the Grand Canyon image, the combination of Snap Neutral Midtones with one of the contrast-enhancing algorithms knocks out a significant chunk of the blue haze and brings the warmth of the canyon rock back into the image. Click OK when you find the version that looks closest to what you want, then compare the before and after by toggling the adjustment layer’s visibility on and off with the eye icon in the Layers panel. The difference is usually bigger than you’d expect from something that took about thirty seconds.
Step 5: Address Uneven Brightness with a Gradient-Based Approach
 Circling the brighter upper portion of the Grand Canyon image
The top of the Grand Canyon frame is noticeably brighter than the bottom, which is a common issue with landscape shots where you’ve got sky or bright cliffs in one part of the frame. After the Levels correction, evaluate whether the brightness still feels unbalanced. If it does, add a new Curves adjustment layer and apply a layer mask. Use the Gradient tool set to black-to-white, and drag it across the mask to limit the curves correction to only the brighter area. This lets you darken the top portion of the image without flattening the shadows in the foreground.
Circling the brighter upper portion of the Grand Canyon image
The top of the Grand Canyon frame is noticeably brighter than the bottom, which is a common issue with landscape shots where you’ve got sky or bright cliffs in one part of the frame. After the Levels correction, evaluate whether the brightness still feels unbalanced. If it does, add a new Curves adjustment layer and apply a layer mask. Use the Gradient tool set to black-to-white, and drag it across the mask to limit the curves correction to only the brighter area. This lets you darken the top portion of the image without flattening the shadows in the foreground.
The mask approach means you’re not making a global brightness change that affects everything equally. You’re being surgical about where the correction applies, which is what separates a quick edit from a polished one.
Step 6: Sharpen the Detail
 Zoomed into rocky canyon detail showing softness
Atmospheric haze doesn’t just affect color and brightness. It softens fine detail because you’re literally photographing through millions of tiny water particles in the air. After your tonal corrections are in, zoom in to 100% and evaluate the actual sharpness of the image. For landscape work, the High Pass sharpening method gives you the most control. Duplicate your flattened image (Ctrl+Shift+Alt+E to stamp visible layers), then go to Filter, Other, High Pass and set the radius between 1.5 and 3 pixels depending on how soft the image is. Change that layer’s blend mode to Overlay or Soft Light. Soft Light is subtler and usually safer. Toggle the layer on and off to compare.
Zoomed into rocky canyon detail showing softness
Atmospheric haze doesn’t just affect color and brightness. It softens fine detail because you’re literally photographing through millions of tiny water particles in the air. After your tonal corrections are in, zoom in to 100% and evaluate the actual sharpness of the image. For landscape work, the High Pass sharpening method gives you the most control. Duplicate your flattened image (Ctrl+Shift+Alt+E to stamp visible layers), then go to Filter, Other, High Pass and set the radius between 1.5 and 3 pixels depending on how soft the image is. Change that layer’s blend mode to Overlay or Soft Light. Soft Light is subtler and usually safer. Toggle the layer on and off to compare.
This approach brings back edge contrast in the rock texture and tree detail without introducing the crunchy, over-sharpened look you get from just cranking the Unsharp Mask.
What I’d Add From My Own Workflow
The Auto Options trick is legitimately something I’d never explored properly before watching this, and I’ve been working in Photoshop long enough to be embarrassed about that. But the one thing I’d layer on top of Aaron’s approach is using a Hue/Saturation adjustment after the Levels correction to selectively desaturate the blue and cyan channels. Atmospheric haze often leaves a residual blue cast even after Auto correction, especially in the midtones, and pulling the saturation of just the blue channel down about 15 to 20 points while shifting the hue slightly toward cyan can clean that up without making the sky look weird and gray. It’s a small addition, but on hazy shots it makes the Levels correction feel even more complete.
The biggest thing this tutorial drives home is that most vacation photo disappointment is fixable, and the fixes don’t require hours of careful masking and compositing. A smart auto correction with the right algorithm settings, some attention to how brightness falls across the frame, and a sharpening pass can take a flat, hazy landscape and make it look like you actually knew what you were doing when you pressed the shutter.
Watch the full tutorial on YouTube to see Aaron walk through the full before and after, and to catch any details I didn’t cover in this breakdown.
Comments (1)
This is going in my reference folder. Incredibly useful.
Leave a Comment