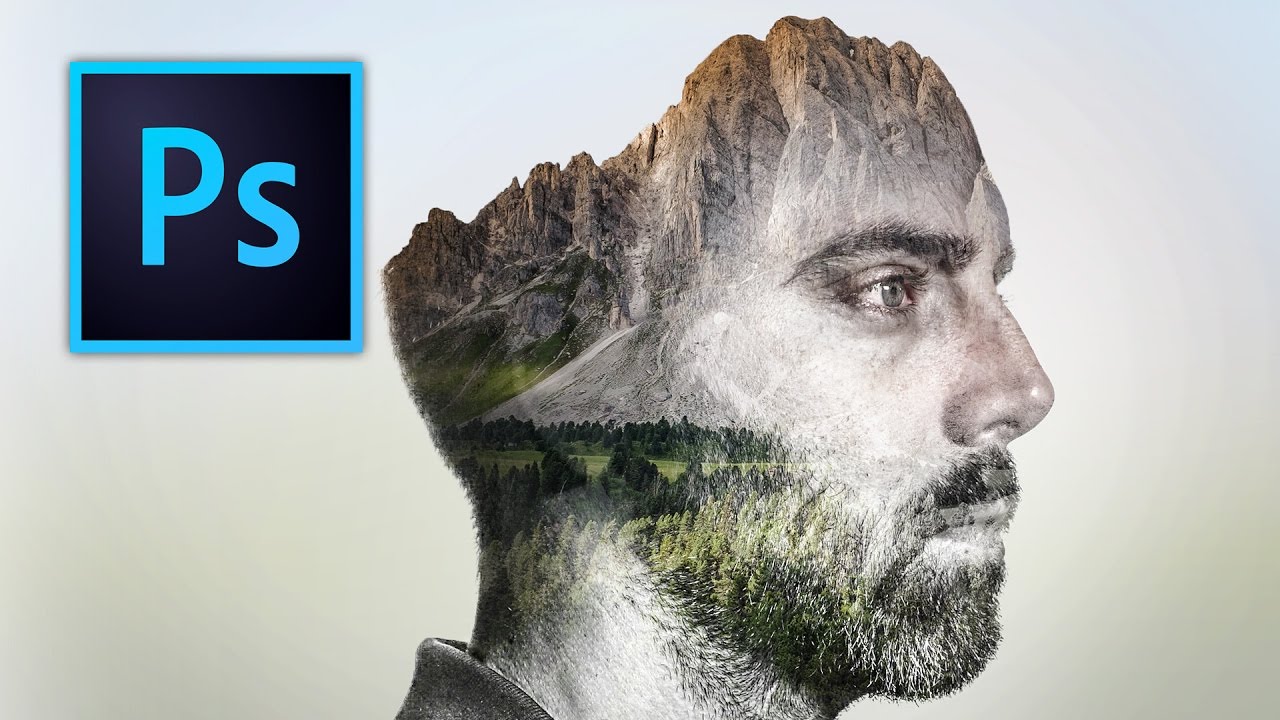
There’s a specific kind of design request that used to make me sweat a little. Client sends over a headshot and a mood board full of those dreamy portrait-meets-landscape composites, and suddenly you’re either the person who knows how to do that, or you’re about to spend three hours on YouTube pretending you did all along. Double exposure is one of those effects that looks complicated and mysterious until someone actually walks you through it, and then you feel mildly embarrassed by how simple the core idea is.
Watch the full tutorial on YouTube
In this Kelvin Designs tutorial, creator Kelvin takes a profile portrait and a mountain/forest landscape and blends them into a clean, professional double exposure using nothing you don’t already have in Photoshop. No plugins, no subscription tools, no Lightroom presets. Just layers, blending modes, and a couple of Camera Raw adjustments. I watched it, rebuilt it on my own, and what follows is my step-by-step breakdown so you can follow along without pausing every 30 seconds.
One thing worth flagging before we start: the photo choice matters more than most people realize. A profile shot works significantly better than a straight-on portrait for this effect. Why? Because the natural slope of a person’s silhouette from the side, the forehead, the nose, the chin, gives the landscape image a clean edge to flow along. Face-on shots tend to flatten everything out and the illusion falls apart at the edges. File that away before you even open Photoshop.
Step 1: Prep Your Portrait with Camera Raw
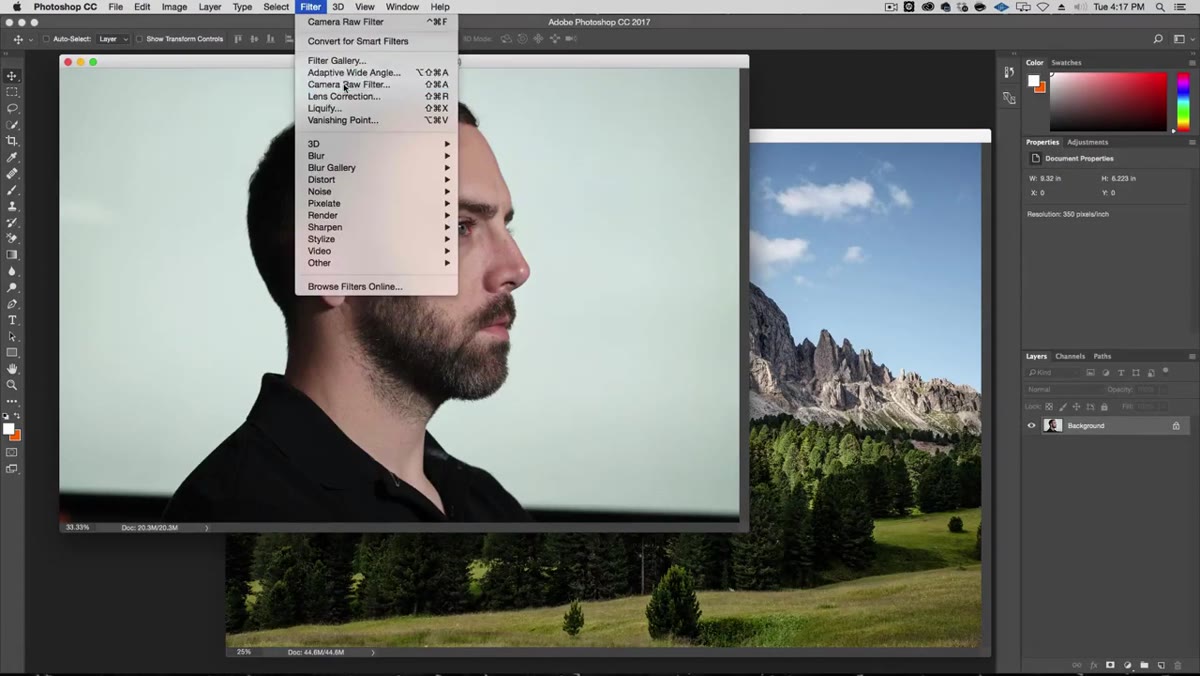 Camera Raw filter open with Clarity, Shadows, and Highlights adjusted
Before any blending happens, you want to push the portrait toward something that feels a little more textured and cinematic. Open your portrait layer and go to Filter > Camera Raw Filter. Bring the Clarity up noticeably, open the Shadows, and pull the Highlights down. This creates a pseudo-HDR look that gives the skin and edges more definition. You can also nudge the Exposure up slightly to open the image up, and widen the Whites a touch. You’re not going for a dramatic HDR look here, just more visual information throughout the tonal range.
Camera Raw filter open with Clarity, Shadows, and Highlights adjusted
Before any blending happens, you want to push the portrait toward something that feels a little more textured and cinematic. Open your portrait layer and go to Filter > Camera Raw Filter. Bring the Clarity up noticeably, open the Shadows, and pull the Highlights down. This creates a pseudo-HDR look that gives the skin and edges more definition. You can also nudge the Exposure up slightly to open the image up, and widen the Whites a touch. You’re not going for a dramatic HDR look here, just more visual information throughout the tonal range.
Once you’re happy, hit OK and rename this layer “Subject” in the Layers panel. Clean layer naming saves you from chaos later, and I say this as someone who once had a project file with eight layers all called “Layer 1 copy.”
Step 2: Convert the Portrait to Black and White
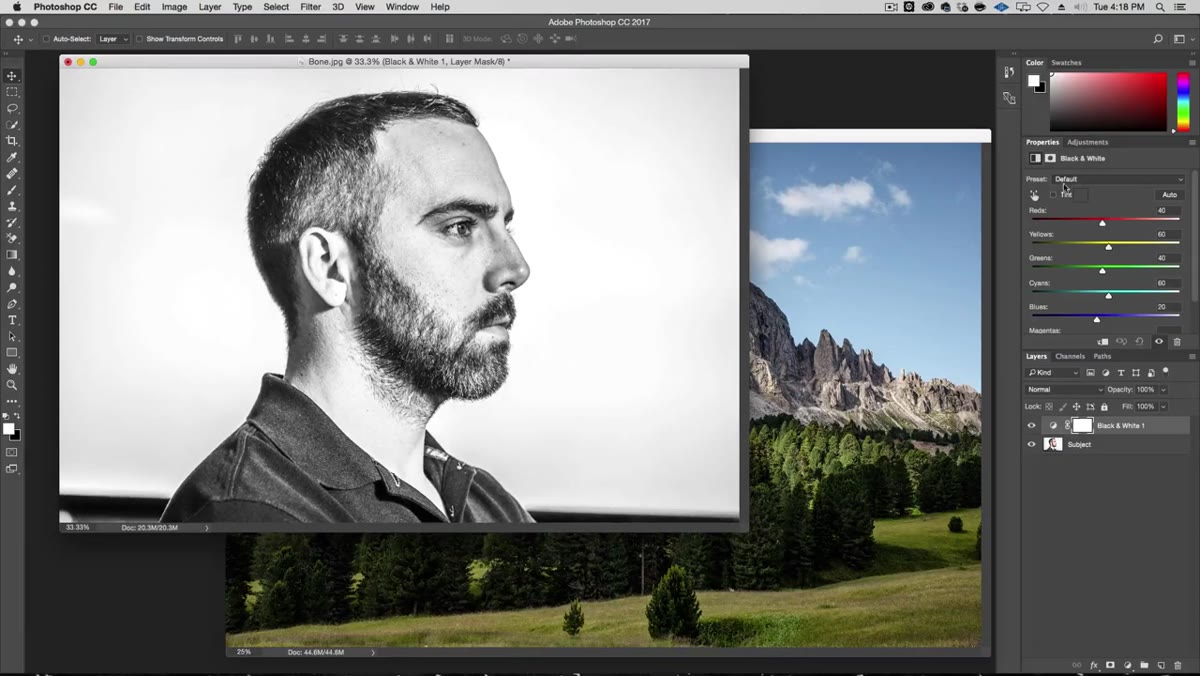 Black and White adjustment layer applied with High Contrast Blue filter selected
Double exposure blends are almost always done in black and white, at least on the portrait side. The reason is straightforward: color in the base layer competes with color in the overlay layer and the whole thing turns muddy. Go to the Adjustments panel and add a Black and White adjustment layer. The default settings are fine as a starting point, but Kelvin recommends the High Contrast Blue preset, which deepens the blues and brightens the skin tones in a way that adds contrast and drama.
Black and White adjustment layer applied with High Contrast Blue filter selected
Double exposure blends are almost always done in black and white, at least on the portrait side. The reason is straightforward: color in the base layer competes with color in the overlay layer and the whole thing turns muddy. Go to the Adjustments panel and add a Black and White adjustment layer. The default settings are fine as a starting point, but Kelvin recommends the High Contrast Blue preset, which deepens the blues and brightens the skin tones in a way that adds contrast and drama.
Now here’s the part that trips people up. You need to clip this adjustment layer to the Subject layer so it only affects the portrait and not everything beneath it. Hold Alt (or Option on Mac) and click between the Black and White layer and the Subject layer in the panel. You’ll see the little clipping arrow appear. That’s what you want.
Step 3: Bring in the Nature Layer
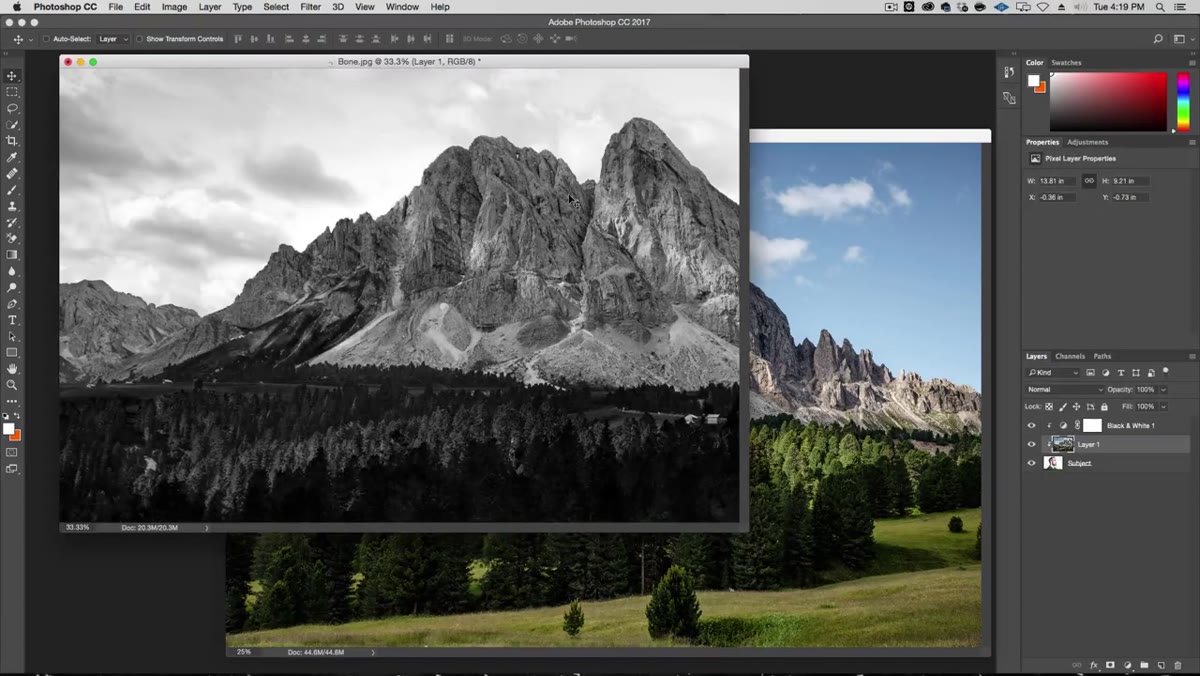 Nature photo dragged into the document above the Subject layer
Drag your landscape photo into the document. Photoshop may try to slot it into your clipping mask group, which is not what you want. If that happens, drag the layer above the clipping group so it sits independently. Rename it “Nature” so your Layers panel stays readable.
Nature photo dragged into the document above the Subject layer
Drag your landscape photo into the document. Photoshop may try to slot it into your clipping mask group, which is not what you want. If that happens, drag the layer above the clipping group so it sits independently. Rename it “Nature” so your Layers panel stays readable.
This layer needs to go into Screen blending mode. Click the blending mode dropdown at the top of the Layers panel (it probably says “Normal”) and switch it to Screen. What Screen mode does is use the brightness values of the top layer to lighten what’s beneath it. Dark areas in the landscape become transparent, light areas show through. The portrait underneath starts to merge with the scenery in a way that feels organic rather than just stacked.
Step 4: Position the Landscape Strategically
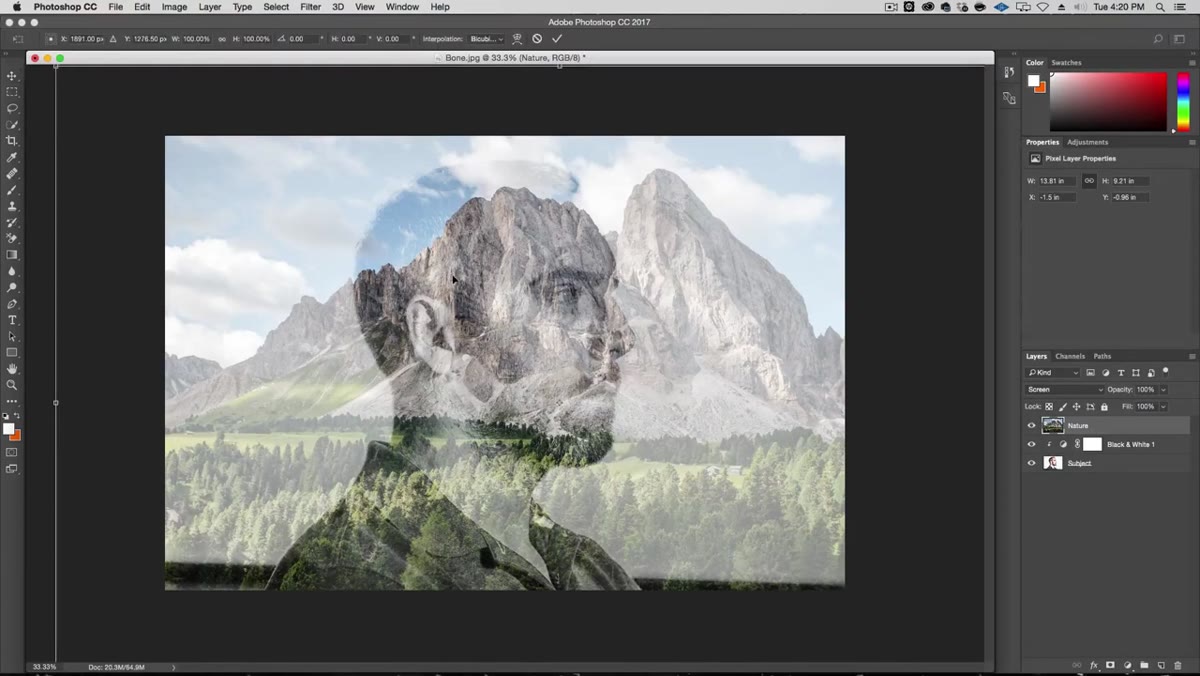 Free Transform active on the Nature layer, repositioning landscape over portrait
This is where the actual artistry lives. Hit Command+T (or Ctrl+T on Windows) to enter Free Transform on the Nature layer. You’re not just centering the image, you’re thinking about which parts of the landscape correspond to which parts of the face.
Free Transform active on the Nature layer, repositioning landscape over portrait
This is where the actual artistry lives. Hit Command+T (or Ctrl+T on Windows) to enter Free Transform on the Nature layer. You’re not just centering the image, you’re thinking about which parts of the landscape correspond to which parts of the face.
Kelvin’s approach here is smart: use the natural slope of the mountain to follow the curve of the forehead. The decline of the mountain ridge becomes the decline of the hairline. This kind of intentional alignment is what separates a convincing double exposure from one that just looks like two pictures sitting on top of each other. Hold Alt+Shift while dragging a corner handle to scale proportionally from the center. Move the image around and look for those moments where the landscape geography echoes the portrait’s contours.
A quick tip for positioning: temporarily drop the opacity of the Nature layer so you can see both images at once and dial in the placement. Bring the opacity back to 100% once you’ve locked in the position.
Step 5: Use Multiply Mode to Check Your Blend
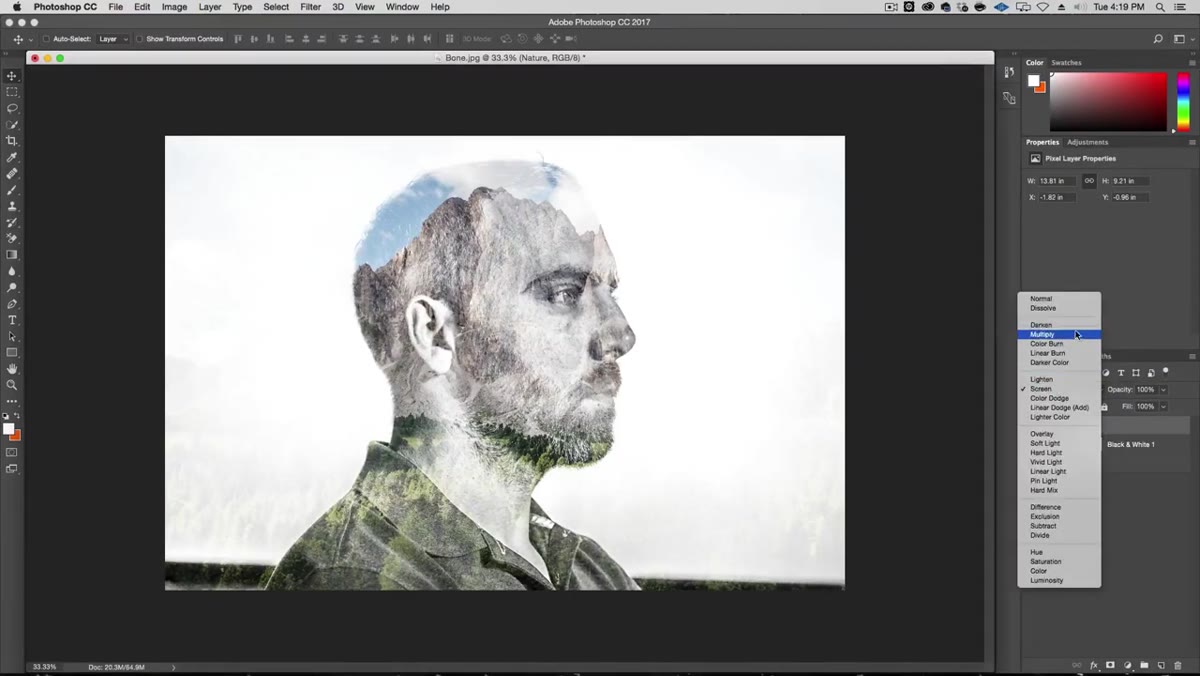 Nature layer temporarily switched to Multiply blend mode for positioning reference
Before you commit to Screen mode, Kelvin briefly switches the Nature layer to Multiply mode during the positioning phase. This isn’t the final look, it’s just a diagnostic tool. Multiply darkens everything, which makes both layers visible simultaneously and lets you see exactly how the two images are overlapping. Once you’ve confirmed the alignment looks good, switch back to Screen for the actual effect.
Nature layer temporarily switched to Multiply blend mode for positioning reference
Before you commit to Screen mode, Kelvin briefly switches the Nature layer to Multiply mode during the positioning phase. This isn’t the final look, it’s just a diagnostic tool. Multiply darkens everything, which makes both layers visible simultaneously and lets you see exactly how the two images are overlapping. Once you’ve confirmed the alignment looks good, switch back to Screen for the actual effect.
This is a small workflow trick but it’s genuinely useful. Screen mode can make it hard to judge placement because the bright areas wash out. Multiply gives you a clearer picture of what’s actually aligning where.
What I’d Add: Mask the Edges for a Cleaner Result
The tutorial gets you to a solid result fast, and that’s a real skill. But in my own work I almost always take one extra step: I add a layer mask to the Nature layer and use a soft black brush to clean up the edges on the side of the face opposite the landscape’s natural fade. The Screen blending mode handles a lot, but around the jaw and neck area in particular, you can often see the landscape image bleeding outside the portrait’s silhouette in a way that breaks the illusion. A quick mask pass takes maybe five minutes and tightens everything up considerably.
If you want to go further, try running a Levels or Curves adjustment layer clipped to the Nature layer and pulling the shadows down. This deepens the darker areas of the landscape and makes the transparent zones feel more deliberate.
The single biggest takeaway from this technique is that blending modes are doing the heavy lifting, not masking, not selections, not complex compositing. Screen mode is the whole trick. Once you internalize how Screen works (bright areas show, dark areas disappear), you’ll start seeing double exposure opportunities everywhere.
Watch the full tutorial on YouTube to see Kelvin walk through the full build, including the source files he makes available for free on his site.
Comments (2)
Just subscribed. If the rest of your content is this good, I'm in.
Applied this to my portfolio shots and the improvement is noticeable.
Leave a Comment