Client work is unpredictable. One week you’re doing logo lockups, the next someone’s asking for an animated GIF for their email campaign or social post and suddenly you’re staring at Photoshop’s Timeline panel like it personally wronged you. I’ve been there. GIFs feel like they should be simple, and they are, once someone walks you through the logic. That’s exactly what this CreativeLive tutorial delivers. Watch the full tutorial on YouTube before or after reading this breakdown.
What I love about this particular approach is that it treats the GIF as exactly what it is: a sequence of frames, each one a layer. No plugins, no third-party tools, no weird export dance. Just Photoshop doing what it’s always been able to do, if you know where to look. The creator also shares a workflow trick I hadn’t seen spelled out clearly before, building the animation backwards, and once you hear the reasoning, it clicks immediately.
Let me walk you through the whole process so you can follow along in Photoshop without having to pause and rewind every 30 seconds.
Step 1: Set Up Your Layers as Individual Frames
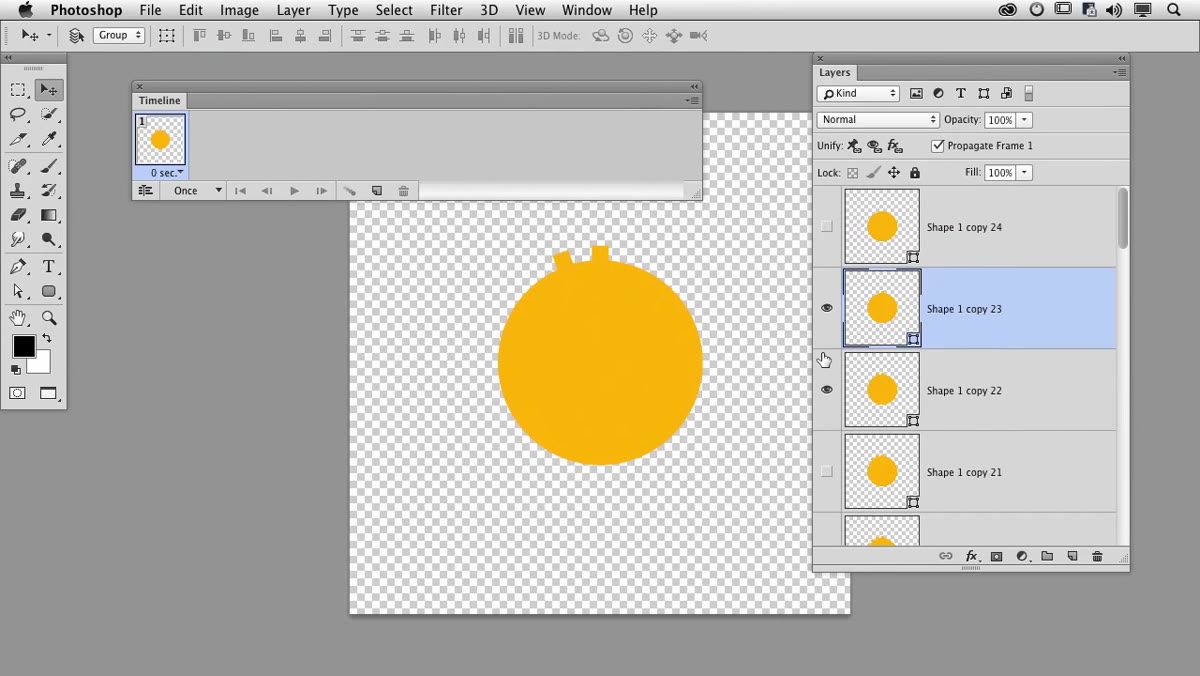 Layers panel showing each frame as a separate layer
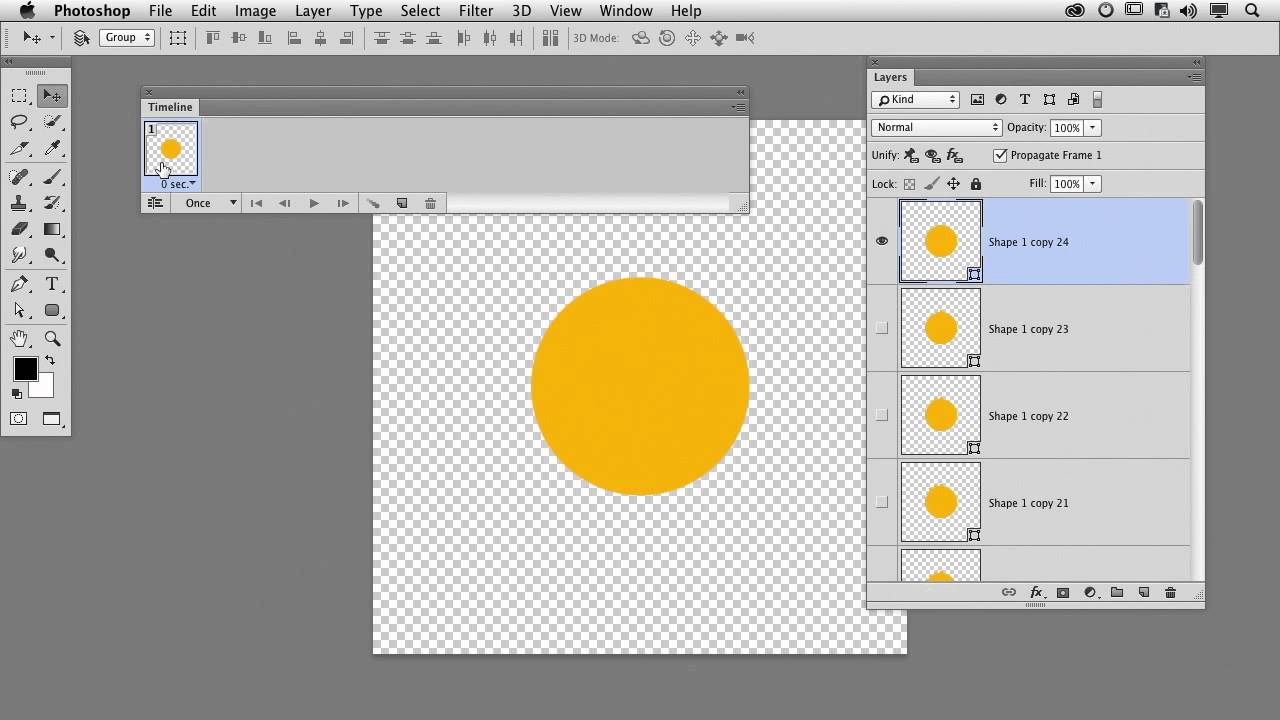
Every frame of your GIF lives as its own layer in the Layers panel. That’s the whole foundation here. Before you touch the Timeline, you should have your artwork spread across individual layers, one layer per animation frame. If you’re building something from scratch, think of each layer as a snapshot of your image at a specific moment in time.
Layers panel showing each frame as a separate layer
Every frame of your GIF lives as its own layer in the Layers panel. That’s the whole foundation here. Before you touch the Timeline, you should have your artwork spread across individual layers, one layer per animation frame. If you’re building something from scratch, think of each layer as a snapshot of your image at a specific moment in time.
The tutorial uses vector paths rather than pixel art for the base artwork, which keeps things clean and scalable. If you’re working with raster content that’s fine too, but vectors give you more flexibility when tweaking shapes before you flatten things into the animation.
Step 2: Build Your Animation Backwards
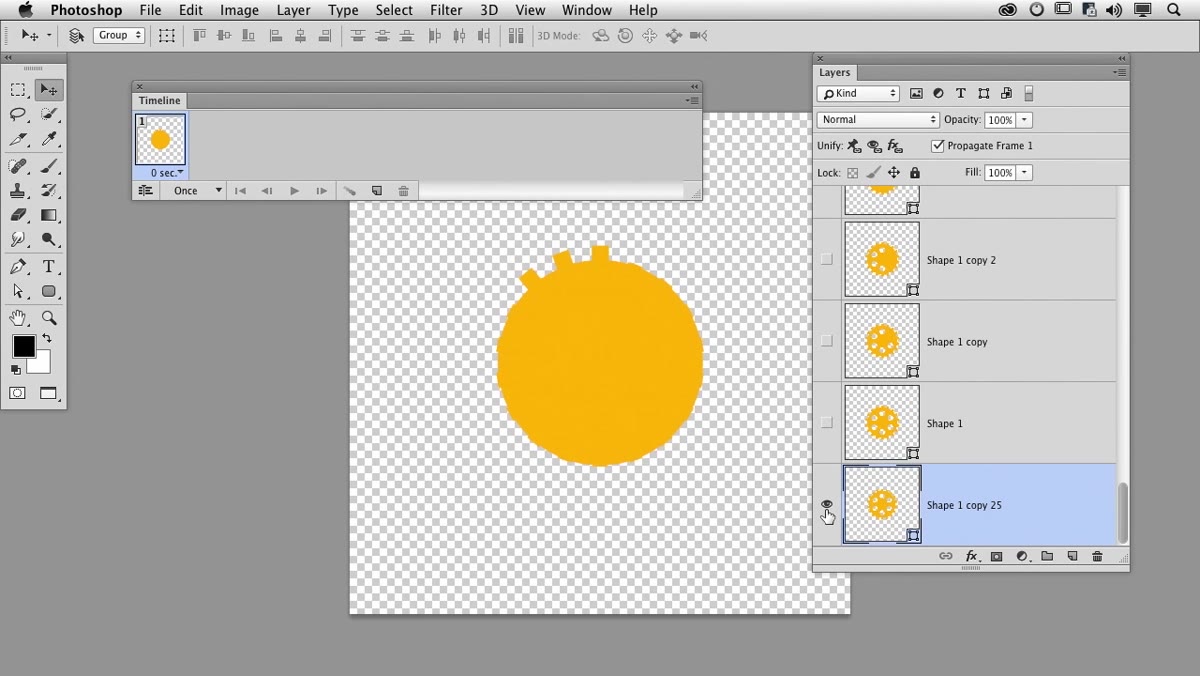 Final completed artwork visible as the starting layer
Here’s the workflow insight that’s genuinely worth stealing. Instead of starting with your first frame and adding elements as you go, build your complete final image first, then duplicate that layer and remove something from each successive copy. You end up with a stack of layers where the top layer is the full composition and each layer below it is progressively stripped back.
Final completed artwork visible as the starting layer
Here’s the workflow insight that’s genuinely worth stealing. Instead of starting with your first frame and adding elements as you go, build your complete final image first, then duplicate that layer and remove something from each successive copy. You end up with a stack of layers where the top layer is the full composition and each layer below it is progressively stripped back.
Why does this work better? Because it’s far easier to subtract from a finished design than to reconstruct it piece by piece from a blank canvas and keep everything aligned. You already know what the finished product looks like. Working backwards just means you’re peeling it apart in a controlled way. Once I tried this I couldn’t go back to building forward.
Step 3: Open the Timeline Panel
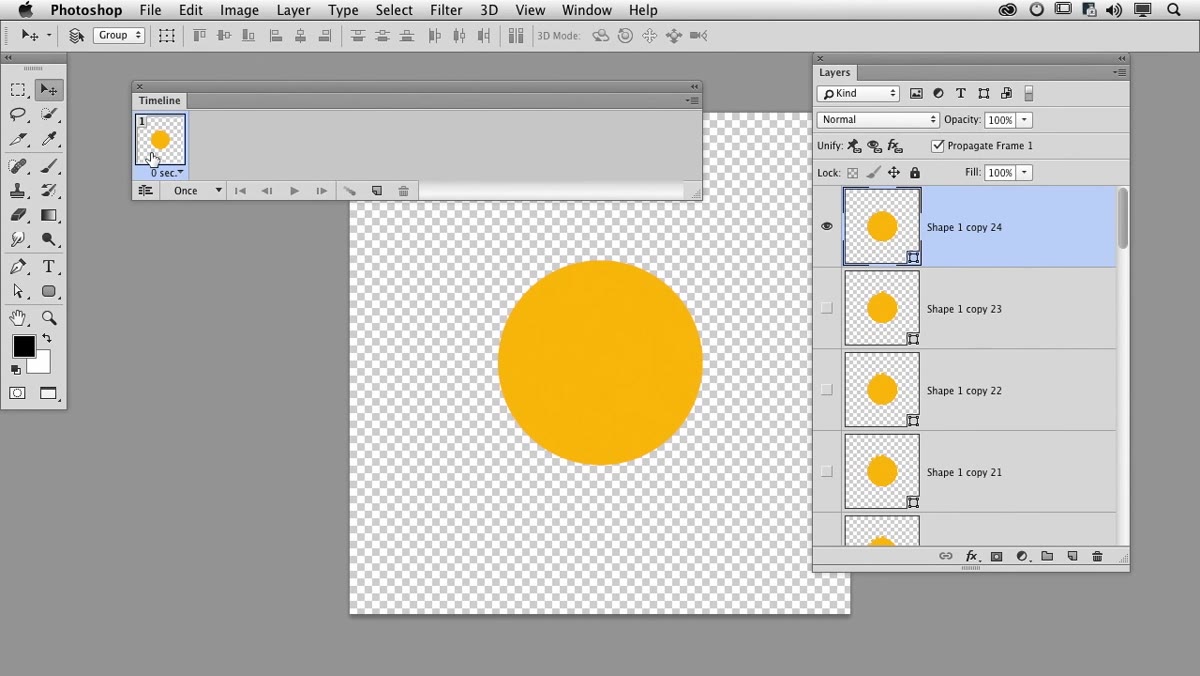 Timeline panel opening from the Window menu
Go to Window and open the Timeline panel. When it opens, make sure you’re in Frame Animation mode, not Video Timeline. There should be a dropdown or button in the middle of the panel that lets you switch between the two. You want Frame Animation for this workflow.
Timeline panel opening from the Window menu
Go to Window and open the Timeline panel. When it opens, make sure you’re in Frame Animation mode, not Video Timeline. There should be a dropdown or button in the middle of the panel that lets you switch between the two. You want Frame Animation for this workflow.
If you’ve accidentally run through this process before and have leftover frames sitting in the Timeline from a previous session, clear them out before you proceed. The tutorial shows this cleanup step at the very start, and skipping it will cause your new frames to stack on top of old ones and create a mess.
Step 4: Use “Make Frames from Layers”
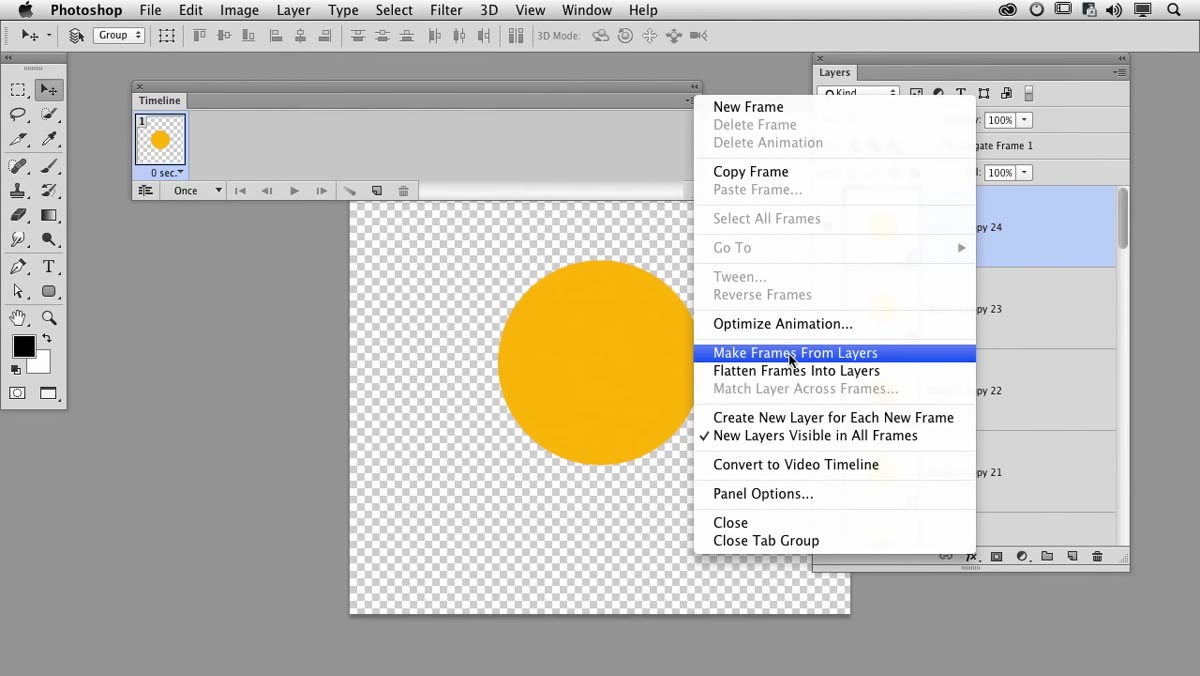 Timeline hamburger menu showing Make Frames from Layers option
Click the hamburger menu icon in the top right corner of the Timeline panel. You’ll see an option called “Make Frames from Layers.” Click it. Photoshop will automatically convert every layer in your document into a separate frame in the Timeline, in layer order.
Timeline hamburger menu showing Make Frames from Layers option
Click the hamburger menu icon in the top right corner of the Timeline panel. You’ll see an option called “Make Frames from Layers.” Click it. Photoshop will automatically convert every layer in your document into a separate frame in the Timeline, in layer order.
This is where the backwards build pays off. Photoshop reads your layers from top to bottom and creates frames in that sequence. Because you built your animation in reverse layer order, Photoshop will import the frames in the wrong direction. That’s expected. You’ll fix it in the next step.
Step 5: Reverse the Frame Order
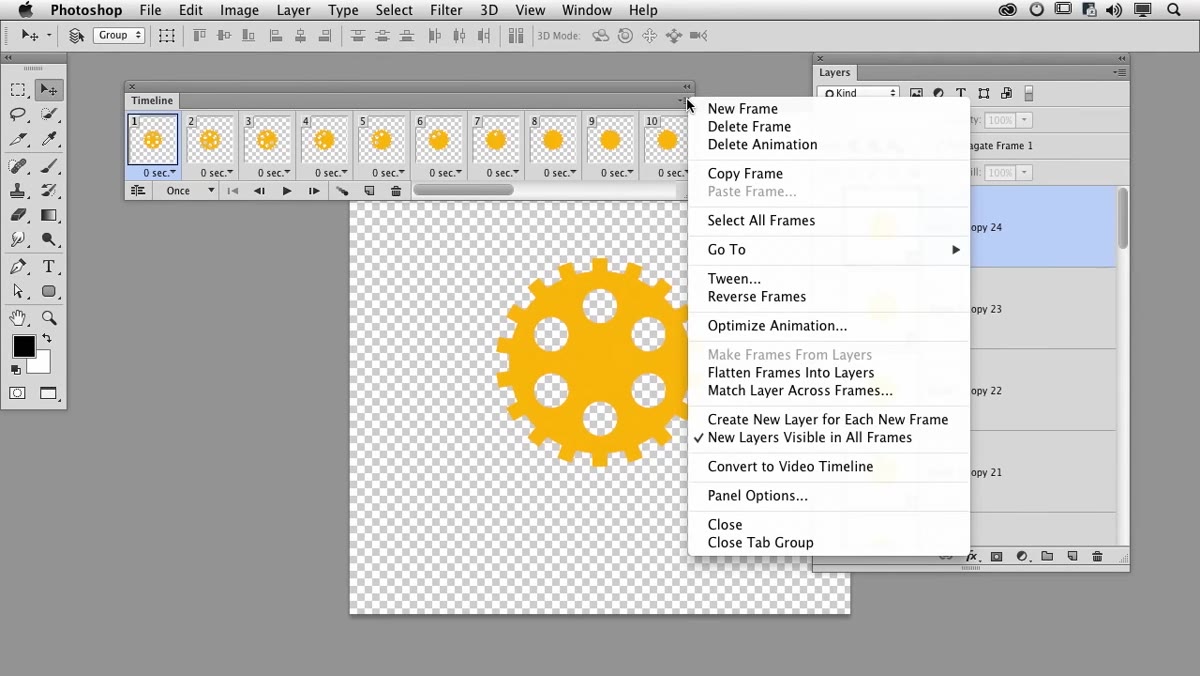 Timeline menu with Reverse Frames option highlighted
Back in the Timeline hamburger menu, look for “Reverse Frames.” Click it. Your frame sequence will flip so the stripped-back version comes first and the fully built composition comes last, which is exactly the order you want for a build-style animation.
Timeline menu with Reverse Frames option highlighted
Back in the Timeline hamburger menu, look for “Reverse Frames.” Click it. Your frame sequence will flip so the stripped-back version comes first and the fully built composition comes last, which is exactly the order you want for a build-style animation.
Scroll through the frames in the Timeline to confirm the order makes sense visually. Frame one should be your simplest state, and the last frame should be your most complete version. If anything looks off, you can also manually drag individual frames left or right in the Timeline to reorder them, though for anything more than a handful of frames that gets tedious fast.
Step 6: Set Your Frame Delay and Loop Options
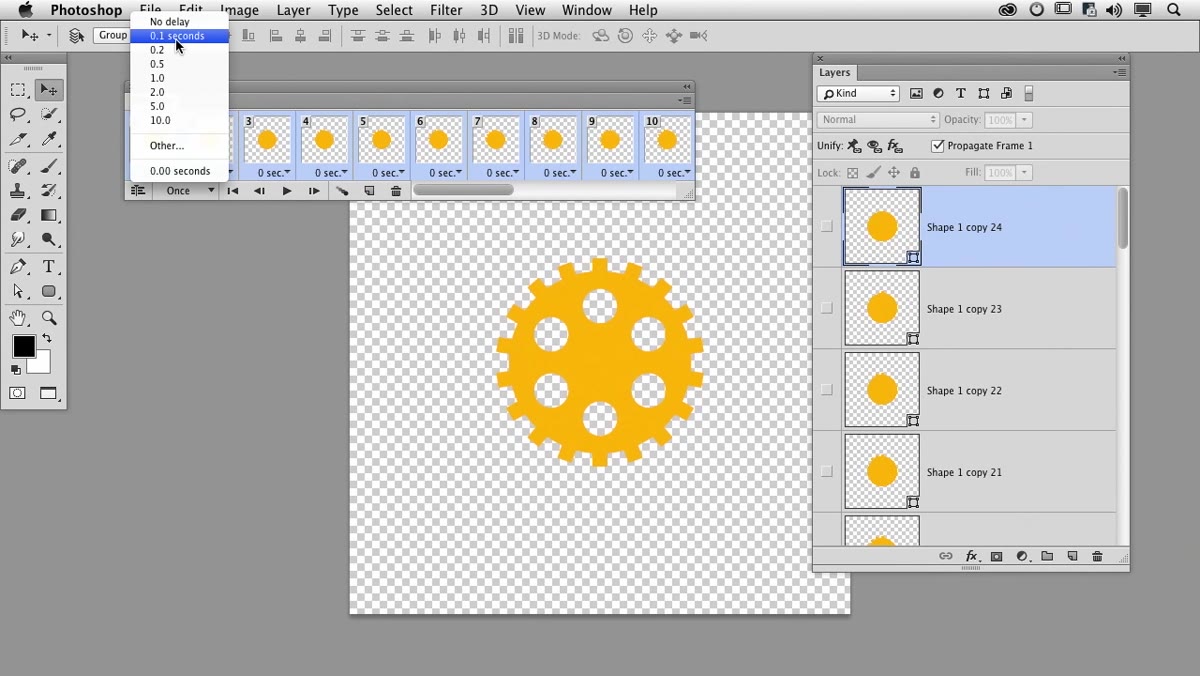 Frame delay dropdown showing timing options per frame
Select all your frames by clicking the first one, then shift-clicking the last. With all frames highlighted, click the timing dropdown beneath any frame (it usually shows “0 sec” by default) and choose a delay. The tutorial lands on around 0.2 seconds per frame as a comfortable pace, but the right number depends entirely on what you’re animating.
Frame delay dropdown showing timing options per frame
Select all your frames by clicking the first one, then shift-clicking the last. With all frames highlighted, click the timing dropdown beneath any frame (it usually shows “0 sec” by default) and choose a delay. The tutorial lands on around 0.2 seconds per frame as a comfortable pace, but the right number depends entirely on what you’re animating.
A few things worth knowing here. Slower delays, 0.5 seconds or more, work well for presentations or step-by-step reveals. Faster delays, 0.1 seconds or less, create the smooth motion feel of a traditional animation. Play with it. Also set your looping option at the bottom left of the Timeline. Your choices are Once, a specific number of times, or Forever. For most social and web GIFs, Forever is what clients want.
Step 7: Export Your GIF
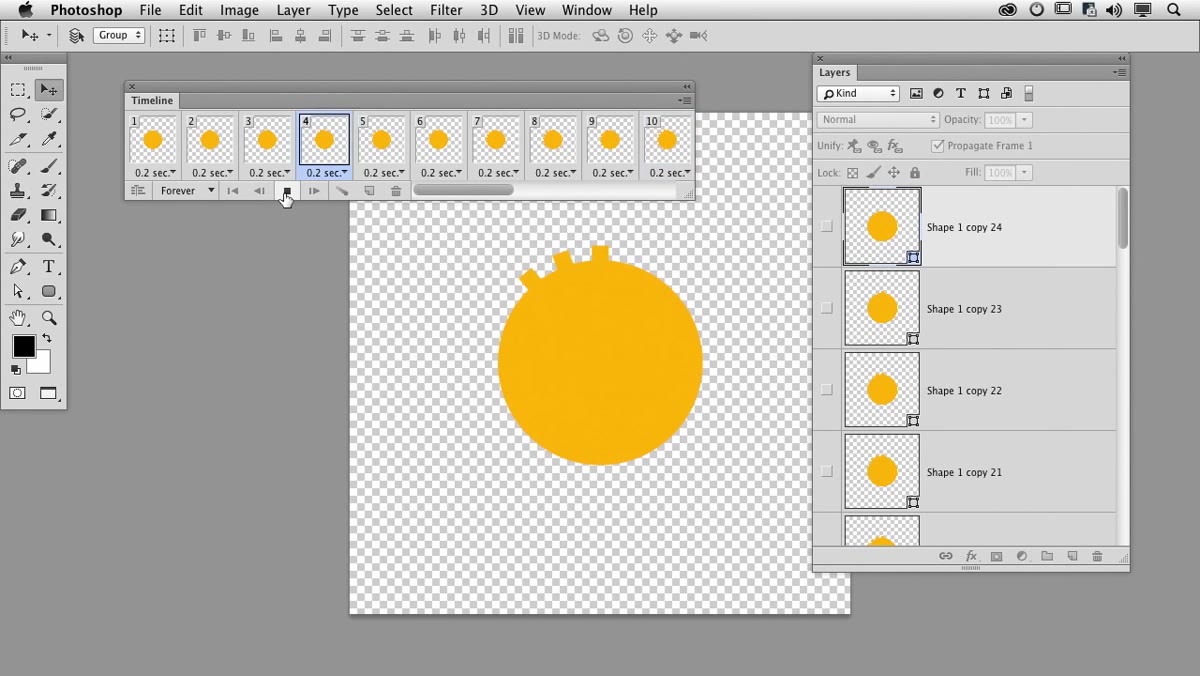 Photoshop with animation playing in timeline preview
Go to File, then Export, then Save for Web (Legacy). This dialog gives you full control over GIF settings including color palette size, dithering, and file size. For most web GIFs, 128 or 256 colors is plenty. Keep an eye on the file size preview in the bottom left corner of the dialog. Anything over 2-3MB will load slowly and most platforms have size caps anyway.
Photoshop with animation playing in timeline preview
Go to File, then Export, then Save for Web (Legacy). This dialog gives you full control over GIF settings including color palette size, dithering, and file size. For most web GIFs, 128 or 256 colors is plenty. Keep an eye on the file size preview in the bottom left corner of the dialog. Anything over 2-3MB will load slowly and most platforms have size caps anyway.
Hit Save, choose your destination, and you’ve got a working animated GIF built entirely inside Photoshop.
One Thing I’d Add: Use Smart Objects for Reusable Elements
The tutorial focuses on a single flat animation, which is perfect for learning the workflow. But if you’re making something more complex, like a logo animation you might need to tweak later, consider converting your key artwork layers into Smart Objects before you start duplicating them. That way, if the client comes back and wants the shape changed, you edit one Smart Object and it updates everywhere instead of hunting through 20 individual layers. I learned this lesson the hard way when I flattened a client project and had to rebuild it from scratch. Smart Objects would have saved me an afternoon.
The real takeaway from this tutorial is that frame-by-frame GIF animation in Photoshop isn’t complicated. It’s just layers, with a clever backwards workflow to make building easier, and the Timeline panel to string them together. If you’ve been avoiding GIF work because the Timeline looked intimidating, this is the video that makes it approachable.
Watch the full tutorial on YouTube to see the complete animation play out and catch any nuances I’ve summarized here.
Comments (1)
This is going in my reference folder. Incredibly useful.
Leave a Comment