
I’ll be honest with you. For way too long, I treated the Liquify tool like that one kitchen gadget you only pull out for a specific recipe once a year. I knew it existed. I’d used it in a panic to fix something weird in a portrait. Then I’d close the dialog and pretend it never happened. It wasn’t until I started digging into Aaron Nace’s work over at PHLEARN that I realized I was barely scratching the surface of what this thing can actually do. If you’re in the same boat, this breakdown is for you.
In this Aaron Nace (PHLEARN) tutorial, the workflow covers two things at once: getting a sophisticated color grade inspired by photographers like Annie Leibovitz, and then using Liquify to push the image further than most people think to take it. The combination is what makes this one worth your time. Watch the full tutorial on YouTube if you want to follow along directly, but everything below is written so you can work through it without pausing a video every 30 seconds.
The image Aaron works with is a simple fashion portrait, one subject, relatively clean background. That’s intentional. Starting with something uncluttered lets you focus on the technique instead of troubleshooting a messy comp. I’d recommend doing the same when you’re learning any new tool. Save the complicated stuff for when you know what you’re doing.
Step 1: Set Up Your Image as a Smart Object
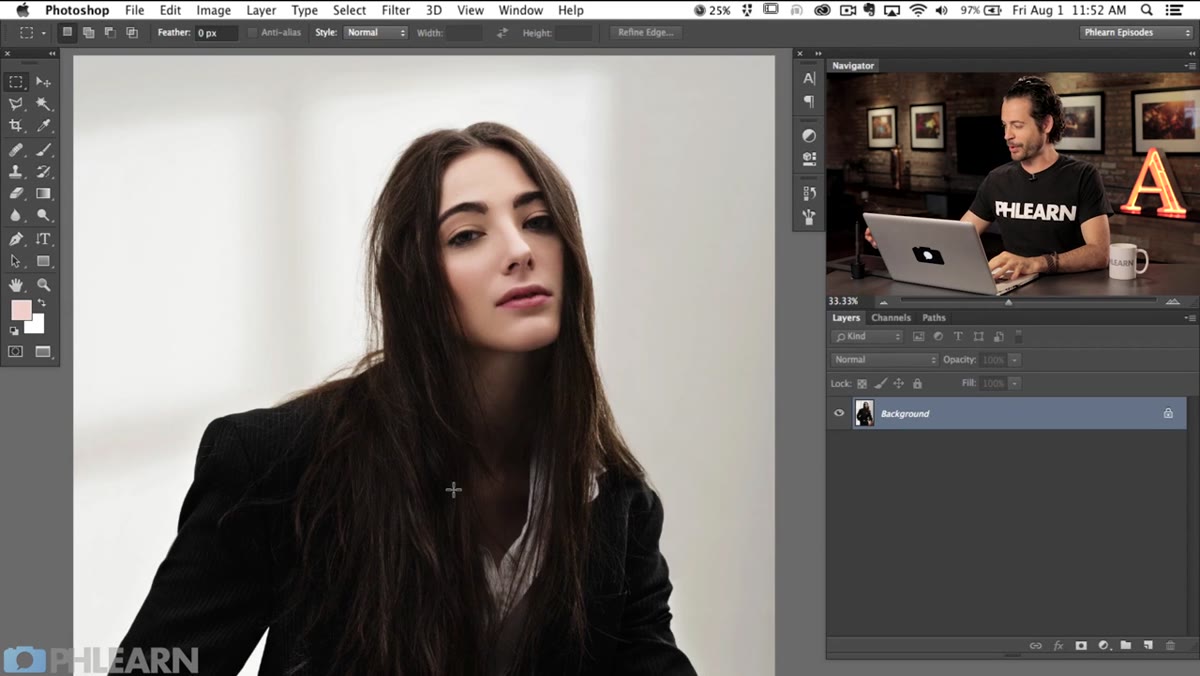 Fashion portrait open in Photoshop, Layers panel visible
Before you touch Liquify, convert your layer to a Smart Object. Right-click the layer in the Layers panel and choose “Convert to Smart Object.” This is the single most important habit you can build around Liquify. The tool is destructive by default, meaning every push and pull is baked into the pixels permanently if you’re working on a regular layer. With a Smart Object, Liquify gets applied as a Smart Filter, and you can go back and edit the mesh later without starting over. I learned this the hard way years ago on a client project where I couldn’t undo three sessions worth of reshaping. Don’t be me.
Fashion portrait open in Photoshop, Layers panel visible
Before you touch Liquify, convert your layer to a Smart Object. Right-click the layer in the Layers panel and choose “Convert to Smart Object.” This is the single most important habit you can build around Liquify. The tool is destructive by default, meaning every push and pull is baked into the pixels permanently if you’re working on a regular layer. With a Smart Object, Liquify gets applied as a Smart Filter, and you can go back and edit the mesh later without starting over. I learned this the hard way years ago on a client project where I couldn’t undo three sessions worth of reshaping. Don’t be me.
Step 2: Build the Color Grade First
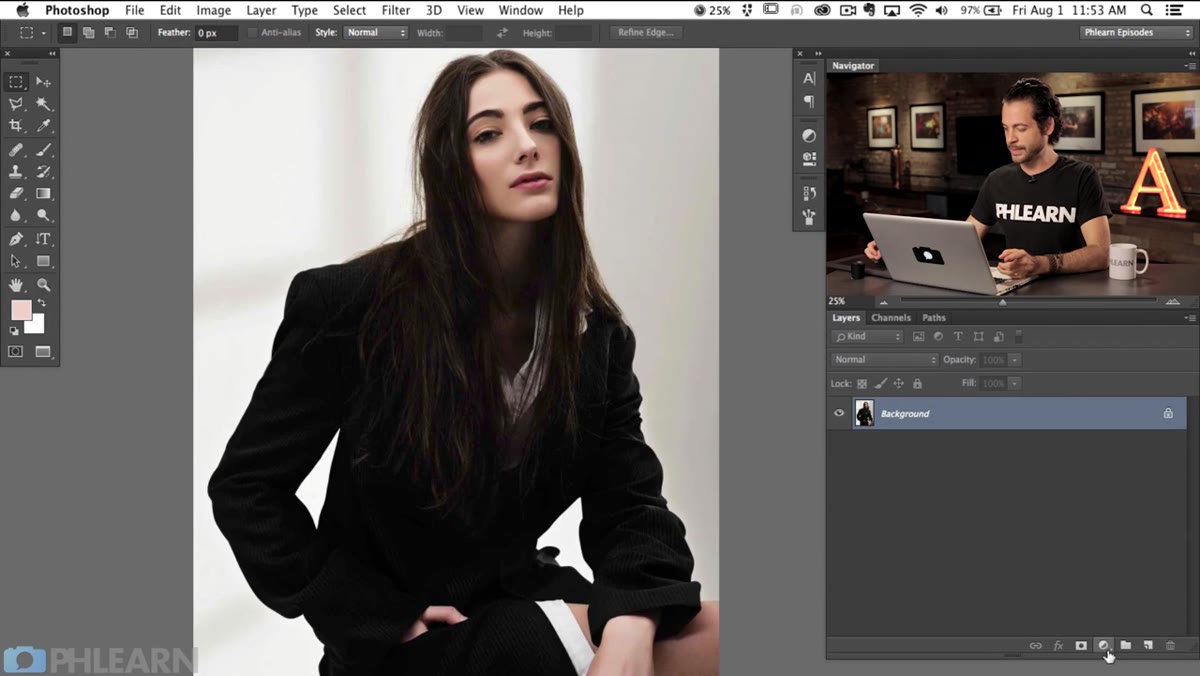 Adjustment layers being added above the portrait layer
Aaron tackles the color toning before opening Liquify, and that order matters more than it sounds. He’s going for a look associated with high-end portrait photography: shadows that lean slightly cool, highlights with warmth, and an overall tonal balance that feels intentional rather than accidental. The tools for this are Curves and Color Balance adjustment layers. In Curves, you can pull the shadow anchor point to introduce a slight blue or green cast in the dark tones. In Color Balance, work the Shadows and Highlights sliders separately rather than trying to do everything at once. The goal is separation between your tonal ranges, not a blanket color shift.
Adjustment layers being added above the portrait layer
Aaron tackles the color toning before opening Liquify, and that order matters more than it sounds. He’s going for a look associated with high-end portrait photography: shadows that lean slightly cool, highlights with warmth, and an overall tonal balance that feels intentional rather than accidental. The tools for this are Curves and Color Balance adjustment layers. In Curves, you can pull the shadow anchor point to introduce a slight blue or green cast in the dark tones. In Color Balance, work the Shadows and Highlights sliders separately rather than trying to do everything at once. The goal is separation between your tonal ranges, not a blanket color shift.
This kind of grading also connects to what’s happening in camera on a shoot like this. Gray seamless backdrops, wind machines, deliberate complementary color palettes in wardrobe, those are all choices that make post-processing easier because there’s real tonal structure to work with. If your source photo is a flat, colorless mess, no amount of Curves adjustment is going to save you.
Step 3: Open the Liquify Dialog
 Filter menu open with Liquify highlighted
With your color grade in place, go to Filter > Liquify. The keyboard shortcut Shift+Ctrl+X (Shift+Cmd+X on Mac) gets you there faster, which I strongly encourage you to memorize because you will be opening this dialog constantly once you start using it properly. The Liquify workspace is its own full-screen interface with its own toolbar on the left and a properties panel on the right. Take a second to get familiar with the layout before you start pushing pixels around. The two tools you’ll use most are the Forward Warp tool (W) and the Freeze Mask tool (F), and we’ll get to both shortly.
Filter menu open with Liquify highlighted
With your color grade in place, go to Filter > Liquify. The keyboard shortcut Shift+Ctrl+X (Shift+Cmd+X on Mac) gets you there faster, which I strongly encourage you to memorize because you will be opening this dialog constantly once you start using it properly. The Liquify workspace is its own full-screen interface with its own toolbar on the left and a properties panel on the right. Take a second to get familiar with the layout before you start pushing pixels around. The two tools you’ll use most are the Forward Warp tool (W) and the Freeze Mask tool (F), and we’ll get to both shortly.
Step 4: Use the Forward Warp Tool for Subtle Reshaping
 Liquify dialog open, Forward Warp tool selected in toolbar
The Forward Warp tool is the bread and butter of Liquify. It works like pushing wet paint with your finger. You click and drag, and the pixels move in the direction of your stroke. The two settings that control everything here are Brush Size and Brush Pressure. Keep pressure low, somewhere in the 20-40 range, especially for portrait work. High pressure makes changes that look like a funhouse mirror. Low pressure makes changes that look like better lighting or a slightly different camera angle.
Liquify dialog open, Forward Warp tool selected in toolbar
The Forward Warp tool is the bread and butter of Liquify. It works like pushing wet paint with your finger. You click and drag, and the pixels move in the direction of your stroke. The two settings that control everything here are Brush Size and Brush Pressure. Keep pressure low, somewhere in the 20-40 range, especially for portrait work. High pressure makes changes that look like a funhouse mirror. Low pressure makes changes that look like better lighting or a slightly different camera angle.
For portrait retouching, the most common applications are refining jaw lines, adjusting the position of hair, and making subtle changes to clothing silhouettes. The key word in all of that is subtle. If someone can tell you used Liquify, you’ve gone too far.
Step 5: Freeze Areas You Don’t Want to Move
 Freeze Mask tool being painted over facial features in Liquify
This is the step most people skip, and it’s why their Liquify results look broken. The Freeze Mask tool lets you paint a protected region over parts of the image you don’t want the warp tools to affect. Eyes, in particular, need to be frozen before you do anything near them. Even a small, unintended shift in an eye shape reads immediately as wrong to any human viewer, because we are wired to notice when eyes look off. Paint the freeze mask over the eyes and any other anchor points, like the edge of the nose or the corners of the mouth, before you start warping nearby areas.
Freeze Mask tool being painted over facial features in Liquify
This is the step most people skip, and it’s why their Liquify results look broken. The Freeze Mask tool lets you paint a protected region over parts of the image you don’t want the warp tools to affect. Eyes, in particular, need to be frozen before you do anything near them. Even a small, unintended shift in an eye shape reads immediately as wrong to any human viewer, because we are wired to notice when eyes look off. Paint the freeze mask over the eyes and any other anchor points, like the edge of the nose or the corners of the mouth, before you start warping nearby areas.
The mask shows up as a red overlay in the Liquify dialog. You can adjust its opacity in the View Options on the right side if you want to see the image underneath more clearly while you work.
Step 6: Check Your Work With the Mesh Overlay
 Show Mesh option enabled, distortion grid visible over portrait
In the View Options panel inside Liquify, there’s a “Show Mesh” checkbox. Turn it on. The mesh is a grid that visualizes exactly how far and in what direction you’ve displaced pixels. It’s incredibly useful for catching overcorrections you might not spot just by looking at the image, especially in areas of smooth skin or flat backgrounds where distortion can be subtle but still present. If the mesh lines look lumpy or are crossing over each other, that’s a sign you’ve pushed too hard in one area and need to use the Smooth tool or Reconstruct to back it off.
Show Mesh option enabled, distortion grid visible over portrait
In the View Options panel inside Liquify, there’s a “Show Mesh” checkbox. Turn it on. The mesh is a grid that visualizes exactly how far and in what direction you’ve displaced pixels. It’s incredibly useful for catching overcorrections you might not spot just by looking at the image, especially in areas of smooth skin or flat backgrounds where distortion can be subtle but still present. If the mesh lines look lumpy or are crossing over each other, that’s a sign you’ve pushed too hard in one area and need to use the Smooth tool or Reconstruct to back it off.
What I’d Add: Save the Mesh for Repeat Clients
If you’re doing retouching work for the same clients regularly, you can save the Liquify mesh as a preset and reload it on future images of the same subject. It won’t be a perfect match since lighting and pose change, but it gives you a starting point rather than rebuilding everything from zero every single session. The option is in the Liquify dialog under Load Mesh. It’s a small workflow habit that adds up fast when you’re billing hourly.
Liquify is one of those tools where the ceiling is genuinely high. Most people use it like a panic button and close it before they’ve gotten anywhere near what it’s capable of. After going through this tutorial properly, my approach to portrait retouching changed in a way that actually shows up in the work. That’s a pretty high bar for a single video to clear.
Watch the full tutorial on YouTube and follow along with Aaron’s walkthrough directly. He covers the color grading in more depth than I’ve gone into here, and seeing the before and after on the actual image is worth the watch time on its own.
Comments
Leave a Comment