Here is a scenario I have lived more times than I care to admit: I need to drop my watermark onto a finished photo, and I spend five minutes hunting through folders trying to find the right PSD file, then another two minutes opening it, copying the layers, switching back, pasting, and resizing. For something I do on nearly every client deliverable. That is embarrassing. It took me way too long to realize Photoshop had already solved this problem and I had been walking past the solution every single day without clicking on it.
The Libraries panel is one of those features that sounds like something you would skip in a tutorial because the name makes it sound like filing cabinet bureaucracy. It is not. In this Matt Kloskowski tutorial, Watch the full tutorial on YouTube, he walks through how Libraries actually function as a live, synced creative asset system that follows you across every device connected to your Adobe account. Watermarks, textures, brushes, color swatches – anything you use repeatedly – saved once and available everywhere, instantly.
I watched this one from a coffee shop on my laptop and immediately went home to clean out my messy “assets_FINAL_v3” folder situation. Here is the whole process broken down so you can do the same.
Step 1: Open the Libraries Panel
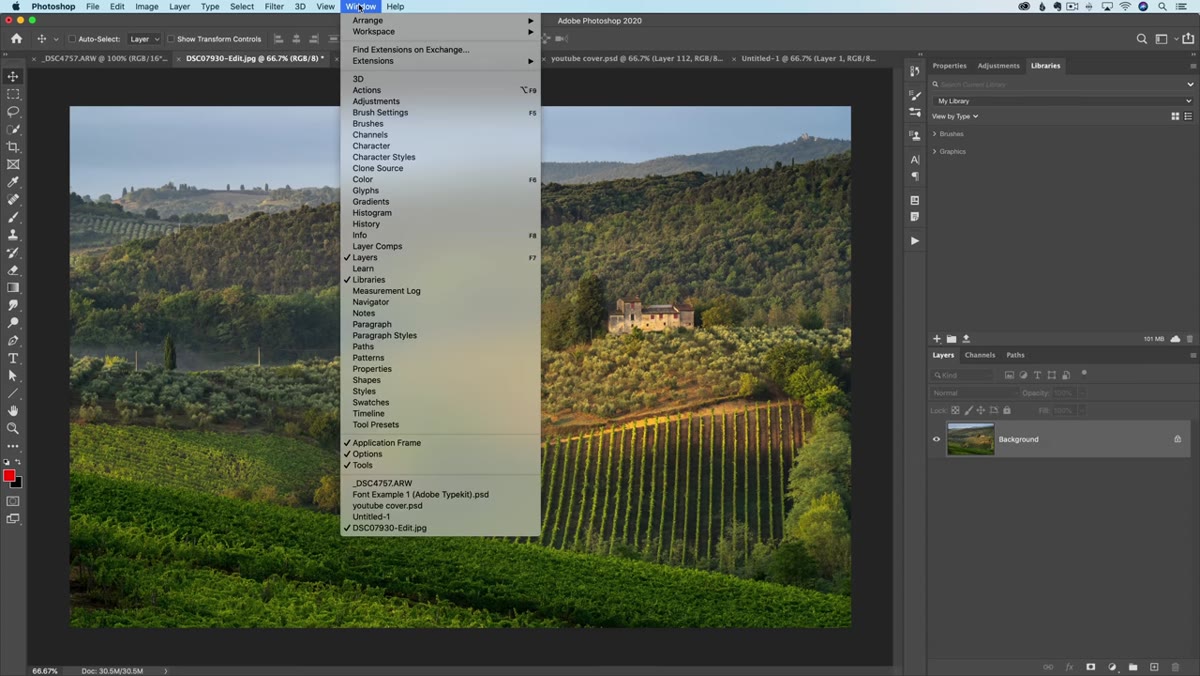 Libraries panel location in the Window menu
Go to the Window menu at the top of Photoshop and scroll down until you see Libraries. Click it and the panel opens on the right side of your workspace, docked alongside your other panels. If you have never touched this before, it will probably look empty or have some default Adobe Stock suggestions in it. That is fine. You are about to make it actually useful.
Libraries panel location in the Window menu
Go to the Window menu at the top of Photoshop and scroll down until you see Libraries. Click it and the panel opens on the right side of your workspace, docked alongside your other panels. If you have never touched this before, it will probably look empty or have some default Adobe Stock suggestions in it. That is fine. You are about to make it actually useful.
The panel is connected directly to your Adobe Creative Cloud account. Whatever you store here syncs automatically – no manual exporting, no Dropbox shuffling, no emailing yourself files. It just lives in the cloud and shows up wherever you log in.
Step 2: Create a Reusable Asset from Existing Layers
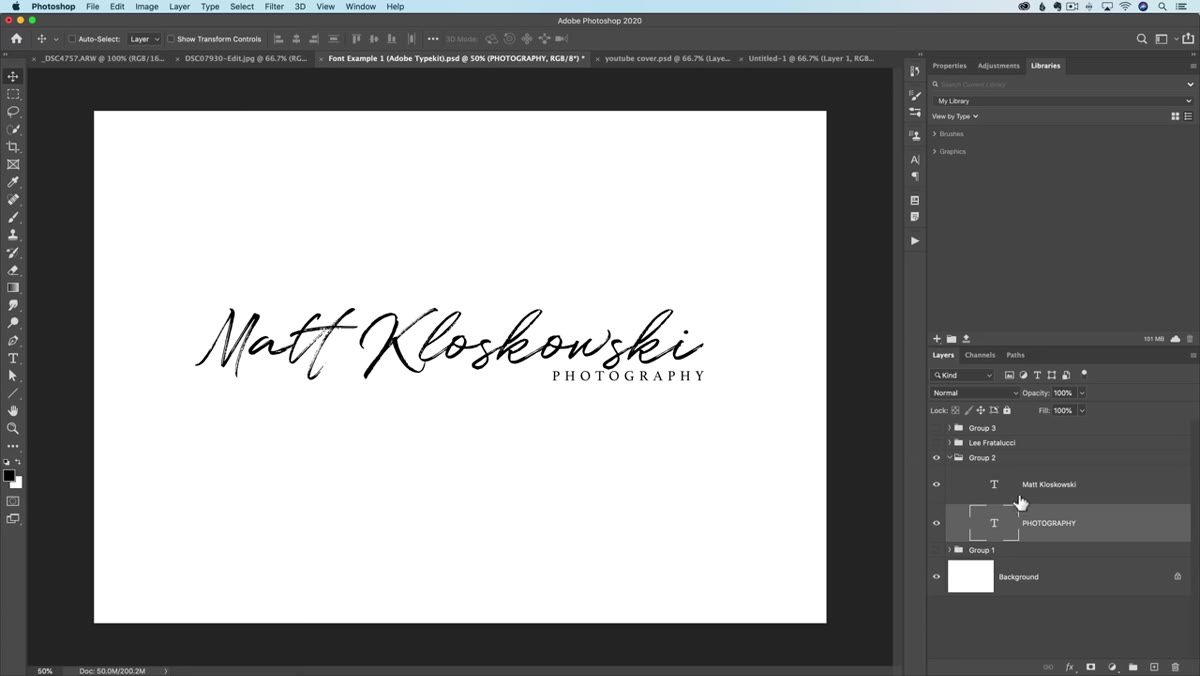 Dragging a layer group into the Libraries panel
This is where it gets good. Matt’s example is a watermark – a signature-style logo he built from a couple of text and shape layers, all sitting inside a single layer group. The move here is simple: grab the Move tool, click on that group in the Layers panel, and drag it directly into the Libraries panel. That is it. Photoshop packages the whole group as a single saved asset.
Dragging a layer group into the Libraries panel
This is where it gets good. Matt’s example is a watermark – a signature-style logo he built from a couple of text and shape layers, all sitting inside a single layer group. The move here is simple: grab the Move tool, click on that group in the Layers panel, and drag it directly into the Libraries panel. That is it. Photoshop packages the whole group as a single saved asset.
Once it lands in the panel, you can double-click the name to rename it something sensible. Call it what it actually is – “Watermark,” “Client Logo,” “Social Badge” – because future you will not remember what “Group 7 copy” means at 11pm on a deadline.
Step 3: Place a Library Asset into Any Open Document
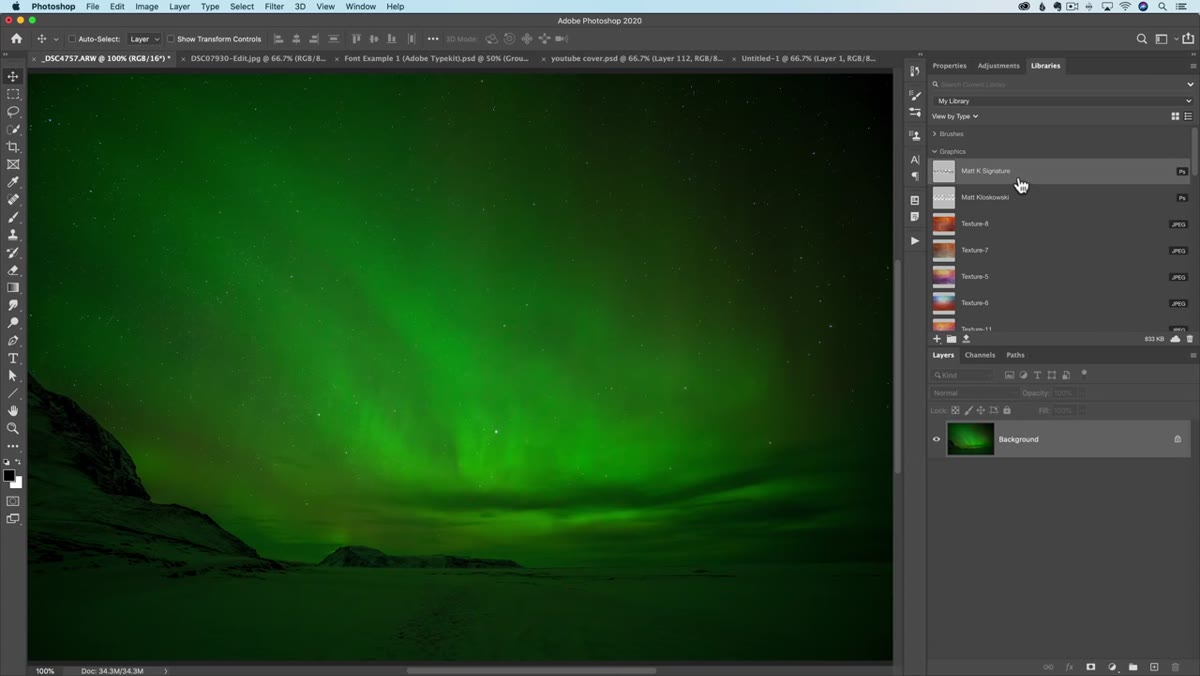 Dragging a library asset onto a photo canvas
When you need to use that asset again – on a different photo, in a different project, even on a different machine – you just open the Libraries panel, find the asset, and drag it out onto your canvas. Photoshop drops it in as a Smart Object, which means you can scale it up or down without destroying quality. Hit Enter or Return to confirm the placement.
Dragging a library asset onto a photo canvas
When you need to use that asset again – on a different photo, in a different project, even on a different machine – you just open the Libraries panel, find the asset, and drag it out onto your canvas. Photoshop drops it in as a Smart Object, which means you can scale it up or down without destroying quality. Hit Enter or Return to confirm the placement.
From there, treat it like any other layer. Use Free Transform to resize it, move it into position, and you are done. What used to take me five minutes of folder archaeology now takes about fifteen seconds.
Step 4: Adjust the Asset for Different Backgrounds
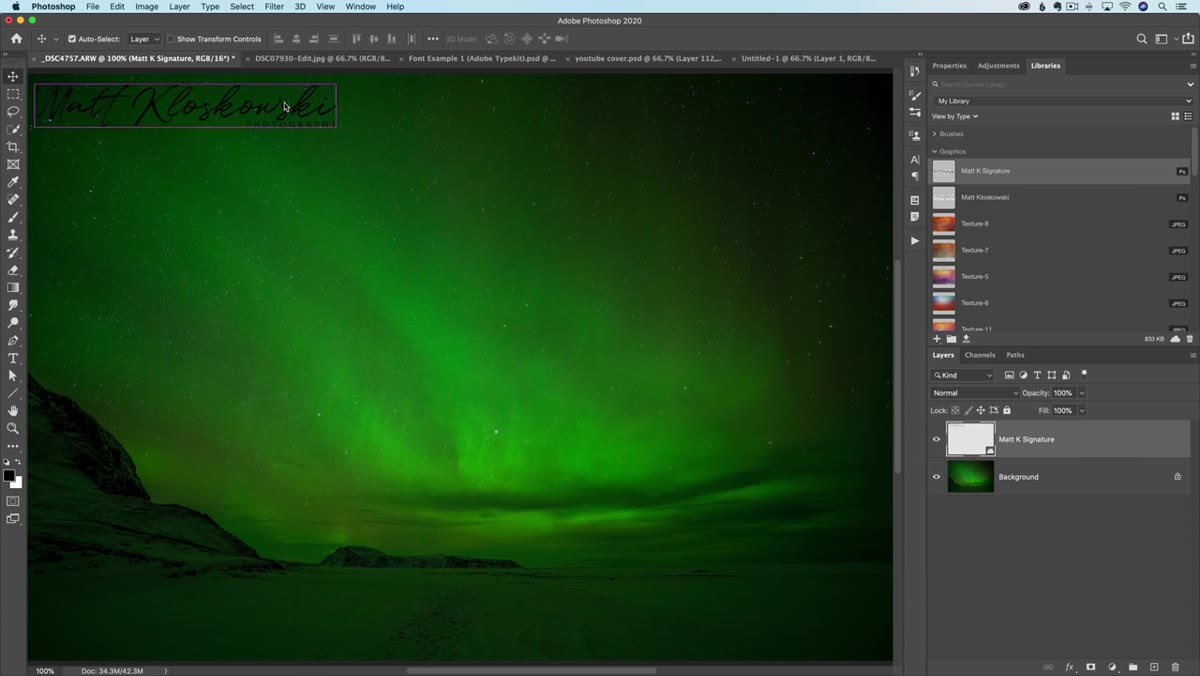 Using Invert command to switch watermark from black to white
Here is a small but genuinely useful trick Matt throws in. If your watermark or logo is black and you are dropping it onto a dark photo, it will disappear. Instead of going back to re-edit the original, just select the asset layer and hit Command+I (Mac) or Control+I (Windows). That is the Invert shortcut, and it flips black to white instantly. No need to dig into layer styles or hue adjustments for a simple color flip.
Using Invert command to switch watermark from black to white
Here is a small but genuinely useful trick Matt throws in. If your watermark or logo is black and you are dropping it onto a dark photo, it will disappear. Instead of going back to re-edit the original, just select the asset layer and hit Command+I (Mac) or Control+I (Windows). That is the Invert shortcut, and it flips black to white instantly. No need to dig into layer styles or hue adjustments for a simple color flip.
Tuck it into a corner using the Move tool and you are done. The original asset in your Library stays unchanged – you are only adjusting the instance on this particular canvas.
Step 5: Organize Your Library with Groups
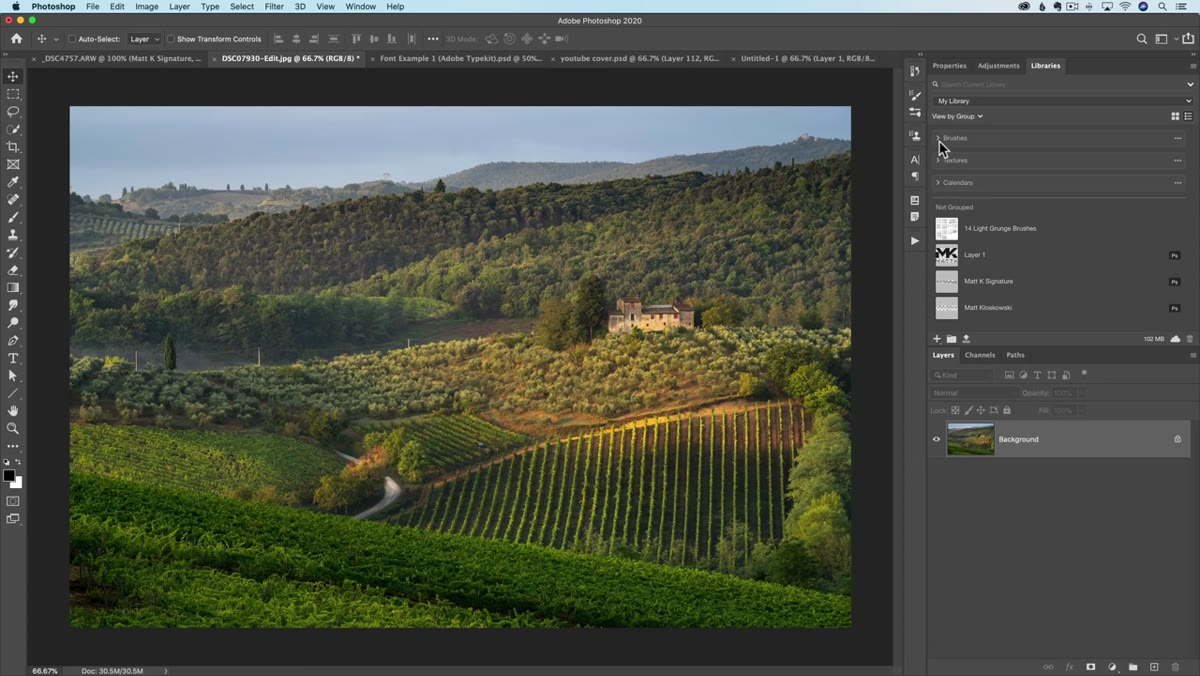 Library panel showing groups for brushes and textures
Once you start saving assets, the panel can get cluttered fast. Matt solves this by creating Groups inside the Library – think of them as folders. You can make a Group for brushes, one for textures, one for client logos, whatever makes sense for how you work. There is a small icon at the bottom of the Libraries panel to create a new Group.
Library panel showing groups for brushes and textures
Once you start saving assets, the panel can get cluttered fast. Matt solves this by creating Groups inside the Library – think of them as folders. You can make a Group for brushes, one for textures, one for client logos, whatever makes sense for how you work. There is a small icon at the bottom of the Libraries panel to create a new Group.
He mentions dragging in a set of high-quality texture files to have them ready to go. This is something I have now done myself and it genuinely changes how fast I work. Instead of browsing a textures folder and dragging files in from Finder or Explorer, I pull directly from the panel without ever leaving Photoshop.
Step 6: Understand the Storage Trade-Off
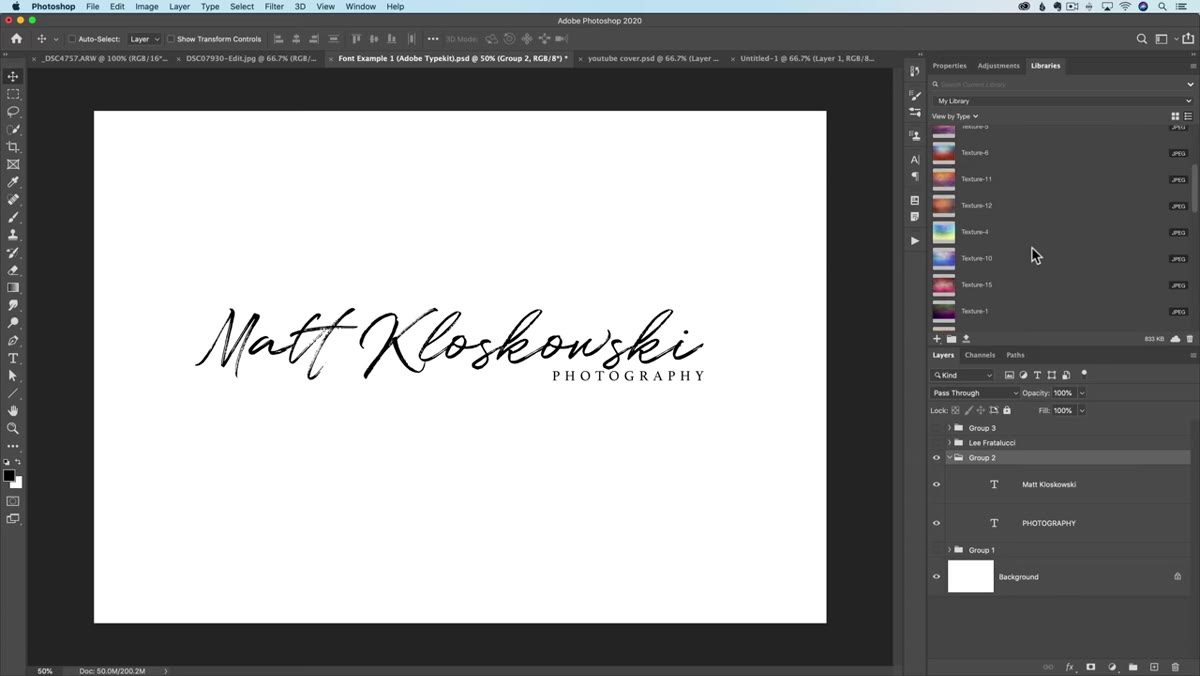 Cloud sync indicator and storage usage next to a library asset
Worth knowing before you go upload your entire asset collection: everything in your Libraries counts against your Adobe Creative Cloud storage limit. Matt points this out clearly, and it is an easy thing to overlook. The panel actually shows you a small indicator of how much space each asset is taking up, which is a nice touch.
Cloud sync indicator and storage usage next to a library asset
Worth knowing before you go upload your entire asset collection: everything in your Libraries counts against your Adobe Creative Cloud storage limit. Matt points this out clearly, and it is an easy thing to overlook. The panel actually shows you a small indicator of how much space each asset is taking up, which is a nice touch.
The practical takeaway is to be selective. Save the things you actually reuse repeatedly – not every texture you have ever downloaded. Curate it like you would a tool kit, not a hoarding situation.
The Thing I Would Add From My Own Workflow
The tutorial covers the core use case beautifully, but there is one extension I have found really valuable: saving color swatches to your Library. If you are doing work for a client with a specific brand palette, you can add those exact hex colors to the Library as color assets. Then any time you are working on anything for that client, the colors are sitting right there in the panel – no opening a style guide PDF, no hunting for the hex code in an old email. It keeps brand work consistent across sessions without any extra effort, and it works across Illustrator too if you are jumping between apps.
The single biggest thing Libraries does is remove the tax of context switching. Every time you leave Photoshop to go find a file, you lose momentum. Keeping your most-used assets one drag away means you stay in the work instead of managing files around the work. That is the actual value here, and it is bigger than it sounds.
Go watch Matt walk through the whole thing himself – he shows some additional details that are easier to follow visually than to read about: Watch the full tutorial on YouTube
Comments (1)
Quality content like this is rare. Keep it up.
Leave a Comment