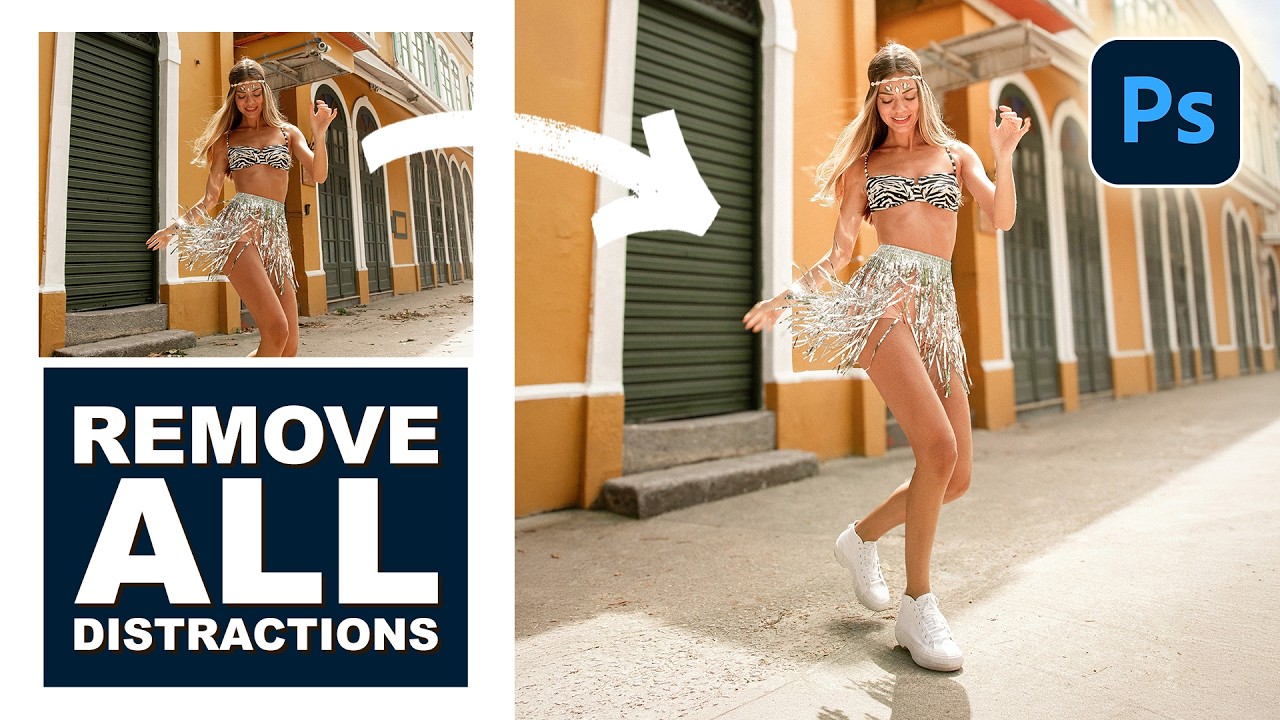
There’s a specific kind of frustration that comes from spending two hours cloning out power lines and random visual garbage from a photo, only to realize you missed three of them. I’ve been there more times than I’d like to admit. It’s the kind of tedious work that makes you question your life choices somewhere around the 45-minute mark at your corner coffee shop table. So when I watched PHLEARN’s tutorial on cleaning up, reframing, and polishing photos in Photoshop, I immediately stopped what I was doing and paid close attention. Watch the full tutorial on YouTube
The tutorial covers three genuinely useful techniques in one compact workflow: using Photoshop’s updated Remove Tool with automatic distraction detection, expanding a canvas with Generative Expand to fix awkward cropping, and dropping in a replacement sky. These aren’t isolated party tricks. They’re the kind of moves that come up constantly in real photo editing work, and the newer AI-assisted versions of these tools have gotten good enough that it’s worth updating your muscle memory.
What I appreciated most about this walkthrough is that it respects your time. No five-minute intro, no filler. Just a photo that needs work and a clear path through it. Here’s how the whole thing breaks down so you can follow along without needing to pause and rewind every 30 seconds.
Step 1: Grab the Remove Tool and Run Automatic Distraction Detection
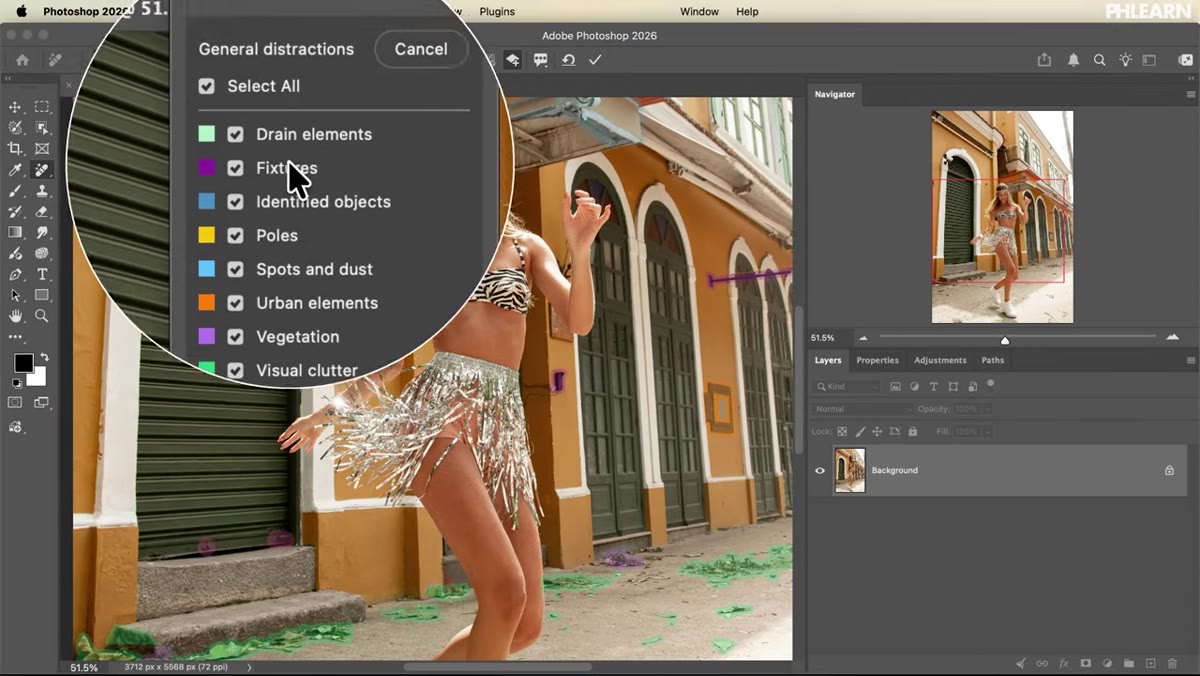 Remove Tool selected in Photoshop toolbar
Hit J to grab the Remove Tool. Once it’s active, look for the “Find Distractions” option in the tool options bar at the top of your screen. Click it, then select “General Distractions” from the dropdown and hit Find. Photoshop will scan the entire image and categorize visual clutter automatically, color-coding different types of distractions so you can see exactly what it’s flagging.
Remove Tool selected in Photoshop toolbar
Hit J to grab the Remove Tool. Once it’s active, look for the “Find Distractions” option in the tool options bar at the top of your screen. Click it, then select “General Distractions” from the dropdown and hit Find. Photoshop will scan the entire image and categorize visual clutter automatically, color-coding different types of distractions so you can see exactly what it’s flagging.
The color-coded overlay is genuinely useful here. Green highlights indicate general visual clutter. The tool won’t always catch everything, but that’s fine because you can manually paint over anything it missed using the same brush. If it flags something you actually want to keep, hold Alt (Windows) or Option (Mac) and paint over that area to remove it from the selection. It’s a clean system once you get a feel for the two-mode painting behavior.
Step 2: Apply the Distraction Removal with Generative AI
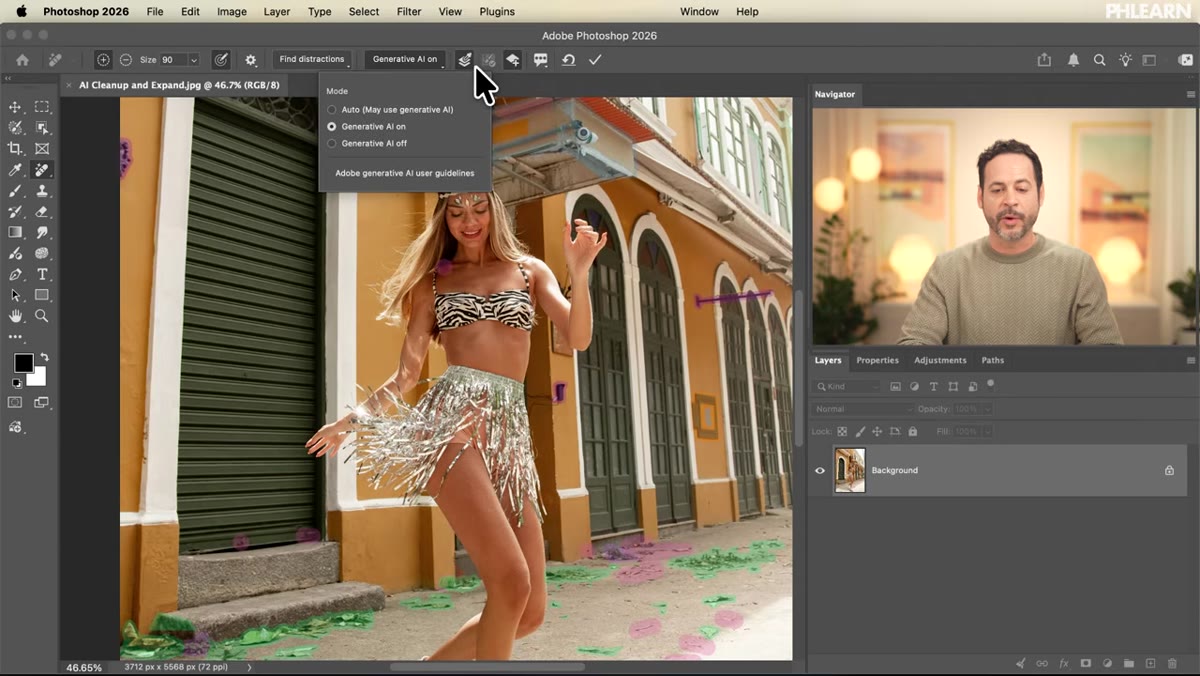 Find Distractions panel with generative AI option enabled
Before you confirm the removal, check three things in your settings: Generative AI should be toggled on, “Sample All Layers” should be active, and “Create New Layer with Remove Results” should be checked. That last one is important because it keeps your edit non-destructive and lets you compare before and after without flattening anything.
Find Distractions panel with generative AI option enabled
Before you confirm the removal, check three things in your settings: Generative AI should be toggled on, “Sample All Layers” should be active, and “Create New Layer with Remove Results” should be checked. That last one is important because it keeps your edit non-destructive and lets you compare before and after without flattening anything.
Once those are set, click the checkmark to apply. Photoshop processes the selections and generates fill for each distraction in one shot. The results land on a new layer, which means you can toggle visibility to see exactly what changed. The PHLEARN tutorial demonstrates this toggle and the difference is legitimately dramatic.
Step 3: Handle Wires and Cables Separately
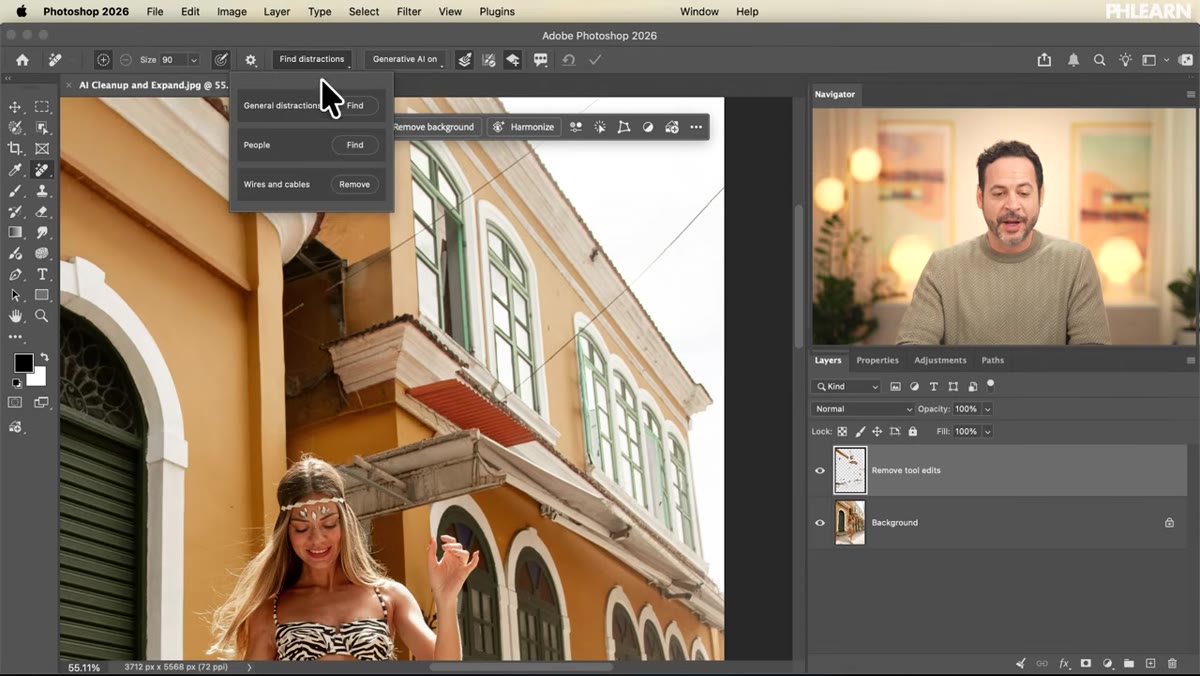 Find Distractions submenu showing wires and cables option
If the general distraction pass didn’t catch every wire or cable in the image (which is common), go back to Find Distractions and this time choose “Wires and Cables” from the submenu. Run it the same way: check the box to place results on a new layer, then apply. Photoshop treats wires as their own detection category, which is why they get their own dedicated pass rather than being lumped in with general clutter.
Find Distractions submenu showing wires and cables option
If the general distraction pass didn’t catch every wire or cable in the image (which is common), go back to Find Distractions and this time choose “Wires and Cables” from the submenu. Run it the same way: check the box to place results on a new layer, then apply. Photoshop treats wires as their own detection category, which is why they get their own dedicated pass rather than being lumped in with general clutter.
This two-pass approach is worth remembering as a habit. General distractions first, then wires. You end up with separate layers for each pass, which gives you precise control if something looks off and needs to be redone.
Step 4: Reframe the Composition with the Crop Tool and Generative Expand
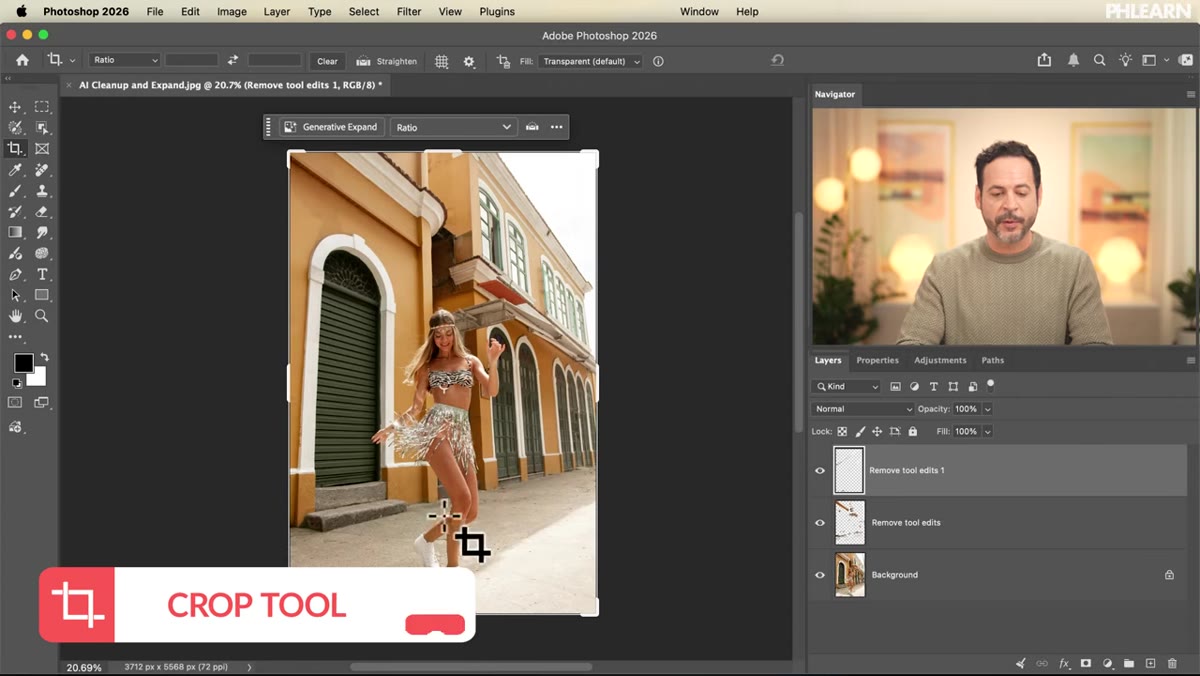 Crop tool extended below the image canvas boundary
Hit C for the Crop Tool. If your subject is sitting too close to the bottom or edge of the frame, drag the crop handle outward beyond the existing canvas boundary to create new space. The tutorial uses the rule of thirds as a guide here: position the subject near the intersection of the horizontal and vertical grid lines rather than crowding them against an edge. This reframing alone changes the whole feel of the image.
Crop tool extended below the image canvas boundary
Hit C for the Crop Tool. If your subject is sitting too close to the bottom or edge of the frame, drag the crop handle outward beyond the existing canvas boundary to create new space. The tutorial uses the rule of thirds as a guide here: position the subject near the intersection of the horizontal and vertical grid lines rather than crowding them against an edge. This reframing alone changes the whole feel of the image.
With the canvas extended, look for the “Generative Expand” option in the tool options bar and click Generate without typing any prompt. Photoshop fills the empty space by synthesizing pixels that match the existing image. You’ll get a few variations in the Properties panel to choose from. Pick the one that reads most naturally and move on.
Step 5: Flatten to a New Layer Using Apply Image
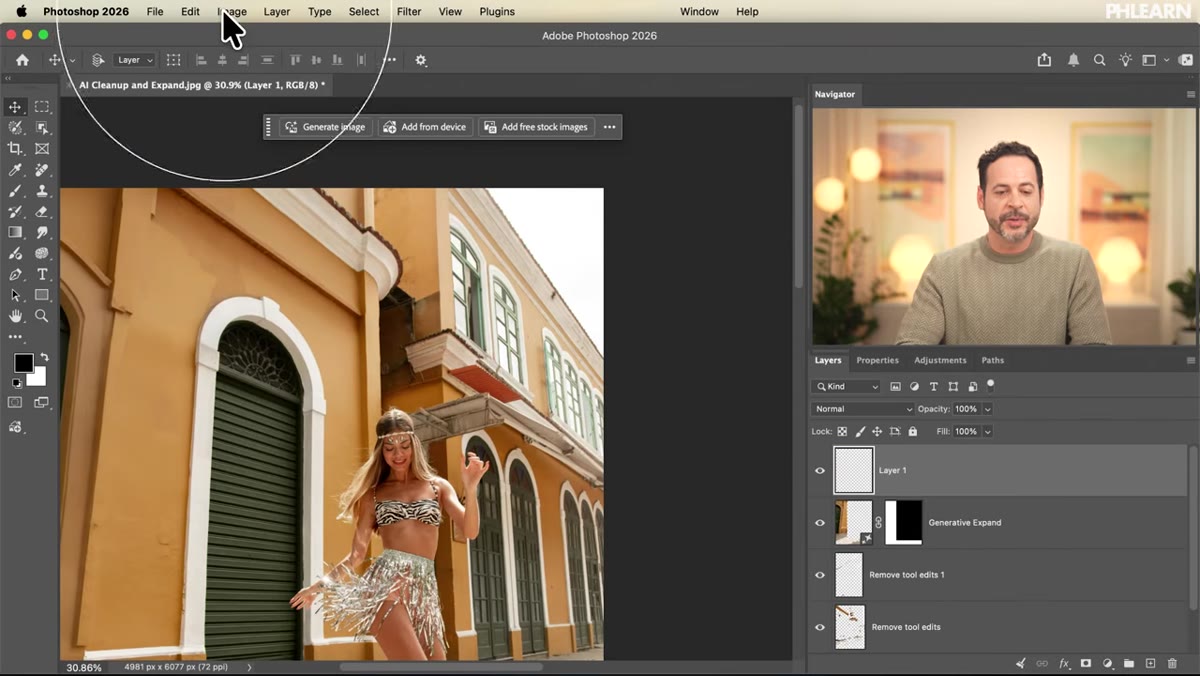 Image menu open with Apply Image option highlighted
Before bringing in a new sky, you need a clean, merged snapshot of the current state of the image to work from. Create a new blank layer at the top of your layer stack. Then go to Image > Apply Image. This command composites everything visible in your document onto that single layer without flattening your actual stack. It’s a fast way to get a merged pixel layer while keeping all your edits intact underneath.
Image menu open with Apply Image option highlighted
Before bringing in a new sky, you need a clean, merged snapshot of the current state of the image to work from. Create a new blank layer at the top of your layer stack. Then go to Image > Apply Image. This command composites everything visible in your document onto that single layer without flattening your actual stack. It’s a fast way to get a merged pixel layer while keeping all your edits intact underneath.
This is one of those Photoshop moves that feels like a trick but is actually just a core technique. It comes up constantly any time you need to select or mask based on the current visual state of a multi-layer document.
Step 6: Select the Sky and Drop in a Replacement
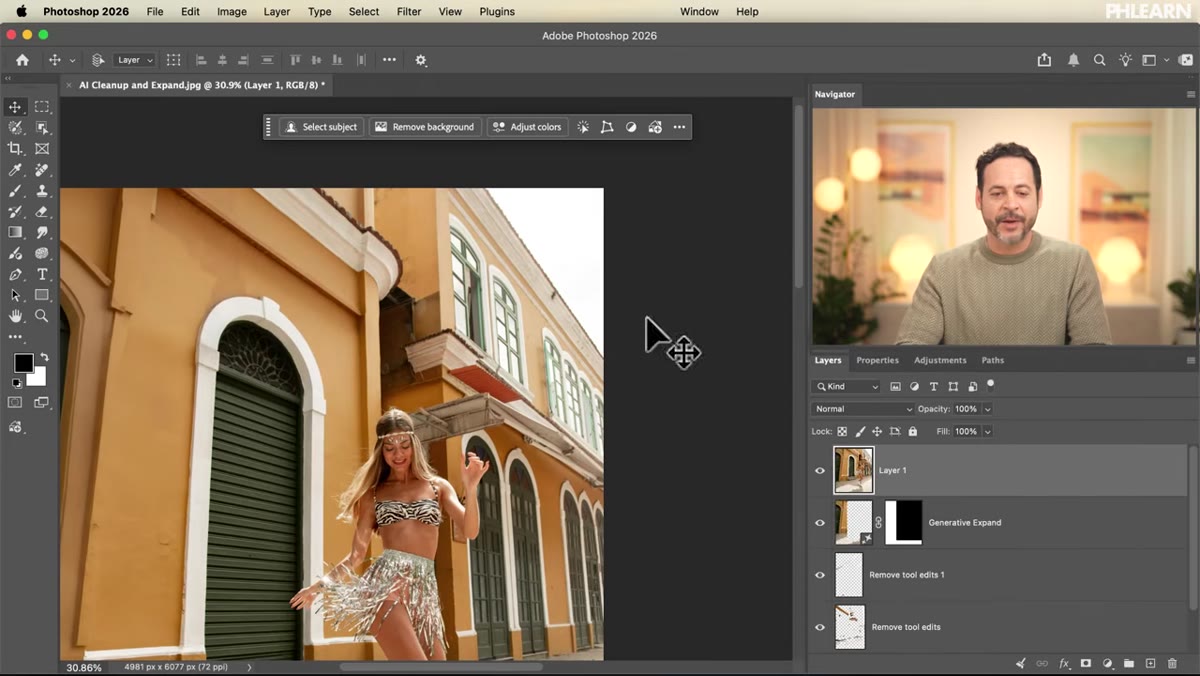 Select menu with Sky option highlighted
Click on your merged Apply Image layer, then go to Select > Sky. Photoshop analyzes the image and makes a selection around the sky automatically. With that selection active, drag your replacement sky image directly into the document. It will drop in on its own layer, and the selection you made will contain it to the right area.
Select menu with Sky option highlighted
Click on your merged Apply Image layer, then go to Select > Sky. Photoshop analyzes the image and makes a selection around the sky automatically. With that selection active, drag your replacement sky image directly into the document. It will drop in on its own layer, and the selection you made will contain it to the right area.
Position and scale the new sky so it fits naturally, paying attention to horizon lines and light direction. The goal is a result that reads as believable, not composited.
A Note on Leaning Too Hard on the Auto Detection
The automatic distraction detection is genuinely impressive, and I’ve started using it on almost every outdoor photo I clean up. But I’ll say this: it’s not a full replacement for knowing what you’re looking at. I’ve had it flag shadows and textures that were doing real compositional work in an image. The Alt/Option override brush matters. Take 30 seconds to review what Photoshop flagged before you commit the removal, especially on images where subtle environmental detail is part of the story.
Think of the auto detection as a very good first draft, not a final answer. The tool saves hours of manual work. The human review step keeps it from making decisions you didn’t actually want.
The single most important shift in this workflow is treating these AI tools as a first pass rather than a one-click finish. Run the automatic detection, review it, adjust it, then apply. That loop is fast and the results hold up. The old way of doing this work manually was slow enough that people skipped cleanup steps they knew would improve the image. That excuse is gone now.
Watch the full tutorial on YouTube to see the complete before-and-after and follow along with the free sample files linked in the video description.
Comments (9)
Solid advice. Especially the part about taking your time with it.
Simple but effective. Sometimes that's all you need.
I've been looking for exactly this kind of tutorial. Perfect timing.
Would love to see a follow-up going deeper into this topic.
Shared this with my photography group. Everyone loved it.
Well explained. I think my audience would really benefit from this — mind if I link to it?
Just used this on a wedding shoot edit. Client was thrilled.
Been doing this wrong for years apparently. Thanks for the wake-up call.
Tried this technique this morning. Game changer for real.
Leave a Comment