
There’s a version of me from a few years back who would have created a reflection by duplicating a layer, flipping it, and calling it done. And honestly? That works fine — right up until the client asks you to change the text, the logo, or literally anything about the original element. Then you’re redoing the whole thing by hand, cursing quietly into your cold brew. I’ve been there more times than I want to admit, and it’s exactly the kind of inefficiency that makes freelance work feel harder than it needs to be.
That’s what makes this technique from Aaron Nace’s PHLEARN tutorial worth your time. Instead of a static duplicate, Aaron builds the reflection using a linked Smart Object, which means any change you make to the source file automatically ripples (pun very much intended) through the whole composition. Add a Smart Filter on top for a water ripple effect and you’ve got something that looks polished and stays editable. It’s the kind of workflow that makes you feel like you’ve been doing things the hard way for years. Because you probably have been.
Here’s the full breakdown so you can follow along without pausing and rewinding every thirty seconds.
Step 1: Set Up Your Base Image and Add Text
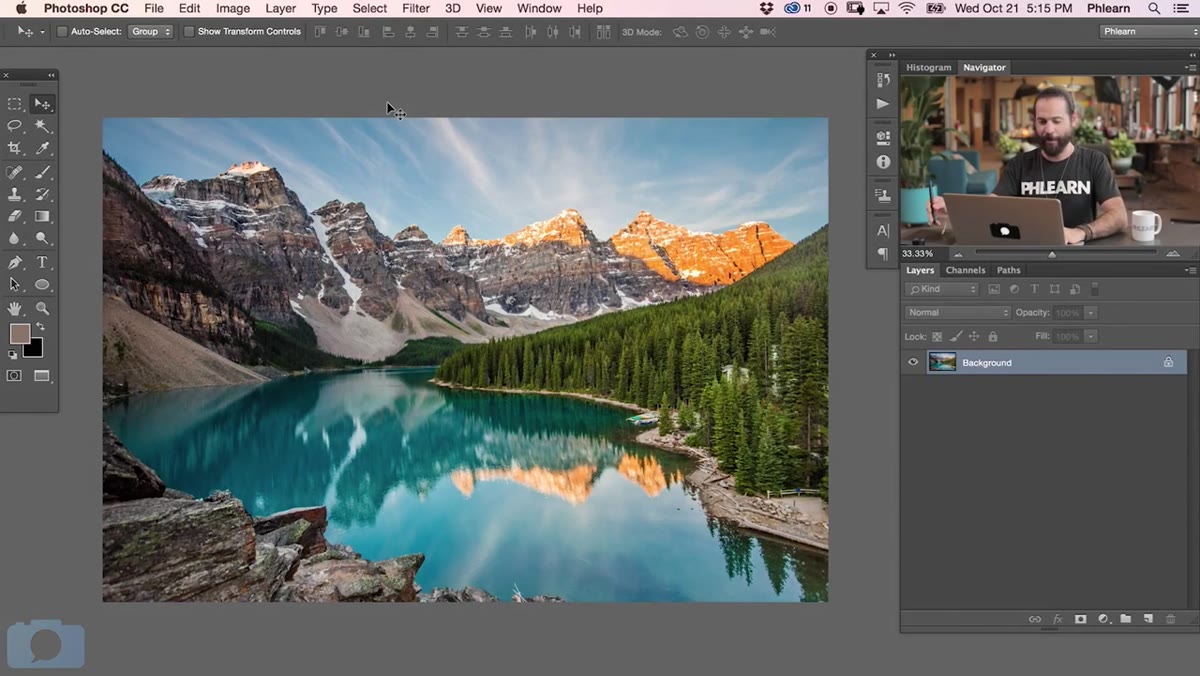 Landscape lake photo open in Photoshop with type tool selected
Start with an image that has a natural “reflection zone” - something with water or a surface that could plausibly hold a mirror image. Aaron uses a lake landscape, which gives the bottom half of the frame somewhere for the reflection to live. Grab the Type tool (T), pick a bold display font - Aaron uses “Woodcut Regular” from DaFont.com - set the color to white, and place your text over the top portion of the image. Think of it like designing a postcard. The text needs to be readable and positioned so its reflection will fall naturally over the water area below.
Step 2: Duplicate the Text Layer to a New Document
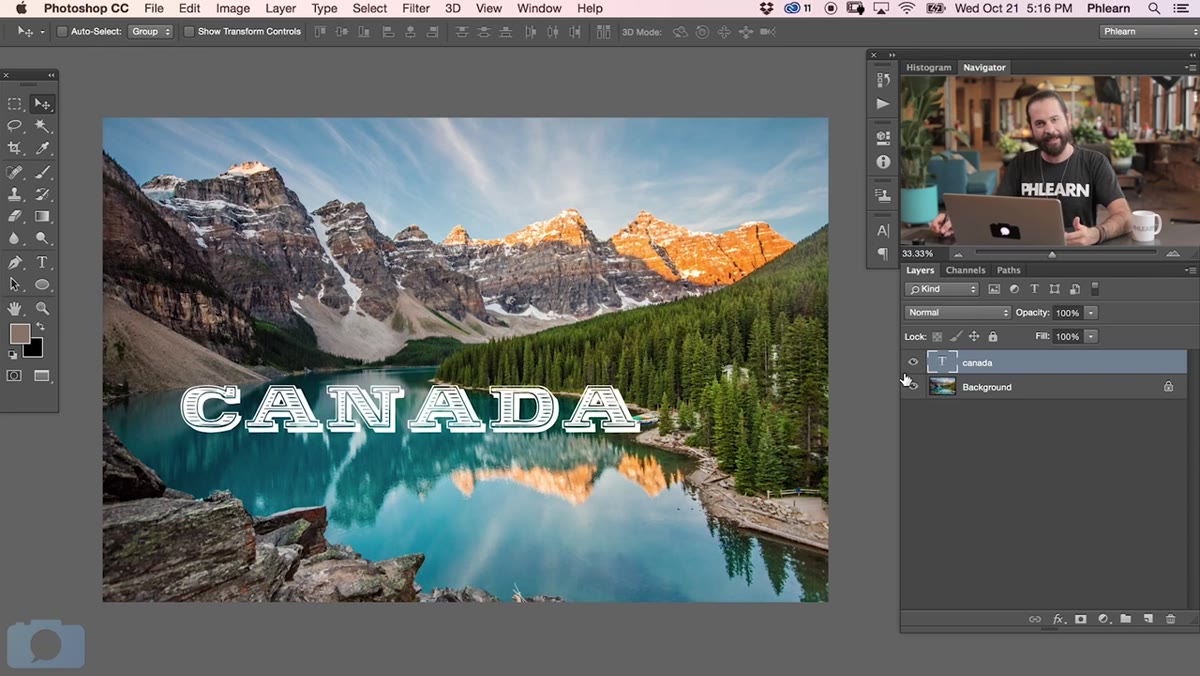 Right-click menu on text layer showing Duplicate Layer option
Here’s where most people would just duplicate the layer and flip it. Don’t. Right-click on your text layer in the Layers panel and choose “Duplicate Layer.” In the dialogue that appears, change the Destination document from your current file to “New.” Give the new document a clear name - something like “smart-obj” - so you can find it easily. Hit OK and Photoshop will open the text layer in a brand new, separate document. This is the foundation of the whole technique. That separate document is about to become your Smart Object source file.
Step 3: Crop and Save the New Document as a PSD
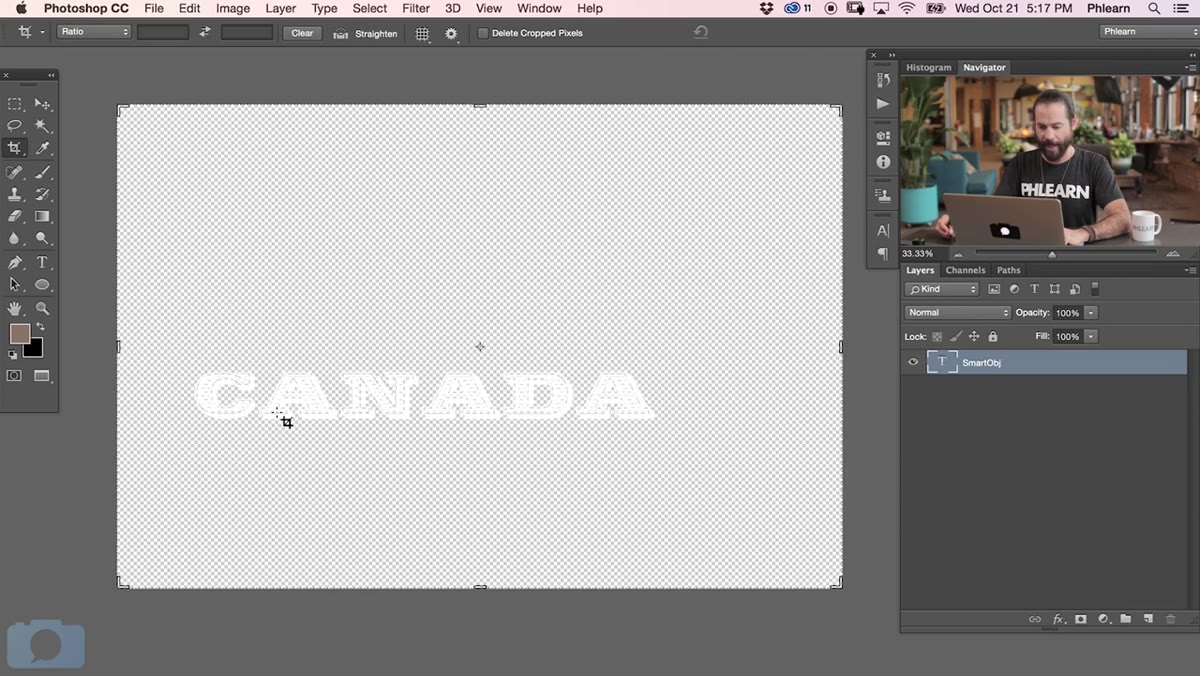 Cropping the duplicated text layer document down to fit the content
With your new document open, grab the Crop tool (C) and trim it down so there’s no excessive empty canvas around your text. You don’t need a lot of breathing room here - just enough that the text isn’t clipped. Then go to File > Save and save it as a PSD. This step is non-negotiable. The whole linked Smart Object system depends on this file existing as a saved document on your drive. If you skip saving and try to place it, nothing will work and you’ll spend ten minutes wondering why.
Step 4: Place the Smart Object into Your Main Document Using Place Linked
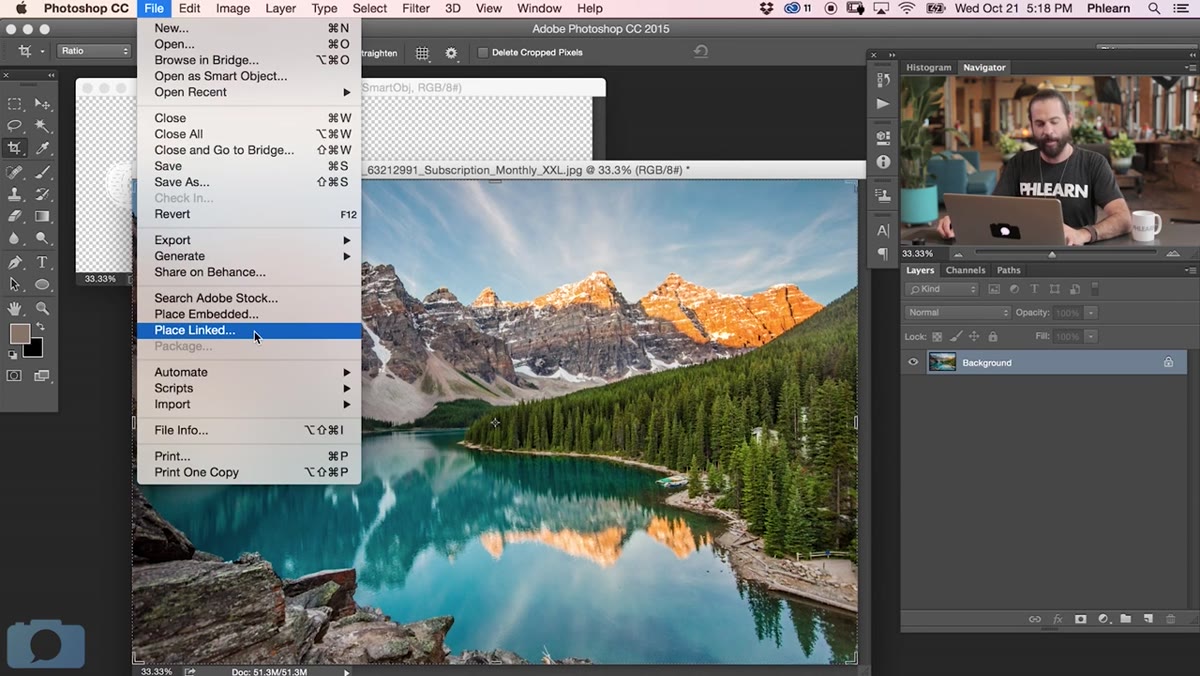 File menu open with Place Linked option highlighted
Go back to your main composition and delete the original text layer - you won’t need it anymore because you’re about to replace it with something smarter. Go to File > Place Linked and navigate to the PSD you just saved. Select it and hit Place. Photoshop will drop it into your document as a linked Smart Object, indicated by a small chain link icon on the layer thumbnail. The key difference between “Place Linked” and “Place Embedded” is that linked files stay connected to their source. Update the source PSD, and the Smart Object in your composition updates automatically. No manual redoing, no hunting through layers.
Step 5: Place a Second Copy for the Reflection
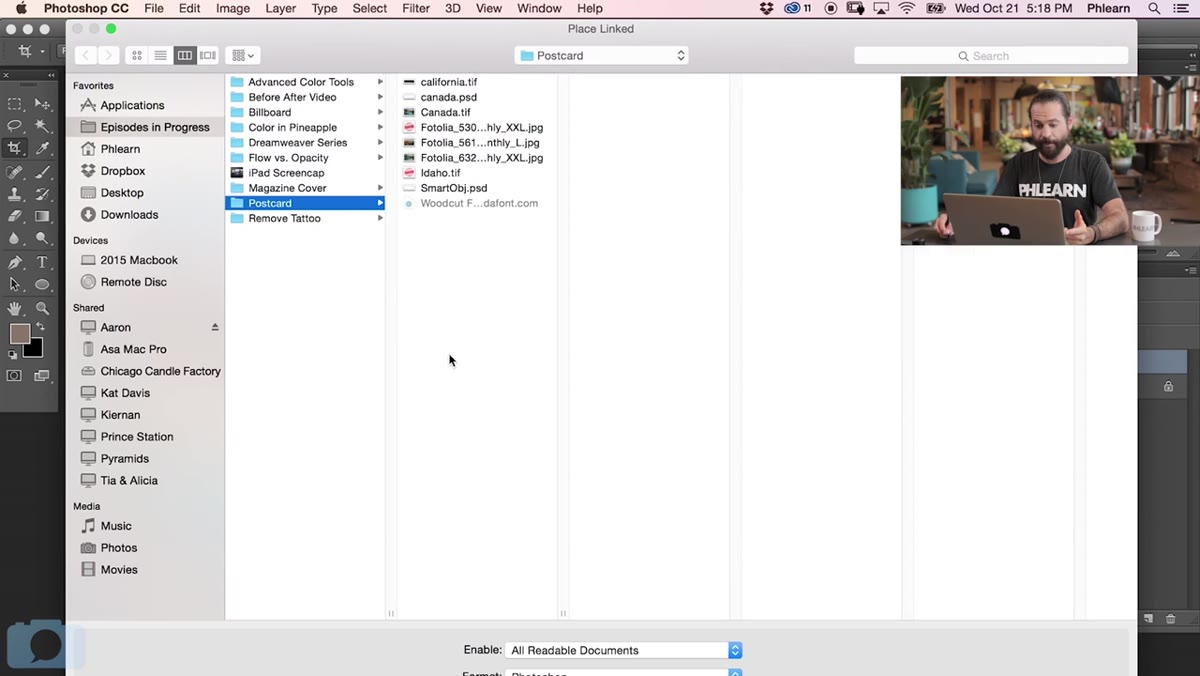 Second instance of the Smart Object being placed into the document
Go to File > Place Linked again and select the same source PSD. Photoshop will place a second instance of the Smart Object into your composition. This is your reflection layer. Having two separate instances linked to the same source means if you ever update the source file, both the original and the reflection update together, automatically, without you touching anything. That’s the whole payoff of doing this the Smart Object way rather than the quick-and-dirty duplicate method.
Step 6: Flip the Reflection Layer Vertically
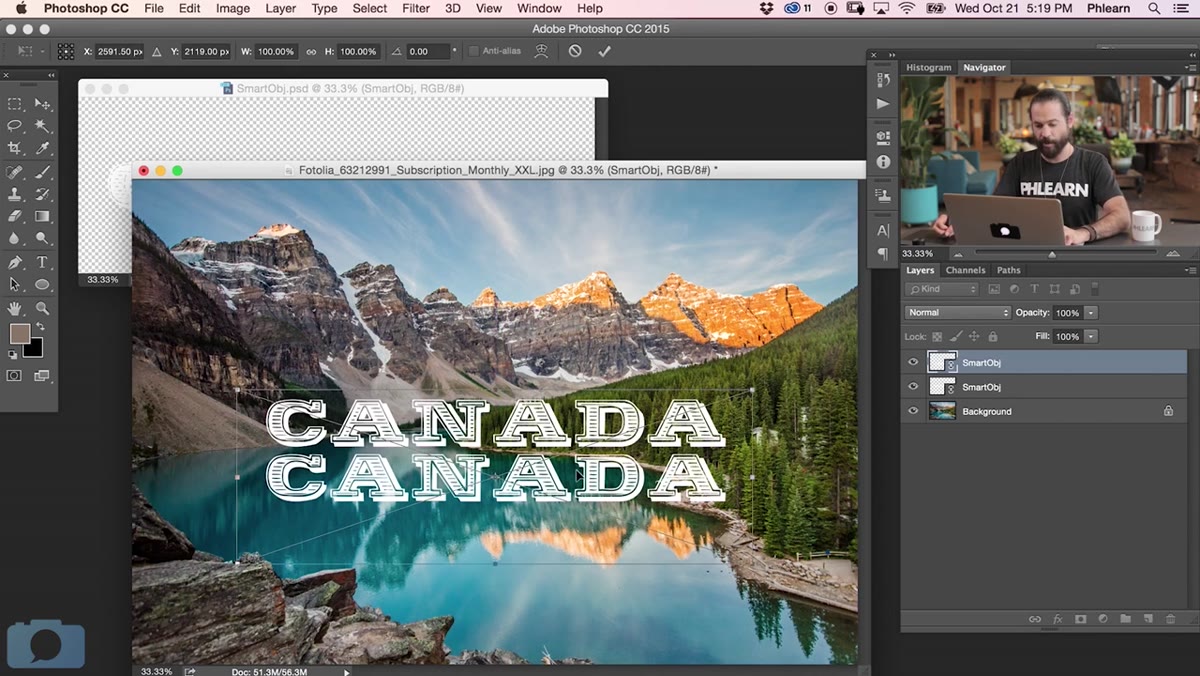 Transform menu open with Flip Vertical option highlighted
With the reflection layer selected, hit Ctrl/Cmd+T to bring up Free Transform. Right-click inside the transform box and choose “Flip Vertical.” This flips the layer upside down to create the mirror image. Then use the Move tool to position both layers so the original sits above the waterline and the flipped version sits below it, lined up so the two meet naturally at the horizon. Take your time with the positioning - this alignment is what sells the illusion. If the two don’t meet cleanly, the whole thing looks off no matter how good your ripple effect is.
Step 7: Add a Smart Filter for the Water Ripple Effect
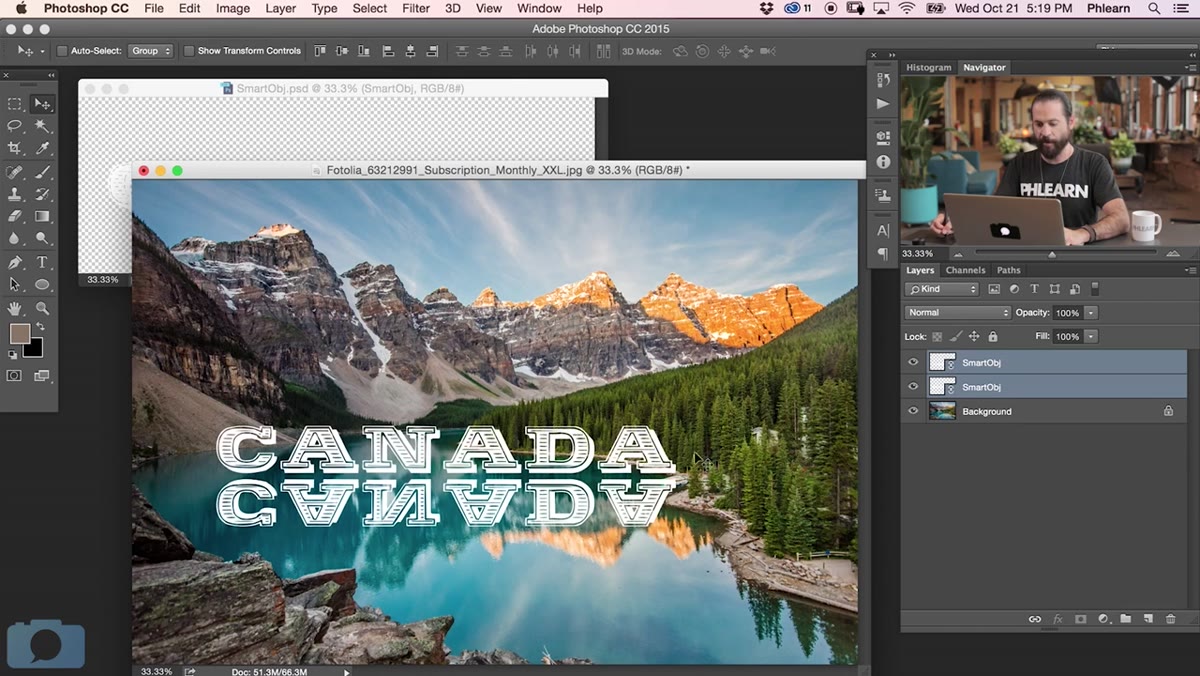 Reflected Smart Object layer positioned below the original in the canvas
To make the reflection look like it’s actually sitting on water rather than just floating there, you need to add some distortion. With the reflection Smart Object layer selected, go to Filter > Distort > Ripple (or ZigZag for a more pronounced wave effect). Because Smart Objects support Smart Filters, this effect stays non-destructive and fully editable. Adjust the amount and size until it reads as natural water movement rather than aggressive digital noise. Less is usually more here - subtle rippling is more convincing than something that looks like a lava lamp.
One Thing I’d Add: Use This for Logos, Not Just Text
The tutorial focuses on a type treatment, but the linked Smart Object approach is genuinely more useful for logo placement in composites. I’ve had clients send updated logo files mid-project more times than I can count. If your logo is embedded as a regular layer, that’s a manual swap every single time. If it’s placed as a linked Smart Object, you replace the source file once and the whole document updates. Set this up as a habit on any composite where the client’s branding is involved and you’ll save yourself a lot of unnecessary back-and-forth.
The single biggest thing to take away from this technique isn’t the reflection itself - it’s the habit of thinking in linked files rather than static layers. Smart Objects with Place Linked turn your Photoshop documents into something closer to a live system than a flattened painting. It costs you maybe two extra minutes of setup and pays you back every time something needs to change.
Watch the full walkthrough from Aaron Nace here: Watch the full tutorial on YouTube
Comments
Leave a Comment