
There’s a specific kind of defeat that comes from spending forty-five minutes with the Pen tool trying to cut out a fuzzy sweater, only to end up with edges that look like they were drawn by someone using a mouse for the first time. I’ve been there. More than once. The problem isn’t skill, it’s using the wrong tool for the wrong edge, and it took me longer than I’d like to admit to accept that.
That’s why this tutorial from Aaron Nace over at PHLEARN hit differently. In it, he breaks down a hybrid approach to cutouts that combines Photoshop’s automatic selection tools with smart, targeted manual cleanup. The result is faster than going fully manual and more accurate than trusting automation blindly. Watch the full tutorial on YouTube if you want to follow along with his actual footage, but here’s the full walkthrough so you can put it straight to work.
The subject in the tutorial is a person wearing a chunky, fuzzy sweater – the kind of edge that makes Pen tool evangelists quietly reconsider their life choices. Aaron uses it specifically because it exposes the limits of pure manual selection and makes the case for leaning into automation first, then refining only where it breaks down.
Step 1: Start With Select Subject
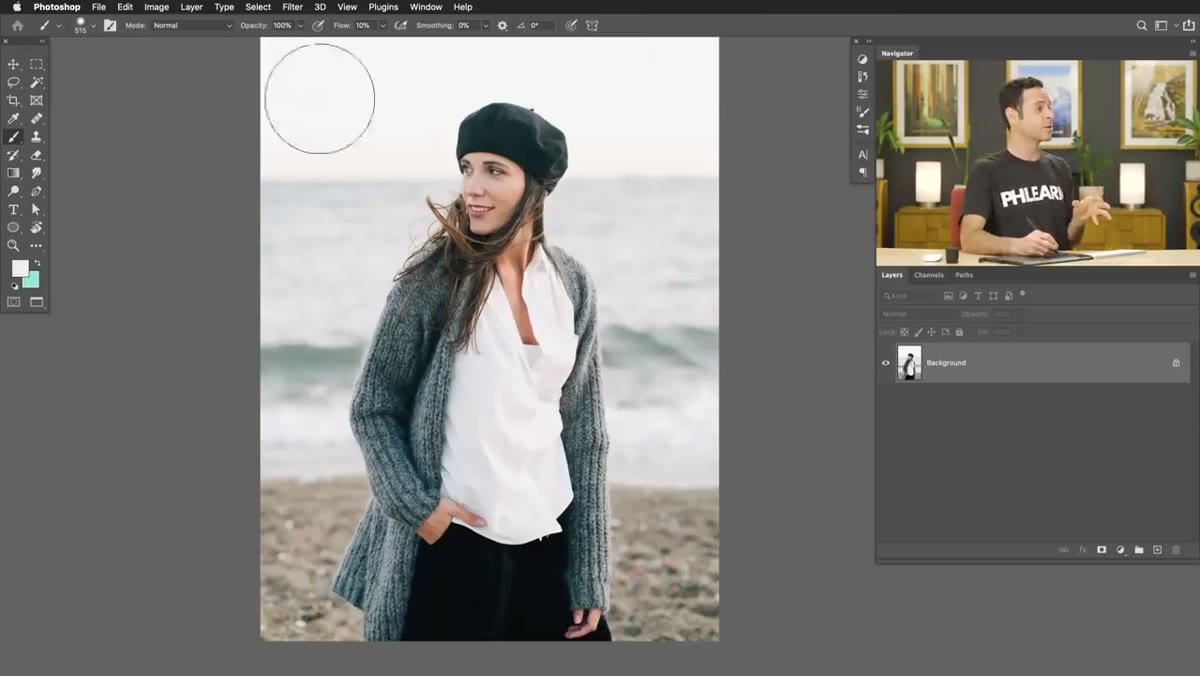 Select Subject option highlighted under the Select menu
Go to Select > Select Subject. That’s it for step one. This is Photoshop’s AI-powered selection tool and it has genuinely gotten good. It analyzes the entire image, identifies the dominant subject, and builds a selection around them, including an attempt at complex edges like hair. It’s not magic but it’s a shockingly solid starting point that would have taken you five to fifteen minutes to approximate manually with a Quick Selection brush.
Select Subject option highlighted under the Select menu
Go to Select > Select Subject. That’s it for step one. This is Photoshop’s AI-powered selection tool and it has genuinely gotten good. It analyzes the entire image, identifies the dominant subject, and builds a selection around them, including an attempt at complex edges like hair. It’s not magic but it’s a shockingly solid starting point that would have taken you five to fifteen minutes to approximate manually with a Quick Selection brush.
Don’t skip this step just because you don’t trust automation. The point isn’t to let it do everything. The point is to let it do the dumb work so you can focus your energy on the two or three spots it actually gets wrong.
Step 2: Apply a Layer Mask
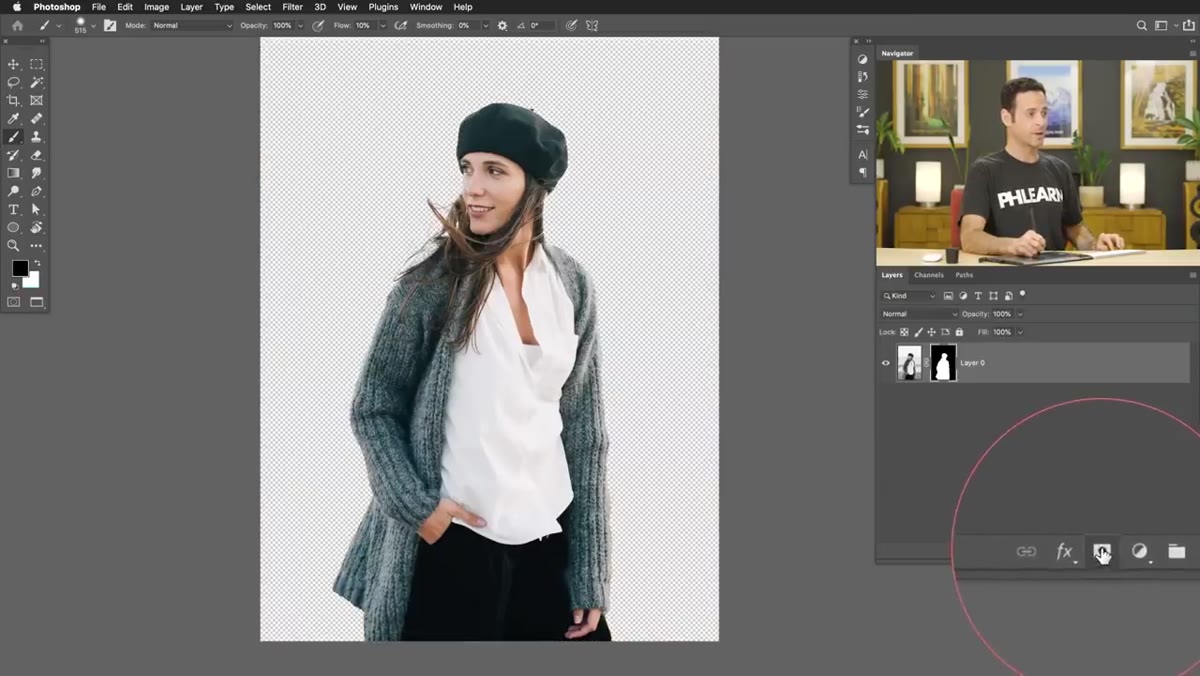 Layer mask applied from the automatic selection
With your selection active, click the Add Layer Mask icon at the bottom of the Layers panel (the rectangle with a circle inside it). Photoshop converts the selection into a mask and hides the background. Your subject is now floating on a transparent layer, and from here you can evaluate what actually needs fixing.
Layer mask applied from the automatic selection
With your selection active, click the Add Layer Mask icon at the bottom of the Layers panel (the rectangle with a circle inside it). Photoshop converts the selection into a mask and hides the background. Your subject is now floating on a transparent layer, and from here you can evaluate what actually needs fixing.
Before you do anything else, create a solid color fill layer below your subject layer and fill it with white or a neutral gray. This makes edge problems visible immediately. Fringing, haloing, gaps, jagged edges – they all show up clearly against a flat background in a way they simply don’t against the original busy background.
Step 3: Audit the Mask Properly
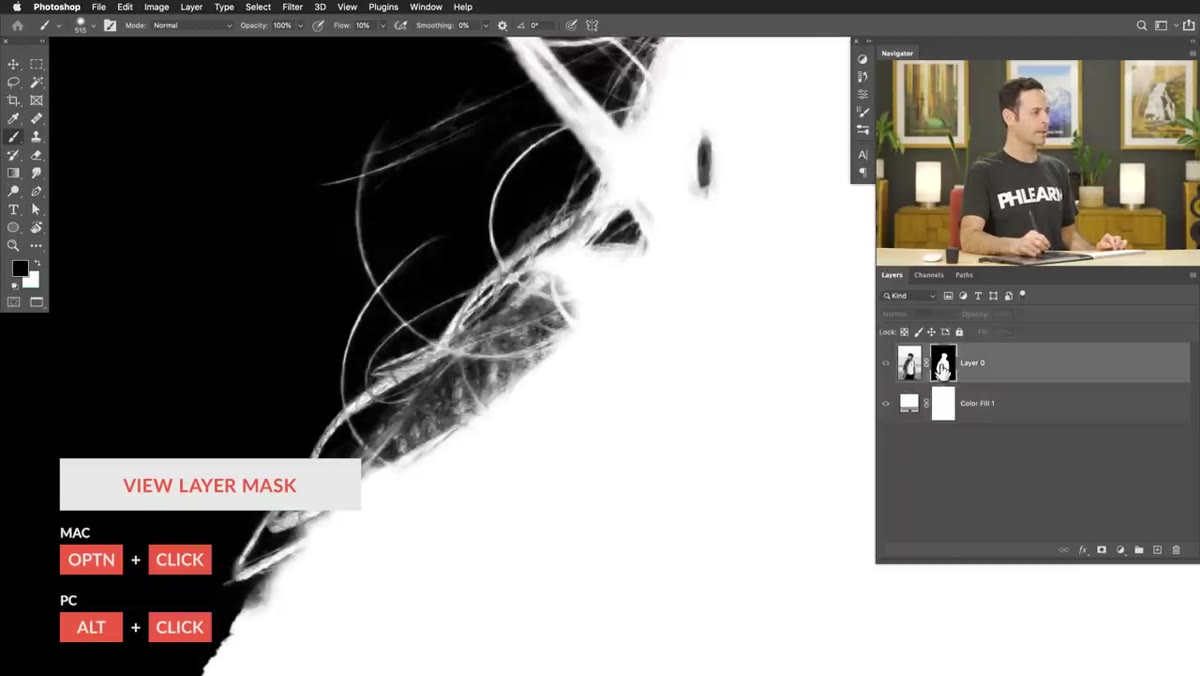 Layer mask viewed in isolation by Alt/Option-clicking
Hold Alt (Windows) or Option (Mac) and click directly on the layer mask thumbnail in the Layers panel. This puts you inside the mask itself, showing it as a black-and-white image where white is visible and black is hidden. This is where you’ll see the real picture. Look for gray areas that should be solid white (parts of the subject that are being semi-hidden), and black areas that should be white (gaps and holes in the selection).
Layer mask viewed in isolation by Alt/Option-clicking
Hold Alt (Windows) or Option (Mac) and click directly on the layer mask thumbnail in the Layers panel. This puts you inside the mask itself, showing it as a black-and-white image where white is visible and black is hidden. This is where you’ll see the real picture. Look for gray areas that should be solid white (parts of the subject that are being semi-hidden), and black areas that should be white (gaps and holes in the selection).
Then hold Shift and click the mask thumbnail to temporarily disable it, which overlays a red tint on your image and shows you exactly where the mask is cutting. Toggle between these two views to get a complete read on what needs work. In Aaron’s example, the sweater has transparency holes punched through it where it shouldn’t, and parts of the hair near the edges didn’t get picked up cleanly.
Step 4: Understand What’s Actually Hard to Fix
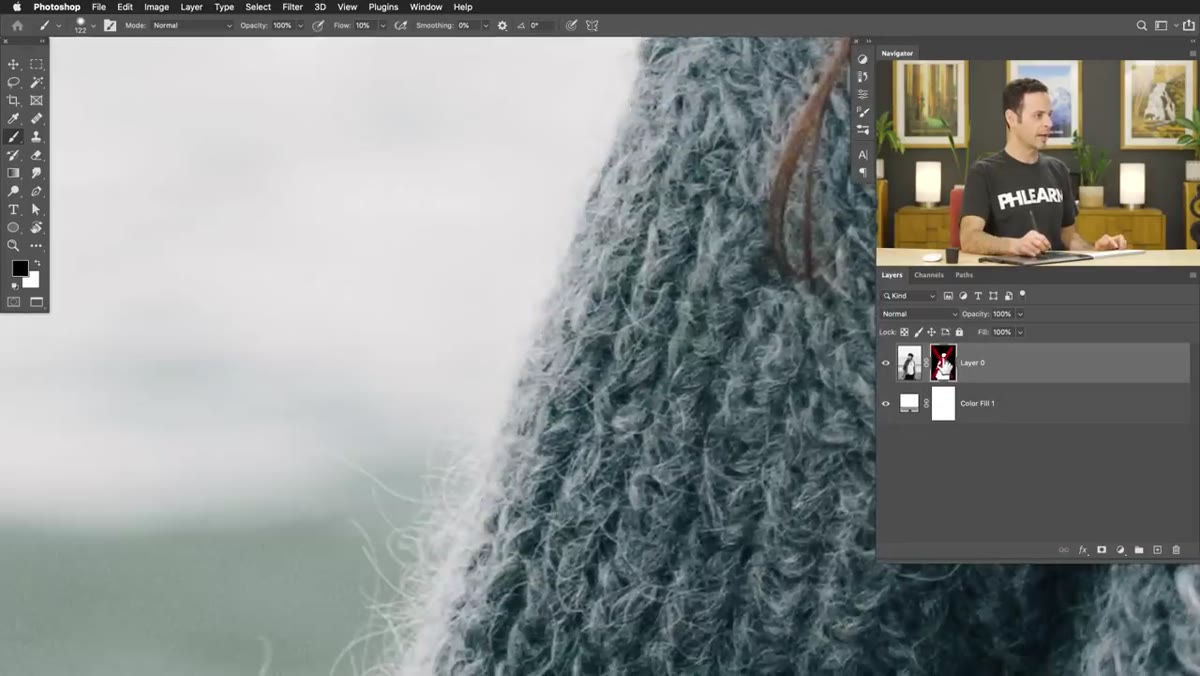 Fuzzy sweater edge showing jagged automatic selection result
Here’s the part of Aaron’s tutorial that I think gets overlooked: he’s explicit about what’s worth fixing and what isn’t. The fuzziness of a chunky knit sweater is genuinely one of the hardest edge problems in compositing. Even with a careful manual selection, you’re not going to recreate the actual fiber texture of the edge.
Fuzzy sweater edge showing jagged automatic selection result
Here’s the part of Aaron’s tutorial that I think gets overlooked: he’s explicit about what’s worth fixing and what isn’t. The fuzziness of a chunky knit sweater is genuinely one of the hardest edge problems in compositing. Even with a careful manual selection, you’re not going to recreate the actual fiber texture of the edge.
His advice, and I agree completely, is to stop trying to cut it out perfectly and instead recreate the look of that edge. The automatic selection gives you a decent approximation of the shape, but the real solution to furry or fuzzy edges isn’t more precise masking. It’s a different technique entirely, which he teases here and expands on in the full tutorial. Knowing when to stop fighting a selection and switch approaches is genuinely one of the more valuable things you can learn.
Step 5: Recognize Where the Pen Tool Is and Isn’t the Answer
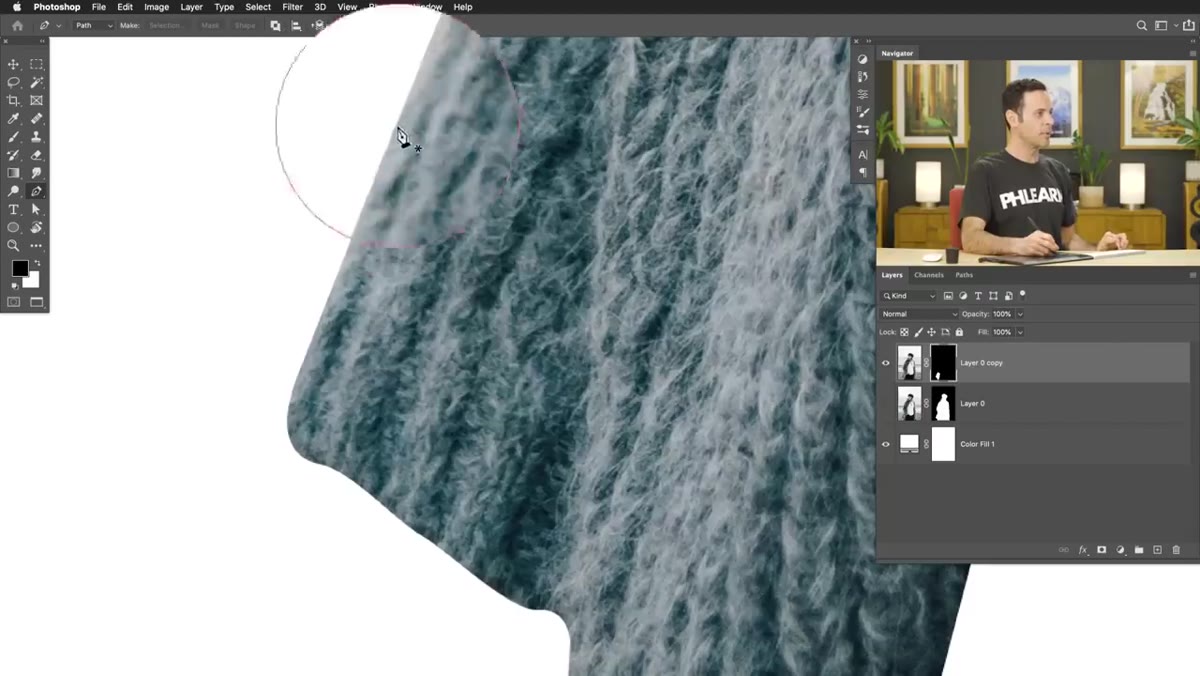 Pen tool path being drawn around subject for comparison
Aaron does a quick side-by-side comparison to make a point worth hammering home. He draws a Pen tool path around part of the subject and converts it to a layer mask. The result looks worse than the automatic selection, not because he did it badly, but because a hard-edged Pen path is completely wrong for soft organic edges like fabric and hair.
Pen tool path being drawn around subject for comparison
Aaron does a quick side-by-side comparison to make a point worth hammering home. He draws a Pen tool path around part of the subject and converts it to a layer mask. The result looks worse than the automatic selection, not because he did it badly, but because a hard-edged Pen path is completely wrong for soft organic edges like fabric and hair.
The Pen tool is still the correct choice for hard, clean edges: think phones, product shots, cars, architectural elements, anything with a clear geometric boundary. But if you’re using it on a soft edge because it feels like the “proper” way to cut something out, you’re adding work while making the result worse. Use the right tool for the edge type. Automatic selection handles organic softness better than a manually drawn path almost every time.
Step 6: Refine the Automatic Selection Instead of Replacing It
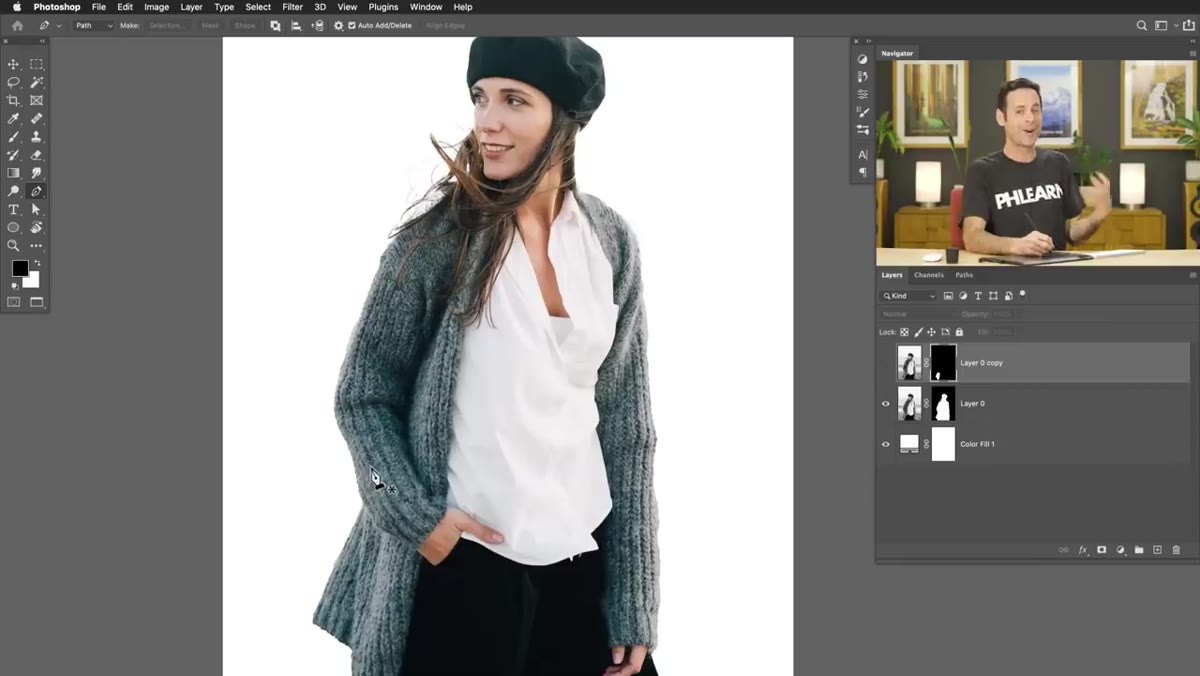 Select and Mask or manual brush cleanup on the layer mask
Instead of scrapping the automatic selection and starting over with the Pen tool, the move is to keep the automatic result and clean up only its specific failures. Go back into the mask (Alt/Option-click the thumbnail), grab a hard or soft brush, and paint white to restore areas that got clipped, or black to remove any background that crept in. You’re doing targeted surgery, not a full rebuild.
Select and Mask or manual brush cleanup on the layer mask
Instead of scrapping the automatic selection and starting over with the Pen tool, the move is to keep the automatic result and clean up only its specific failures. Go back into the mask (Alt/Option-click the thumbnail), grab a hard or soft brush, and paint white to restore areas that got clipped, or black to remove any background that crept in. You’re doing targeted surgery, not a full rebuild.
Aaron’s broader point, and the one that reframes how to think about cutout workflow entirely, is that automatic and manual tools aren’t in competition. Automatic gets you 85 to 90 percent there in about ten seconds. Manual cleanup handles the remaining problem areas in a fraction of the time it would take to do the whole thing manually from scratch.
One Thing I’d Add From My Own Work
The white background evaluation layer Aaron uses in the tutorial is something I now put in every single cutout project before I do any cleanup at all. I used to evaluate masks against whatever was underneath the layer, which meant I was constantly missing fringe colors and soft transparency issues that only became obvious after I placed the subject into the final composite. Catching those problems early, against a flat neutral background, has saved me an embarrassing amount of revision time. Make it a reflex.
The single most important shift this tutorial pushes is this: start automatic, then spend your manual effort only where the automation failed, and don’t try to solve an edge problem with masking when the edge itself can’t be cleanly masked. That reframe alone will change how you approach cutouts. Watch the full tutorial on YouTube to see Aaron demonstrate the fuzzy sweater fix in detail – it’s the part of the video that makes the whole thing worth it.
Comments (3)
Just subscribed. If the rest of your content is this good, I'm in.
Tried this technique this morning. Game changer for real.
This is the kind of content that keeps me coming back.
Leave a Comment