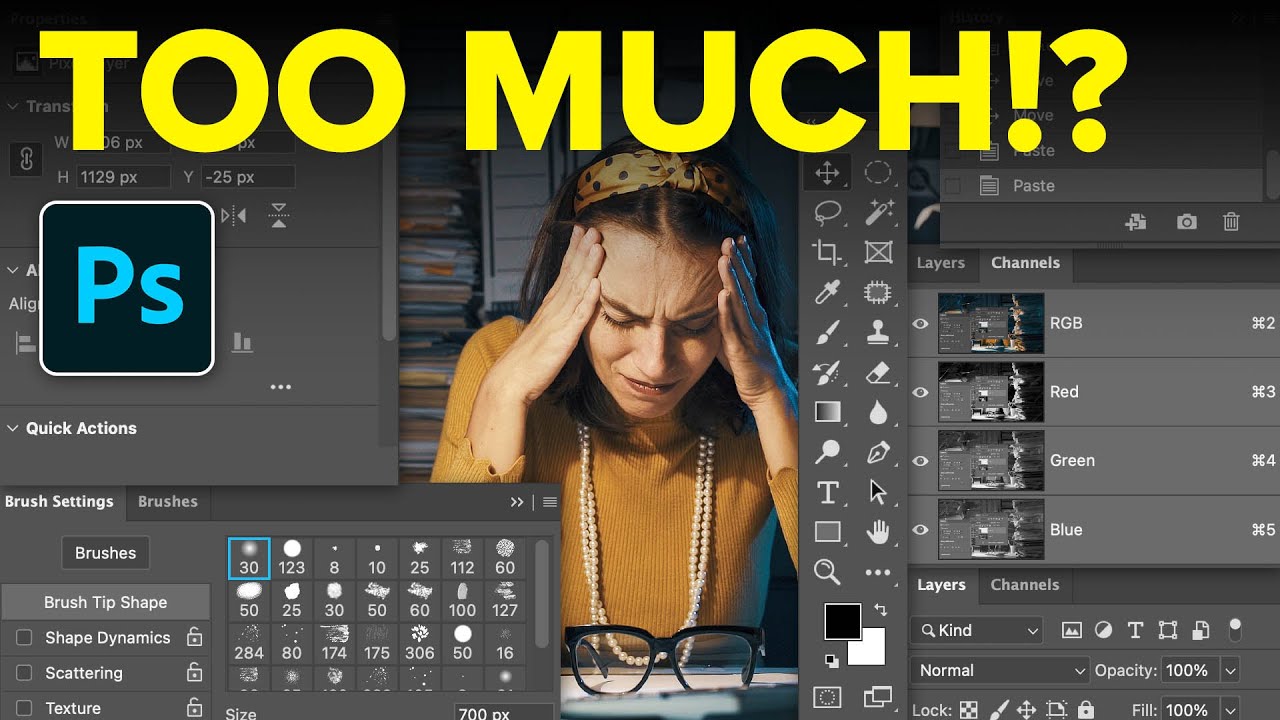
I got my start making garbage memes in MS Paint, which means by the time I actually sat down with Photoshop, I thought having more tools meant more power. I was wrong. What it actually meant was twenty minutes of clicking the wrong thing, panicking, and Googling “why does the rectangle tool keep doing that.” Photoshop has a legacy problem. Half the toolbar exists because someone needed it in 1998, and Adobe never had the heart to pull it out back. The result is a program that looks more intimidating than it actually needs to be, especially if photography is your main use case.
Watch the full tutorial on YouTube
In this Matt Kloskowski tutorial, he does something genuinely useful: he walks through the entire toolbar and the Window menu panel list, flags what photographers should actually care about, and shows you how to strip the rest out of your interface. It sounds basic. It isn’t. Knowing what to ignore is half the skill when you’re trying to build a faster, cleaner workflow. Here’s how to follow along and actually implement it.
Step 1: Start with the Move Tool, and Kill Auto Select Immediately
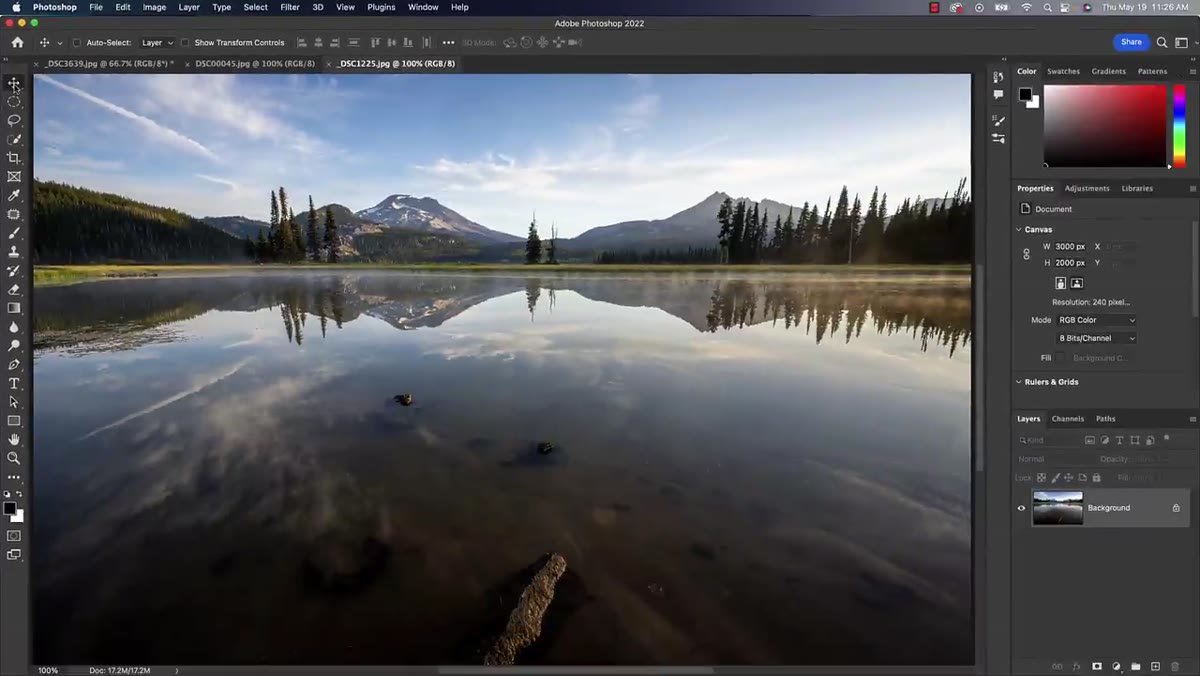 Move tool selected in toolbar with Auto Select option visible
The Move tool stays. You’ll use it constantly, and there’s no replacing it. But the moment you open Photoshop, check the options bar at the top left. If “Auto Select” is checked, turn it off right now. Auto Select will make Photoshop jump between layers every time you click on the canvas, which sounds helpful and is actually a nightmare once you’re working with multiple layers. Unchecking it means your layers stay where you put them until you decide to move them.
Move tool selected in toolbar with Auto Select option visible
The Move tool stays. You’ll use it constantly, and there’s no replacing it. But the moment you open Photoshop, check the options bar at the top left. If “Auto Select” is checked, turn it off right now. Auto Select will make Photoshop jump between layers every time you click on the canvas, which sounds helpful and is actually a nightmare once you’re working with multiple layers. Unchecking it means your layers stay where you put them until you decide to move them.
Step 2: Audit Your Selection Tools and Cut the Deadweight
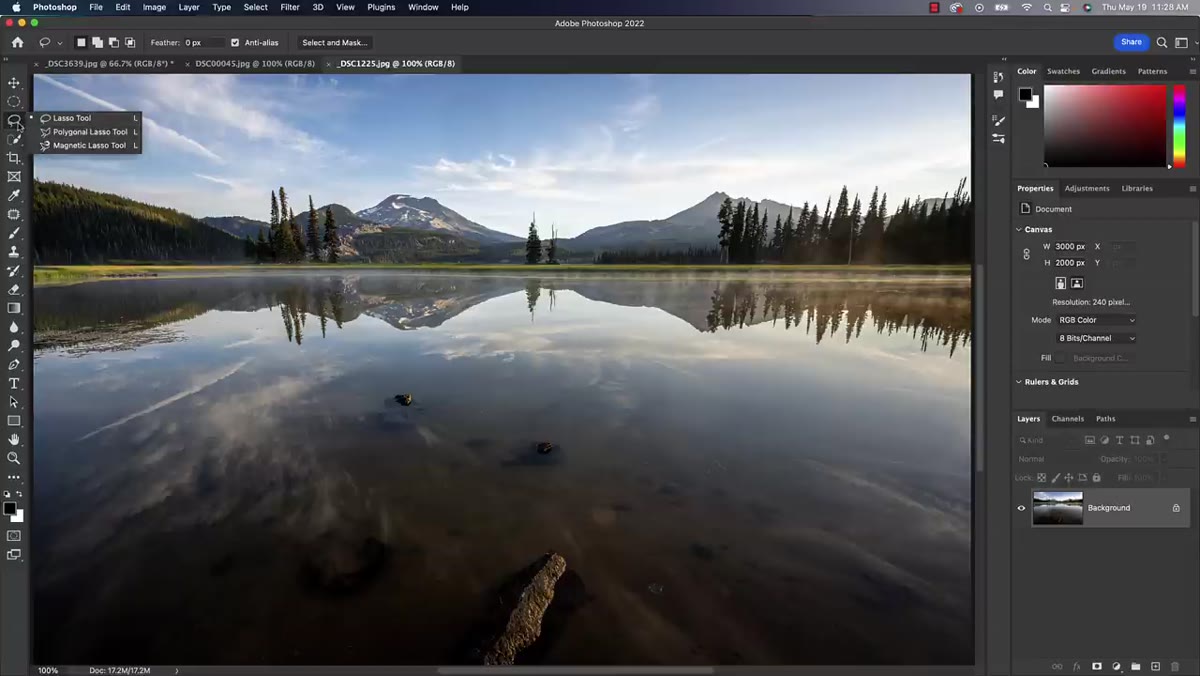 Magnetic Lasso and Magic Wand tools highlighted in toolbar
Photoshop gives you a stack of selection tools, and they are not created equal. The Rectangular and Elliptical Marquee tools are worth keeping around. The Lasso is useful for quick, rough selections, especially if you’re going to follow it up with Content-Aware Fill to remove something from a frame. The Polygonal Lasso has its moments for more geometric selections. But the Magnetic Lasso and the Magic Wand? Both are legacy tools that predate better options. The Magnetic Lasso tries to auto-detect edges and does it poorly. The Magic Wand selects by color tolerance in a way that Object Selection and Quick Selection both outperform without the fuss. Skip them. For photographer workflows, Object Selection and Quick Selection are the ones worth learning deeply.
Magnetic Lasso and Magic Wand tools highlighted in toolbar
Photoshop gives you a stack of selection tools, and they are not created equal. The Rectangular and Elliptical Marquee tools are worth keeping around. The Lasso is useful for quick, rough selections, especially if you’re going to follow it up with Content-Aware Fill to remove something from a frame. The Polygonal Lasso has its moments for more geometric selections. But the Magnetic Lasso and the Magic Wand? Both are legacy tools that predate better options. The Magnetic Lasso tries to auto-detect edges and does it poorly. The Magic Wand selects by color tolerance in a way that Object Selection and Quick Selection both outperform without the fuss. Skip them. For photographer workflows, Object Selection and Quick Selection are the ones worth learning deeply.
Step 3: Trim the Crop Tool Group
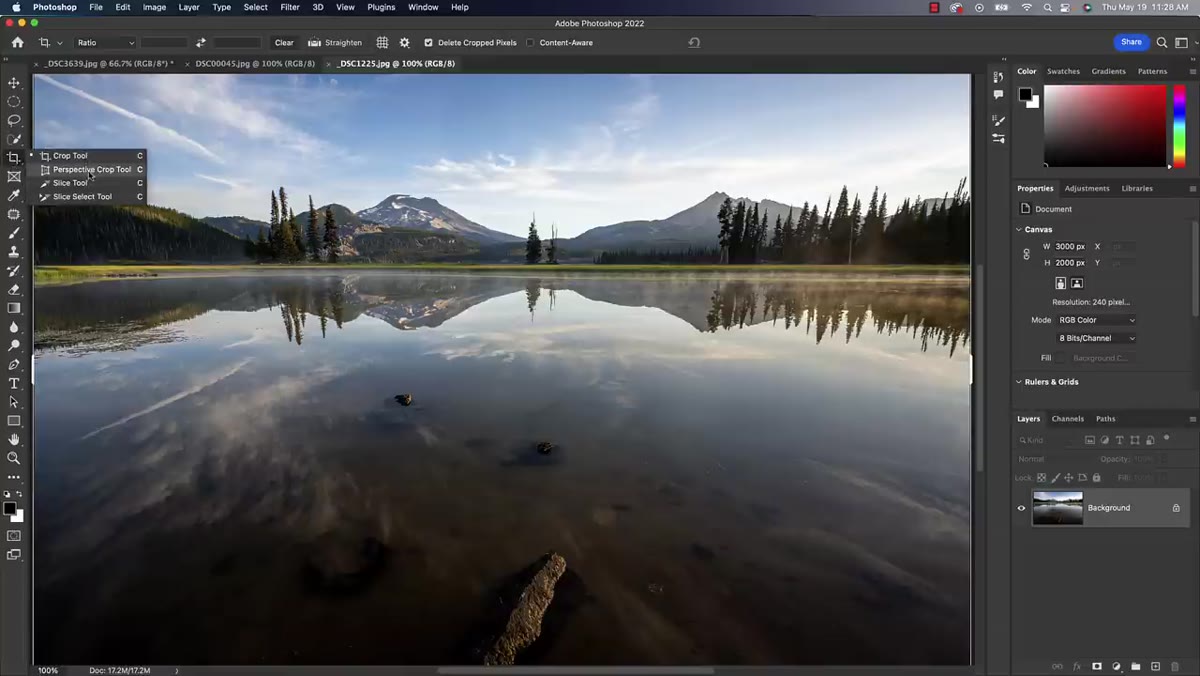 Crop tool flyout showing Perspective Crop and Slice tools
Click and hold on the Crop tool and you’ll see the flyout menu: regular Crop, Perspective Crop, Slice, and Slice Select. The standard Crop tool is essential. The others are much less so. Perspective Crop sounds useful but it’s a narrow use case that most photographers will almost never hit. The Slice tools are built for web designers chopping up layouts, not for anyone editing photos. They can go. Keeping your toolbar tight around the tools you actually reach for means fewer accidental clicks and a faster mental map of where things live.
Crop tool flyout showing Perspective Crop and Slice tools
Click and hold on the Crop tool and you’ll see the flyout menu: regular Crop, Perspective Crop, Slice, and Slice Select. The standard Crop tool is essential. The others are much less so. Perspective Crop sounds useful but it’s a narrow use case that most photographers will almost never hit. The Slice tools are built for web designers chopping up layouts, not for anyone editing photos. They can go. Keeping your toolbar tight around the tools you actually reach for means fewer accidental clicks and a faster mental map of where things live.
Step 4: Make Decisions About the Eyedropper Based on Your Actual Work
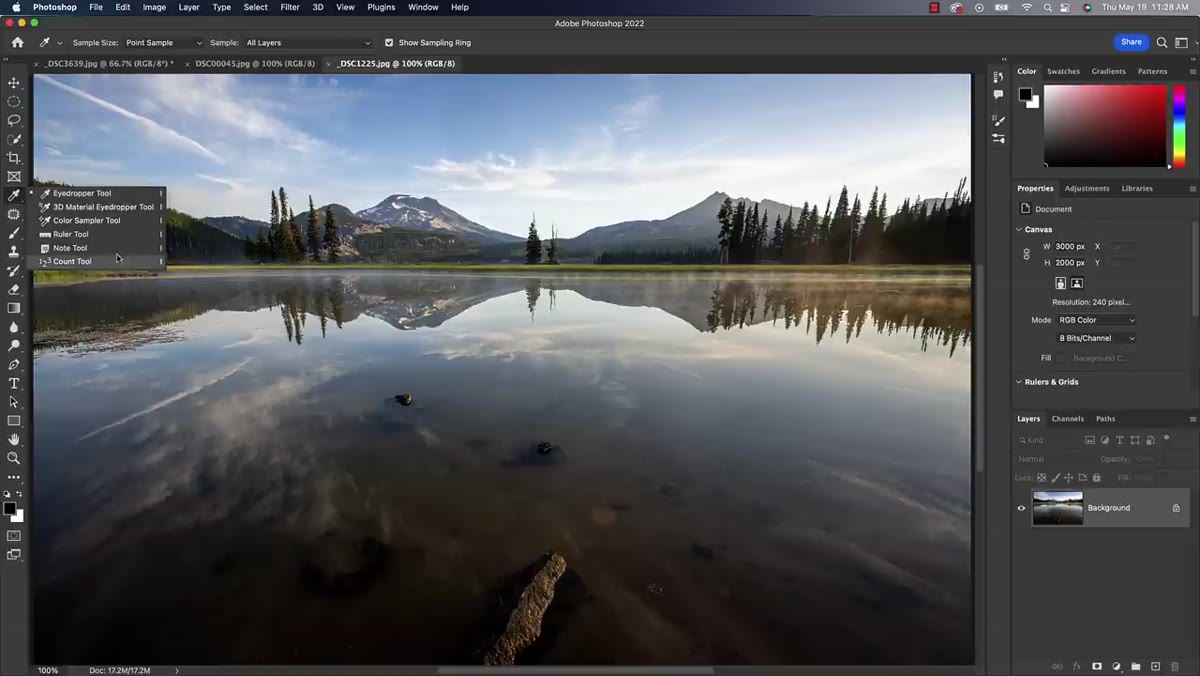 Eyedropper tool selected in toolbar
Here’s where Kloskowski gets honest in a way I appreciate. The Eyedropper tool isn’t a photography essential, but if you do anything beyond straight photo editing, like compositing, making thumbnails, building graphics for any kind of content, you’ll use it. I sample colors constantly when I’m matching text to an image or pulling a palette together for a client layout. The point isn’t to have a universal answer. It’s to look at your actual work and decide whether the tool earns its spot. If you only edit raw images and export, you can probably let it go.
Eyedropper tool selected in toolbar
Here’s where Kloskowski gets honest in a way I appreciate. The Eyedropper tool isn’t a photography essential, but if you do anything beyond straight photo editing, like compositing, making thumbnails, building graphics for any kind of content, you’ll use it. I sample colors constantly when I’m matching text to an image or pulling a palette together for a client layout. The point isn’t to have a universal answer. It’s to look at your actual work and decide whether the tool earns its spot. If you only edit raw images and export, you can probably let it go.
Step 5: Clear Out the 3D and Scientific Tools Entirely
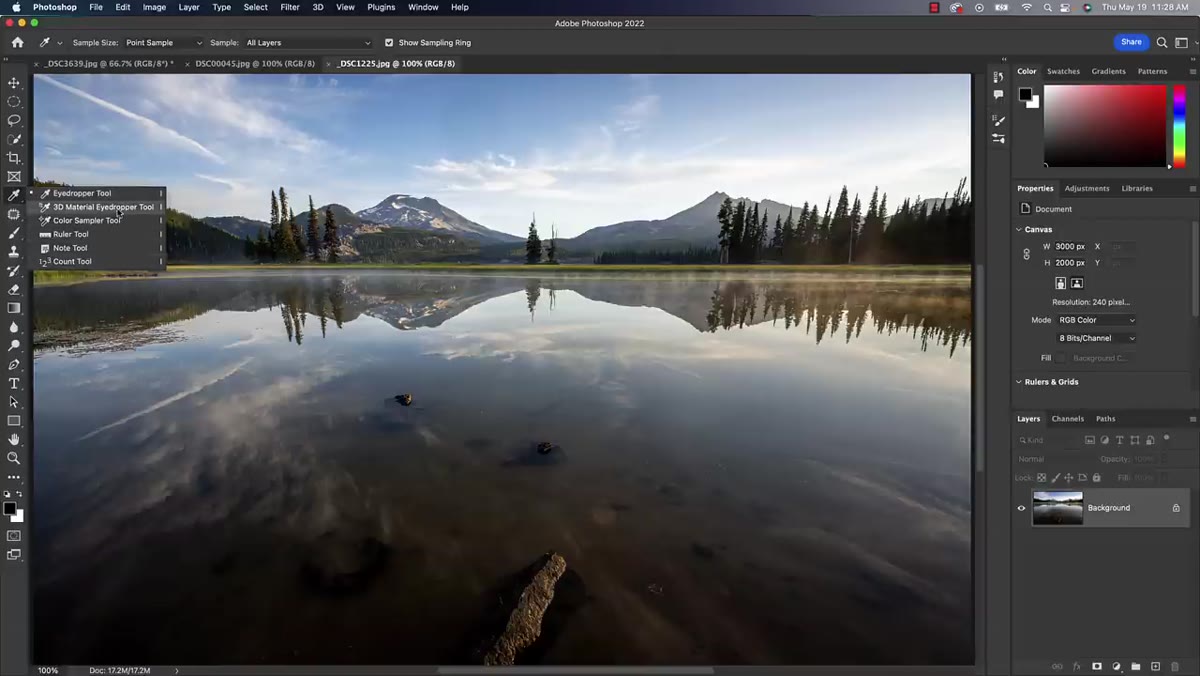 Lower toolbar section showing 3D and measurement tools
Everything at the bottom of the toolbar below the gradient and paint bucket area, the 3D tools, the measurement and analysis tools, the scientific-use stuff, none of it belongs in a photographer’s toolbar. These are holdovers from Photoshop trying to be a tool for everyone. Adobe has largely moved serious 3D work to other applications anyway. If you’ve never once had a reason to reach for these, that’s not a gap in your knowledge. That’s just good taste.
Lower toolbar section showing 3D and measurement tools
Everything at the bottom of the toolbar below the gradient and paint bucket area, the 3D tools, the measurement and analysis tools, the scientific-use stuff, none of it belongs in a photographer’s toolbar. These are holdovers from Photoshop trying to be a tool for everyone. Adobe has largely moved serious 3D work to other applications anyway. If you’ve never once had a reason to reach for these, that’s not a gap in your knowledge. That’s just good taste.
Step 6: Be Honest About the Retouching Cluster
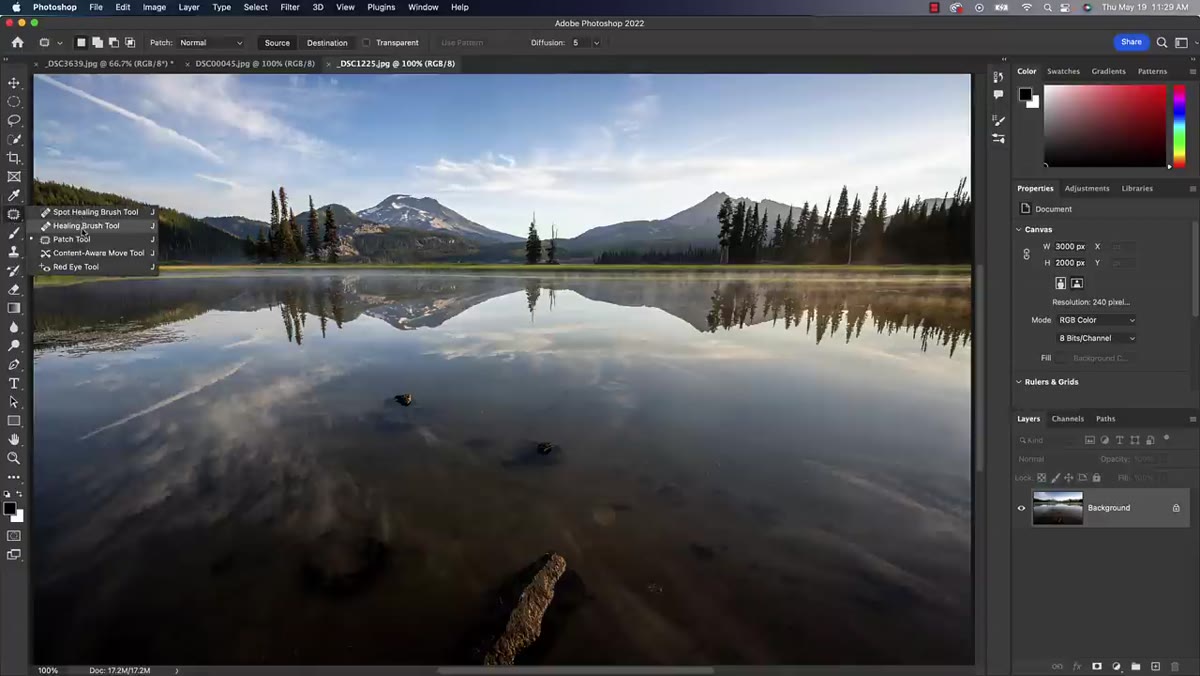 Healing, Patch, and Clone Stamp tools in toolbar
The retouching group is where you want to be selective rather than ruthless. The Spot Healing Brush, the Healing Brush, the Patch tool, and the Clone Stamp are all genuinely useful for photo editing. Content-Aware tools in particular are ones you’ll return to regularly. The Pattern Stamp, the Art History Brush, and the History Brush are a different story. History-based painting tools made more sense when Photoshop’s other retouching options were weaker. Today, they’re rarely the right answer. The Red Eye tool is worth keeping around even if you use it once a year, just for the moments you need it fast. But the rest of that subgroup can come out without losing anything meaningful.
Healing, Patch, and Clone Stamp tools in toolbar
The retouching group is where you want to be selective rather than ruthless. The Spot Healing Brush, the Healing Brush, the Patch tool, and the Clone Stamp are all genuinely useful for photo editing. Content-Aware tools in particular are ones you’ll return to regularly. The Pattern Stamp, the Art History Brush, and the History Brush are a different story. History-based painting tools made more sense when Photoshop’s other retouching options were weaker. Today, they’re rarely the right answer. The Red Eye tool is worth keeping around even if you use it once a year, just for the moments you need it fast. But the rest of that subgroup can come out without losing anything meaningful.
Step 7: Customize the Toolbar to Remove What You Don’t Need
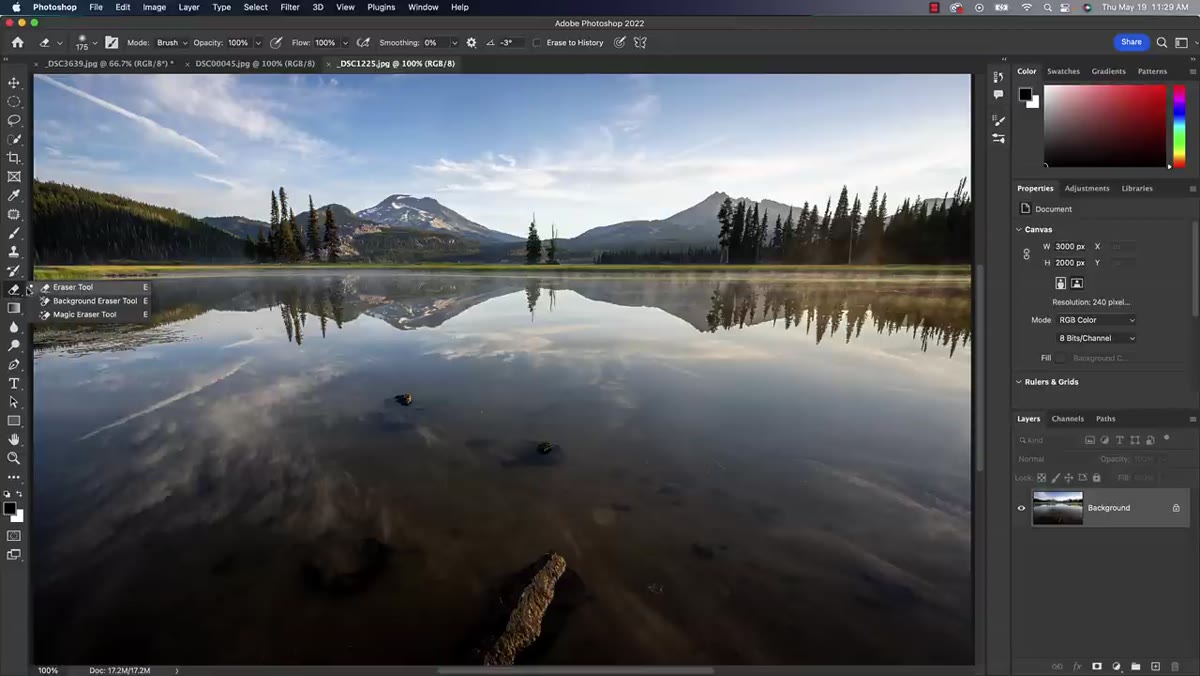 Edit Toolbar dialog showing draggable tool options
This is the step most people skip because they don’t know it exists. Go to Edit, then Toolbar, and Photoshop opens a dialog that lets you drag tools out of the main toolbar and into an “Extra Tools” section. They don’t get deleted. They just stop taking up visual space in your daily interface. Drag out the Magnetic Lasso, the Magic Wand, the Slice tools, the art and history brushes, the 3D tools. Whatever your audit from the previous steps flagged as unused. What’s left should be a toolbar that reflects how you actually work, not one designed to impress someone on a feature list.
Edit Toolbar dialog showing draggable tool options
This is the step most people skip because they don’t know it exists. Go to Edit, then Toolbar, and Photoshop opens a dialog that lets you drag tools out of the main toolbar and into an “Extra Tools” section. They don’t get deleted. They just stop taking up visual space in your daily interface. Drag out the Magnetic Lasso, the Magic Wand, the Slice tools, the art and history brushes, the 3D tools. Whatever your audit from the previous steps flagged as unused. What’s left should be a toolbar that reflects how you actually work, not one designed to impress someone on a feature list.
One More Thing: The Window Menu Deserves the Same Treatment
The tutorial also covers the panels in the Window menu, and the same logic applies. Photoshop defaults to showing panels that photographers almost never open. The Info panel, the Character and Paragraph panels, the Histogram in isolation, these get loaded into people’s workspaces and just sit there eating screen real estate. Close panels you haven’t touched in a month. Save your stripped-down workspace using Window, then Workspace, then New Workspace, and give it a name. Now your clean setup survives restarts and accidental panel explosions.
I’ll be honest: I spent way too long assuming that a complicated-looking interface meant I was using Photoshop seriously. What I was actually doing was adding friction to every session. Getting ruthless about the toolbar is a one-time investment that pays back every single time you open the program.
The single most useful thing to take from this: Photoshop is highly customizable, and most people never touch those settings. Spend thirty minutes cleaning up your toolbar and your panels once, and the program will feel meaningfully different to work in.
Watch the full tutorial on YouTube to see Kloskowski walk through every tool decision in real time. It moves fast and it’s worth watching with Photoshop open so you can follow the cleanup as you go.
Comments (4)
My workflow just got 10x faster. Not even kidding.
Shared this with my photography group. Everyone loved it.
Never thought of approaching it this way. Really creative.
Really solid breakdown. This pairs perfectly with the landscape work I've been writing about.
Leave a Comment